How to Clean Silver Ring at Home | Top 5 Mathods

how to clean silver ring at home

Learn how to clean silver ring at home. Silver rings are the favorite items in the collection of jewelry of most ladies. They love to wear it, but some carelessness may damage it. Most people consider them useless, no dear, don’t make such mistakes. We have come up with fresh ideas to clean your silver rings. After trying these methods, you will witness these rings again shine in your hands and make them beautiful. Thus the blackish look will disappear in a few minutes, and you will find them as they were. In this post, we will share easy step-by-step guide to on how to clean silver ring at home with 5 efficient methods. So, without moving around, let’s move towards the complete detail about them. How To Clean Silver Rings – Top 5 Ways These are the best methods to clean silver rings that will provide lots of benefits to you. 1. Clean Silver Ring With Polish The most effective method to help gain an original look to your ring is to clean it with polish. If you want to polish your rings, these are the measures you need to do. Get a clean, wet cloth and put a dab of polish on it. Then rub it on your silver ring up and down. Never use it circularly because the scratches may become apparent. Fabric tarnish may be avoided by repeatedly reversing the fabric. When you’ve rubbed the rings long enough, please give them a quick rinsing with warm water and thoroughly dry them with a dry towel. ALSO READ 5 Best Moving Companies in Chicago to Help You Make… How to Hire Contractor for Home Renovations in 2022 Which Kitchen Countertops Are The Best? (Answered) 2. Cleaning Sliver Ring With Salt And Towel If you want your ring to look natural, then don’t forget to apply this method. Combine 3 tablespoons of salt, the juice of a lemon, and a cup of boiling water. Drop your ring in this solution and let it remain for about 5 minutes. Take caution since they might be hot when removed.  Use a gentle towel to dry the jewelry. 3. Clean Silver Jewlery With Aluminum Foil And Baking Soda This is the best home remedy to clean the tarnish of your silver ring. You will see a difference in no time. Take a bowl and then use aluminum foil as a lining. Add baking soda and pour some hot water. Just throw in your silver jewelry and walk away for up to three minutes.  Take caution while removing the rings since they may still be hot. Use a gentle towel to dry them. 4. Using Toothpaste To Clean Silver Ring at Home Another method looks strange to apply for cleaning the silver ring. Take a little toothpaste and then use a dish wash sponge to rub this paste on a silver ring. Although the toothpaste helped a little, it wasn’t enough to eliminate the tarnish. Instead of fading the whole work, it came off in clumps. The rubbing of the brush may cause some scratching, so be careful while applying it. 5. Use Ketchup To Clean Silver Rings It is not used to eat with yummy foods but can also be used for cleaning purposes, especially for silver. It looks funny but believe me, you will wonder after seeing its excellent results. Apply some ketchup on a toothbrush to scrub the silver rings clean. Warm water should be used to wash off, and a soft towel to dry off afterward. You will see a shine on the ring, and you will be able to wear it in your beautiful hands. Conclusion: Here you have found the best methods to solve your problems. Additionally, these are easy to apply, and everything will be available at home. These methods are a blessing in disguise to clean your silver rings. You’ll notice a change for the better if you give it a go right away. We hope that you get enough information and tarnish from your rings will disappear. FAQs How to protect silver jewelry from tarnish? Preventing silver from tarnishing is as simple as taking a few precautions. When you keep the jewelry out of the box and expose it to air, it will damage you significantly. Please place them in a velvet box; thus, your jewelry will not be affected by the air, and you will find them new whenever you wear them. What should we keep out of the silver while cleaning it? A firm bristle brush will leave a permanent scratch in the silver. Silver-specific cleansers sometimes include chemicals that harm the material rather than clean it. So, you should refrain from using these items while cleaning the silver.


How To Clean 5 Gallon Water Jug in 6 Easy Steps

How To Clean 5 Gallon Water Jug In 6 Easy Steps

Using my 6-step process, cleaning a 5 gallon water Jug is simple. Today in this post, we will share a 6 step guide for how to clean 5 gallon water jug. Drinking water bottles are commonly made of plastic, which is lightweight. You cannot use them repeatedly. However, when it comes to hard plastic water bottles, they should last a long time. As an example, 5-gallon containers or a sports bottle can be used. Cleaning 5 Gallon Water Jug (Basic Steps) The first step in cleaning your jug is to remove any plastic wrap or other materials that may have been left on top of the bottle when you filled it up with water at the store. Then, wash off any dirt and debris around the mouthpiece with soap and warm water. Next, take the lid off your bottle and rinse all the inside parts with warm water so they are completely clean. Please ensure no cracks or holes in these parts because they could allow dirt into your bottle! Finally, dry all parts thoroughly before putting them back together again–this will keep them from getting moldy over time! TIP:  If you use hot water to rinse plastic bottles, the plastic may leach carcinogens into your water. Store water bottles in a cool, dry place away from direct sunlight to help prevent mold and bacteria growth. ALSO READ How to Hire Contractor for Home Renovations in 2022 How to Clean TV Screen Without Streaks – A Quick… Which Kitchen Countertops Are The Best? (Answered) 6 Methods To Clean 5 Gallon Water Jug: Cleaning your water jug is important to keep it clean and germ-free. You want to ensure that the water inside your bottle does not become contaminated, which can lead to a bacterial infection. Cleaning a 5 gallon water jug; there are many ways to go about it. Here are some of the most common methods and how they work. 1. Cleaning 5 Gallon Water Jug With Warm, Soapy Water Use warm soapy water and scrub with a soft brush or sponge. This method works best for those with hard water conditions who need to remove mineral deposits from their water bottles. 2. Use Of Woodash Wood ash is one of the earliest known natural cleansers. Wood ash was commonly used to clean bottles even before introducing dishwashing soaps. It cleans bottles, removes odors, and even disinfects them. Wood ash can be placed directly on the bottles and washed away with a sponge and warm water. 3. Dishwashing Put your bottle in the dishwasher on the lowest heat setting possible (no soap) and run through a rinse cycle with hot water added until all of the soap is removed; then dry thoroughly with a cloth towel before storing away for future use! 4. How To Clean 5 Gallon Water Jug With Vinegar And Salt Pour at least two cups of white vinegar into a bowl, add 2 tablespoons of salt (optional), and stir until salt dissolves completely before pouring over the bottle cap and filling it with hot water from the faucet until the full level reaches the top of the cap (do not submerge). Swish around inside cap until all lint is gone; then rinse well with clear water (do not submerge). 6. Clean 5 Gallon Watter Jug Using Rice Water Hydrogen peroxide has been shown to kill germs and bacteria, so it’s perfect for cleaning a 5-gallon water bottle. Just pour some into a bowl or cup and add some water; then dip your lid until it starts bubbling. When it does, rinse any excess with running water so none of the hydrogen peroxides gets left behind! 5. Cleansing Water Bottle Through Hydrogen Peroxide The mixture of starch and citric acid in rice water aids in the removal of grease. Fill the bottle with rice water and leave it for around 30 minutes. After that, scrub the bodttle thoroughly and wash it under warm water to remove the unique scent of rice water.d Avoid Using Bleech Or Harm chemicals While Washing the bottle: If you’re seeking a technique to clean your glass water bottle, look no further. First, you must ensure that your water bottle is clean and free of contaminants. You can do this by washing it in hot soapy water or with a dishwasher on the highest setting. Second, avoid using bleach or other harsh chemicals on the outside of your bottle. These can damage the surface of the glass and make it more difficult for you to see through your water bottle when you’re drinking from it. Third, try not to drop your water bottle onto hard surfaces–this can cause damage! Finally, once you’ve cleaned your water bottle with soap and warm water (or dishwashing liquid), run it under cold water for about ten minutes so that any leftover dirt falls off easily into the sink bowl or tub drain. We’re almost done! Hard plastic water bottles are undeniably reusable. You must, however, take special care of such bottles. Otherwise, algae and other potentially hazardous microorganisms may grow within the bottle. In this essay, I attempted to explain how to clean a 5-gallon water bottle in various ways. I hope you can now complete the task without difficulty.

How To Clean Glass Table In 3 Easy Mathods (Step-by-Step Guide)

how to clean glass table

Learn how to clean glass table with our step-by-step expert guide. The glass table is one of the most common tables you’ll find in homes worldwide. Glass table easy to clean, but it can be difficult to keep looking good and new. When you’re looking for ways to spruce up your home, cleaning glass tables is one of the best options. Glass tables can be cleaned using different types of cleaners, including various household chemicals such as vinegar and lemon juice. Fortunately, achieving a sparkling clean glass tabletop is a relatively simple task. Today in this post, you’ll discover four effective methods to clean your glass tabletop and restore its shine. Follow these tips to remove stubborn stains and achieve a streak-free finish. 1. Clean Glass Table With Baking Soda And Vinegar Cleaning a glass table with baking soda and vinegar is an eco-friendly and effective way to remove stains and grime. These common household ingredients can work wonders on a dirty glass tabletop. Step 1: Pour equal parts water and vinegar into a small container for later use. To make your cleaning solution, combine the water and vinegar. The size of your glass tabletop determines the quantity you make. Begin by combining 1 cup (0.24 L) of water and vinegar, then add more later if necessary. While you make the baking soda paste, set aside the mixture. Step 2: Make a paste with 0.5 cup (0.12 L) baking soda and at least 3 teaspoons (44 mL) water. To clean the glass surface without harsh chemicals, create a thick mixture by combining baking soda and water in a small basin. This mixture can be used effectively to clean the glass surface. The method is eco-friendly and safe. Step 3: Using a sponge, apply the baking soda mixture to the table. After dipping the sponge into the basin, rub the paste mixture over the table in circular, sweeping motions. Strive to be as meticulous as you can, and make sure to cover the entire surface of the glass. Choose a soft sponge that won’t scratch or leave marks on the glass. Use a soft sponge that will not leave marks or scratches on the glass. When spreading the baking soda, avoid using items such as steel wool. Step 4: Use a sponge dipped in the vinegar mixture to rinse the table. Use lengthy, sweeping motions to clean the table after soaking the sponge in the vinegar solution. Continually rinse the baking soda until all of it is gone. Based on the size of your table, this can take a while. Consider keeping a small basin or bucket near the table’s edges to capture any vinegar that spills off the table. Step 5: Wipe the glass with a squeegee and allow it to dry. Run a plastic squeegee along the table in straight lines. To remove any extra fluid from the table, work in a grid pattern. After you’ve finished cleaning the table, let it air dry. Continue to catch any extra fluid in a spare container or bucket. A squeegee can be purchased in the car supply department of a store or online ALSO READ How to Hire Contractor for Home Renovations in 2022 How to Clean TV Screen Without Streaks – A Quick… Which Kitchen Countertops Are The Best? (Answered) 2. Clean Glass Table Spraying with Glass Cleaner or Vinegar Looking for an easy way to clean your glass table? Spraying it with glass cleaner or vinegar can be a simple and effective solution. Here’s what you need to know. Step 1: Spray the surface with glass cleaner. Use the amount of product specified on the bottle. Make sure to cover all regions and corners of the table with spray. To avoid streaks, wipe any visible debris from the table with a microfiber cloth or other soft material before spraying on the cleaner. Step 2: If you don’t want to use a glass cleaner, use white vinegar instead. Vinegar can be used to clean dirt and grime from a table. Fill a small spray bottle halfway with white vinegar for easier application. Spray until the entire surface of the table is fully covered. Step 3: To thoroughly wipe the glass, use lengthy, circular strokes. Rub the cleaning solution into the table’s surface with a microfiber cloth. Wipe clean with a lint-free cloth, as lint can make your table appear dusty and cause streaks. 3. Taking Preventative Action Place coasters beneath liquids to prevent the appearance of drink residue. Place your drinks on coasters to prevent rings from developing on the surface. Keep at least a dozen on hand in case you have guests. Cork and sandstone are excellent choices since they do not attach to the glass. Use newspaper to remove minor imperfections. If something spills on your glass table, wipe it down with a little newspaper in small, circular strokes. You can also use newspaper instead of a microfiber cloth when applying cleaning agents. Clean your table daily to keep it looking new and shining. Wipe down your glass table regularly to avoid removing a lot of filth and debris all at once. Depending on how frequently you use the table, set aside a few minutes each week or month to wipe the glass. If you live with others, consider alternating cleaning responsibilities. Conclusion: In this article, I’ve shown you how to clean your glass table. I hope that you were able to learn something new about this process and the products needed for it. If you have any question, please feel free to contact us at any time. We would love to help you out!

How To Deeply Clean 10k, 14k and 18k Gold Jewellry In Easy Steps

How To Deeply Clean 10k, 14k and 18k Gold Jewellry In Easy Steps

Cleaning your hands with sanitizer or hot water and soap is a no-brainer, but do you know how to clean your 10k, 14k, and 18k gold jewelry? Discover how to keep your precious pieces shining like new.  Should you remove your jewelry before sanitizing or washing your hands? Can alcohol damage 14k and 18k gold, as well as gemstones? This article will undoubtedly assist you in cleaning your 18k gold jewelry securely. Basic Tips To Clean 10 karat, 14 karat and 18 karat Gold Jewellry: When it comes to cleaning your 10k, 14k, and 18k gold jewelry, there are a few things you need to know. First, you want to make sure that you clean your 10k, 14k, 18k jewelry in a well-ventilated area. This will help prevent any chemicals from getting into your skin or lungs and causing irritation. Second, try not to use harsh chemicals on your jewelry because they can damage the metal over time. Instead, use gentle cleaners such as soap and water or even baby shampoo! Third, always dry off all of your jewelry before storing it away in its box or bag again. This will help prevent rusting from occurring if moisture is left behind after washing the initial dirt off of your piece of jewelry! Method 1 To Clean 10k , 14k and 18k Gold Jewellry Combine a mild liquid dish soap and warm (not boiling) water. Blue Dawn works well for this, but if you use another soap, ensure it is not hydrating since extra chemicals can cause a film to form on the jewelry. Soak the jewelry for 15 to 30 minutes in the soapy liquid. Use warm water to rinse the jewelry, and a cotton swab to clean any difficult-to-reach areas. Dry the jewelry with a polishing cloth. This will help keep your jewelry clean and looking its best. With a polishing cloth, dry the jewelry. If your jewelry is exceptionally filthy, you can add some drops of ammonia to the mixture, but only if it does not contain semi-precious gemstones such as opals or turquoise. ALSO READ How to Hire Contractor for Home Renovations in 2022 How to Clean TV Screen Without Streaks – A Quick… Which Kitchen Countertops Are The Best? (Answered) Method 2 To Clean 10k , 14k and 18k Gold Regular cleaning with dish soap and ammonia is suitable for solid gold and diamond jewelry, but if your gold jewelry includes semi-precious gemstones like opals or turquoise, special care is needed due to their porous nature. Mix warm (not boiling) water with a gentle liquid dish soap. Blue Dawn works well for this, but if you use another soap, ensure it is not hydrating since extra chemicals can cause a film to form on the jewelry. Using a cotton swab or soft cloth dipped in the solution, carefully wipe the jewelry. Avoid soaking turquoise or opals in the warm water solution as they are porous and may absorb water. The intent is to clean gently. With a polishing cloth, dry the jewelry. Avoid using ammonia or hand sanitizer on gold jewelry that has turquoise or opals as it can cause irreversible damage to the stones. Additionally, it’s important to note that ultrasonic machines can also harm these delicate stones. What To Prevent When Cleaning 10k , 14k and 18k Gold Chlorine can permanently tarnish or destroy your gold jewelry and rings at high temperatures. First, confirm that the water is warm, not hot, when soaking your items. Sanitizer – try to avoid using sanitizer on your jewelry. If you’re out shopping or running errands, this may only sometimes be practical, so clean your jewelry after disinfecting your hands. When washing your hands, always remove any jewelry that contains porous stones, such as opals or turquoise. Moisturizer – Moisturizing is essential for keeping hands germ-free. Cracked or dry hands lose their protective barrier. Check your jewelry for extra accumulation, particularly your engagement rings and wedding bands. Is it possible to clean your jewelry too much? Both yes and no. It is dependent on the stones in the jewelry; diamonds may withstand regular washing, while softer and more porous stones, such as pearl and turquoise, can be dulled and damaged by cleaning solutions. Never soak pearl or turquoise jewelry in a cleaning solution. Instead, gently wipe the piece with a gentle cleaning cloth dipped in non-soapy water before wiping it again. Conclusion: Finally, remember that cleaning your jewelry isn’t just about making it look better–it’s also about protecting it from rusting over time! So remember to protect against oxidation by applying clear nail polish on both sides of each piece before storing them away for long periods. We hope that the article has helped you clean your jewelry properly. If you have any questions or concerns, feel free to contact us.

Cleaning a Laptop: A Step-by-Step Laptop Internal And External Cleaning Guide

Cleaning a Laptop: A Step-by-Step Laptop Internal And External Cleaning Guide

Cleaning a Laptop and keeping it clean is critical to its efficiency and lifespan. Dust and debris can collect in the keyboard, vents, and other components, causing overheating and other problems. Spills, fingerprints, and other substances can also create unattractive stains on the laptop’s screen and body. Cleaning your laptop is an essential and straightforward process that requires only a few common household products.  In this blog post, we’ll walk you through the steps of cleaning your laptop and explain why it’s so vital. We will walk you through the proper technique for cleaning the laptop from both the interior and outside. Before you begin cleaning a laptop, it is critical to be aware of certain precautions and to arm yourself with the necessary tools and materials. Here are some methods for cleaning up your laptop, from wiping down the display to uninstall extra programs. What is the best way to clean a laptop internally? Although you can’t clean the insides of your computer, you can free up space by uninstalling programs you no longer use and compressing large files to take up less space. What should you know about cleaning hardware? If your laptop is performing slower than usual, you should perform some troubleshooting. The first thing you need to do is check how much space you have on your hard drive. To do so on a Windows operating system, go to the start menu and select the “This PC” application. To find out how much space is available, navigate to the silver box labelled “C:”, which is your hard drive storage. The easiest way to clean your hard drive is to use Disk Cleanup. You can use this application to delete temporary files as well as files and programmes that you no longer need. Do I need to compress my files? The disadvantage of compressed files is that they make your computer’s CPU work harder, but because they are smaller, they take up less room on your hard drive. As a result, your PC can read the file faster. The performance of your system may be improved if you have a powerful CPU but limited hard drive space. Here’s why you should delete apps Another option to free up hard disc space is to delete programmes. To avoid permanently removing something you need, you must pay close attention to what you’re deleting. When deleting anything, keep in mind that sending installed programmes to the recycling bin will wipe them from your computer and force you to reinstall them if you change your mind. Typically, the procedure of removing programmes does not permanently destroy them. They are first placed in the recycling bin. Then you can choose whether or not to permanently delete those files. ALSO READ How to Install And Design a Home Theater (Step-by-Step Guide)… How to Clean TV Screen Without Streaks – A Quick… The Best Cleaning Checklist for Office How should you clean your laptop’s fan? Image by Kiều Trường from Pixabay A dusty fan might cause distracting noise pollution while you work. The procedure follows: Turn your device off and unplug it from the wall. Remove the bottom panel of your laptop, which usually requires the use of a screwdriver. If you’re not sure what you’ll need to remove your bottom board, consult your laptop’s manual or search online for a copy. Hold the fan down with one finger to keep it from turning as you clean it. Remove the fan from your laptop in its entirety because it contains many sophisticated pieces that can be difficult to reassemble. Wipe off the fan with a clean cloth, being sure to always use the clean edge of the cloth to avoid sending huge clumps of dust into the fan. Wipe off all of the vents on the laptop’s inside and outside. Blow gently into the fan to help any lingering dust particles escape If my laptop needs to be cleaned externally, how can I do it? To clean the outside of your gadget properly, make sure you only use cleaning products designed for sensitive hardware. If you’re unsure about what’s safe for your product, see the instructions for your gadget. Instructions for Pre-Cleaning First and foremost, turn off the laptop and remove the charger from the power outlet. Direct liquid sprays should not be used on the laptop. Use no direct supply of water, thinners, or other chemical solutions. To clean the vents of a laptop, avoid using a vacuum cleaner and instead use compressed air. Compressed air can be easily obtained. Isopropyl alcohol should be used because it evaporates quickly. Clean with cotton swabs and a delicate linen cloth. How to clean a laptop keyboard? In terms of dust, the keyboard is the most impacted region of the laptop. Apart from filth, the keyboard picks up hazardous bacteria that must be removed regularly. Many websites, including Lifewire, have suggested turning the laptop upside down and tapping the rear side of the laptop to clean the debris from the region between the keys, which we do not advocate. To remove the rubble lodged between the keys, use a compressed air can. Now, dampen a soft cloth with isopropyl alcohol or acetone and use it to clean the keys. You can also clean the keypad and mouse region with a moist cloth. TIP: If something spills on the laptop keyboard, quickly turn the laptop upside down to drain the liquid and then switch it off. Turn it off until the keyboard dries. Cleaning tips for Laptop cases To begin, close the laptop lid. Now, move a damp cloth (soft cotton) over the laptop to clean it. Finally, use a dry cloth to wipe any remaining stains from the body. Because most laptop casings are composed of plastic, avoid using harsh chemical solvents on them. To clean it, use isopropyl alcohol or a home-liquid detergent diluted with water. Best Ways to Clean Laptop’s Ports and Vents? Do not use a cloth to clean the laptop’s cooling outlets or … Read more

Green Cleaning- What is it and Why Should You Care

What is Green Cleaning Why Should You Care

Do you want to clean your house in an environmentally friendly way? Green cleaning is the way to go! Green cleaning is the technique of cleaning your home with non-toxic, biodegradable, and sustainable products to lessen your environmental effect. We’ll cover all you need to know about green cleaning in this blog post, from what it is to frequently asked questions. So, if you want to go green with your cleaning, you’ve come to the correct place! Detailed information and services about green cleaning are provided by Woodcroft Enterprises. For more information you can visit: Woodcroft Enterprises. 1. Are homemade cleansers effective? Yes! Let’s take a look at some of the qualities of two common ingredients in our recipes: vinegar and baking soda.Vinegar deodorises, dissolves mineral deposits and grease, eliminates soap traces, mildew, and wax buildup, polishes brass, chrome, copper, pewter, and stainless steel, cleans brick and stone, removes decals and stickers, and removes water spots from leather.Baking soda neutralises the acid; cleans and polishes aluminium, chrome, jewellery, plastic, porcelain, silver, stainless steel, and tin; deodorises refrigerators, carpets, upholstery, vinyl, and drains; extinguishes grease fires; and cleans and polishes aluminium, chrome, jewellery, plastic, porcelain, silver, stainless steel, and tin. ALSO READ How to Clean Laminate Floors Without Leaving a Film How to Clean Wood Cabinets And Make them Shine Cleaning Tips: How To Clean Wooden doors Step-By-Step Guide And… 2. What exactly is oxygen bleach, and where can I get it? Oxygen bleach is often sold in powder form and is composed of sodium percarbonate. When sodium percarbonate is dissolved in water, it produces hydrogen peroxide, which functions as a natural whitener in the laundry. Powdered oxygen bleach can be purchased in the laundry department of most grocery stores with brand names usually incorporating the phrase “Oxy-” or “Oxi-“. 3. Where can I purchase soap flakes? While soap flakes were previously easy to find, they are becoming increasingly difficult to find these days. You can buy a box of soap flakes at a natural food store (call first) or online, but the simplest solution is to make your own! Simply grate any non-liquid castile soap that does not include sodium lauryl (laureth) sulfate (SLS) or diethanolamine (DEA) with a cheese grater. 4. What exactly is washing soda? Where can I purchase it? Washing soda (sodium carbonate) is related to baking soda, but it is much more caustic (pH 11), so use gloves when combining it to avoid harming your skin. Washing soda, like baking soda, reduces oil, removes wax or lipstick, and neutralizes odours. Washing soda should not be used on delicate fabrics such as silks, woollens, or vinyl. Most supermarkets have it in the laundry area. You can also call Arm and Hammer’s toll-free number 1-800-524-1328 to find out where it’s sold near you. 5. Is vegetable glycerin required? Vegetable glycerin, a byproduct of palm and coconut oil synthesis, is utilised as a preservative. Vegetable glycerin can be purchased online or in soap-making supply stores, health food stores, and/or herbal supplement stores. Although essential oils can be used as a substitute for preservatives, if you want to make a large quantity of cleaner and save some for later usage, vegetable glycerin will dramatically enhance the shelf life of your product.

How to Clean Wood Furniture with Vinegar and Baking Soda (Quicky and Easily)

How to Clean Wood Furniture with Vinegar and Baking Soda

Want to clean wood furniture with vinegar and baking soda? if yes, then you will find this article very helpful. I know that investing in wooden furniture brings a touch of warmth, elegance, and charm to any space in your home. With the right care, it can endure for generations, making it a valuable addition to your household. But over time, wooden furniture can accumulate dirt, grime, and other unsightly substances that detract from its appearance, but don’t worry because Me and you will make your dirty wooden furniture new again. These natural cleaning products (vinegar and baking soda) are not only effective but also environmentally friendly and safe for use on all types of wooden surfaces. As opposed to strong chemicals, vinegar and baking soda will not harm the wooden surface or leave any dangerous residue. In this blog post, we will provide a step-by-step guide on how to clean your wooden furniture using vinegar and baking soda and restore it to its original luster. Just follow this simple step-by-step guide for cleaning wood furniture with vinegar and baking soda. Types of Wood and Finishes Before you begin to the cleaning process, it’s important to know the types of woods and finishes. Certain woods are more porous, while others are less so. Similarly, some finishes are more delicate, while others are more robust. By understanding your furniture, you can avoid damaging it during the cleaning process. There are two different types of wood finishes: one is oil-based and other-one is water-based. Oil-based finishes, such as teak oil, are ideal for outdoor furniture, as they are more durable and water-resistant. Water-based finishes, on the other hand, are ideal for indoor furniture, as they are less brittle and more flexible. They are also simpler to fix in the event of any damage. ALSO READ How to Clean Laminate Floors Without Leaving a Film How to Clean Wood Cabinets And Make them Shine Cleaning Tips: How To Clean Wooden doors Step-By-Step Guide And… Cleaning Wooden Furniture with Vinegar and Baking Sodad What you will need: Baking soda White vinegar Water Spray bottle Cloths (for cleaning and drying) Sponge or brush (optional) Step 1: Mix Baking Soda and Water Step 1: Mix Baking Soda and Water In a bowl, mix together 1/4 cup of baking soda with 1 cup of water to form a paste. If you are dealing with tough stains, you can add 2 tablespoons of baking soda to the mixture. Step 2: Apply Baking Soda Paste to Furniture Using a cloth, sponge, or brush, apply the baking soda paste to the surface of your furniture. Allow the mixture to rest for 5-10 minutes to effectively disintegrate any dirt, smudges, or blemishes. Step 3: Wipe off Baking Soda Paste Using a clean, damp cloth, wipe off the baking soda paste. Ensure to clean along the grain to prevent any harm to the wood. Step 4: Mix Vinegar and Water Combine 1/4 cup of white vinegar and 1 cup of water in a separate bowl. Transfer the mixture into a spray bottle for easy application. Step 5: Spray Vinegar Solution on Furniture Spray the vinegar solution onto a clean cloth, then wipe the surface of your furniture with it. The vinegar will help to remove any remaining baking soda and also sanitize and deodorize the wood. Step 6: Dry Furniture Finally, use a clean, dry cloth to dry your furniture. Ensure you dry in accordance with the grain to prevent water marks from appearing. And there you have it! Your wooden furniture should now look clean and refreshed. If the stains are persistent, you may need to repeat the steps multiple times to fully remove them. But overall, cleaning your wooden furniture with vinegar and baking soda is a simple and effective way to keep it looking its best. Conclusion In conclusion, using vinegar and baking soda to clean your wooden furniture is a great way to save money, protect the environment, and keep your home looking its best. Experience the benefits yourself by trying it today!

How to Remove Sticky Varnish from a Table (Quick and Easy Guide)

how to remove sticky varnish from a table

Have you found yourself with too much varnish on your table and wondered how to remove sticky varnish from a table? If yes, then this article is for you! Here, you will find a step-by-step guide on how to effectively remove sticky varnish from your table and restore its original finish. Removing sticky varnish from a table can be a frustrating task, but with this step-by-step guide, it can be done easily and effectively. Whether you’ve accidentally spilled something sticky on your table or the varnish has simply worn down over time, there are several steps you can follow to restore your table’s finish. In this blog post, we’ll walk you through the process of removing sticky varnish from a table and help you get your table looking like new again. ALSO READ How to Prevent and Remove Rust from Clothes with Baking… How to Remove Water Stains From Quartz Countertops How To Remove Rust From Cast Iron With Salt and… Here’s How to Remove Sticky Varnish from a Table Clean the surface of your table with soap and water to remove any dirt or debris that might have accumulated on the surface. Sand the surface with fine-grit sandpaper to rough up the surface of the varnish. Sand until the surface feels slightly rough to the touch. Apply denatured alcohol or mineral spirits to a clean cloth and rub the surface to remove the varnish. Make sure to use a clean portion of the cloth each time you rub the surface. Wipe the surface clean with a clean, damp cloth to remove any residual solution. Repeat the process of applying the solution and wiping it clean until all of the varnish has been removed. Allow the surface to air dry completely. Sand the surface with a fine-grit sandpaper to smooth out the surface. Clean the surface with soap and water to remove any remaining residue. Apply a fresh coat of varnish or finish as desired. Please Note: Due to material difference you should test the solution on a small portion of your table, in your case it might  not work properly. so before applying, test it and make sure it’s working. Conclusion In conclusion, removing sticky varnish from a table can be a straightforward process with the right tools and techniques. Whether you have a small spill or a table that has become sticky over time, following the steps outlined in this article will help you restore your table to its original finish. With a little bit of patience and attention to detail, you’ll be able to enjoy a clean and smooth table once again. So don’t let sticky varnish hold you back – get started today!

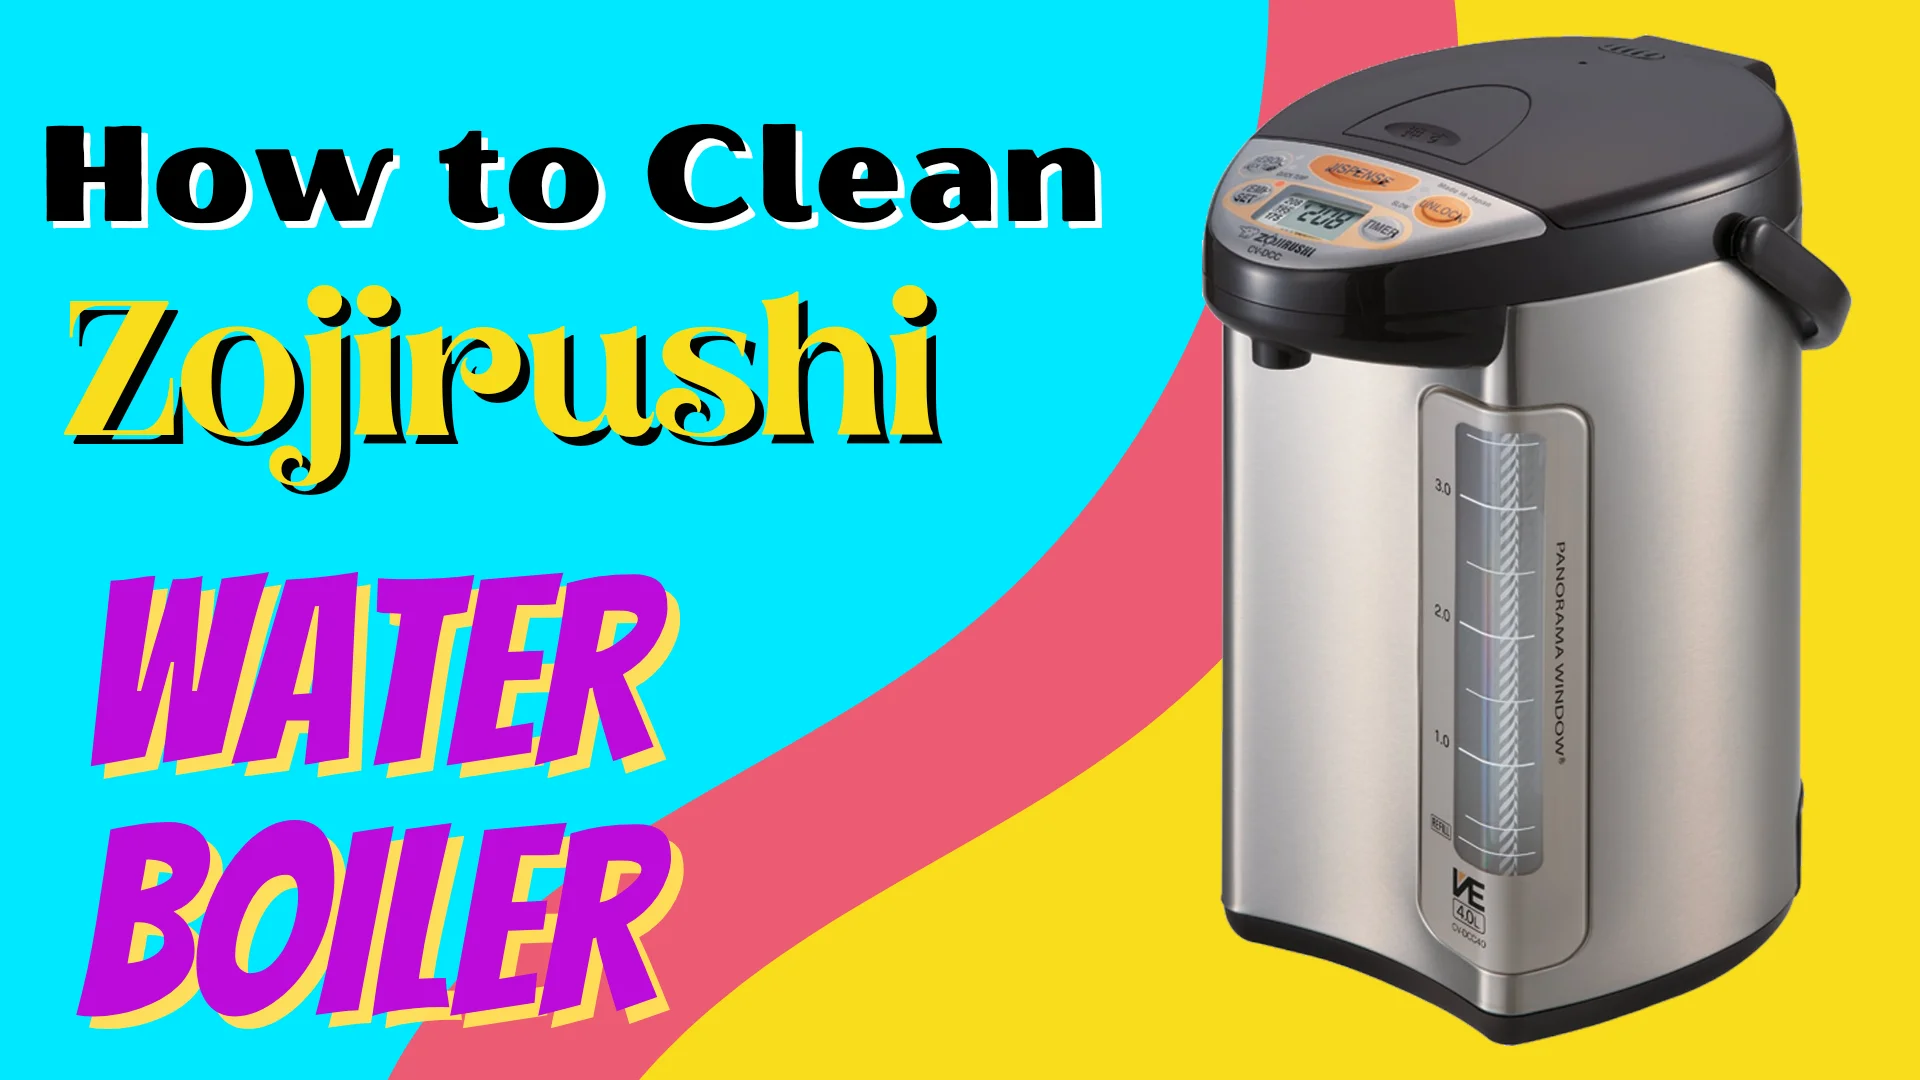
How to Clean Zojirushi Water Boiler with Vinegar (Ultimate Guide)

how to clean zojirushi water boiler with vinegar

This is a quick and easy guide for how to clean Zojirushi water boiler with vinegar, if you are wishing to clean your Zojirushi water boiler with vinegar then you have landed at the perfect page. As you know these types of appliances are in daily use and a clean and well-maintained Zojirushi water boiler ensures that you have access to hot water whenever you need it and also helps to maintain the quality and taste of the water. Over time, mineral deposits can build up in the water boiler, affecting its performance and the taste of the water. In this article, we will provide you with a quick and easy step-by-step guide on how to clean your Zojirushi water boiler using vinegar and some other ways like: lemon juice, baking soda, so that you can keep your Zojirushi water boiler always in top and new condition. Regular cleaning is an important part of maintaining the performance and safety of your water boiler. How and Why a Zojirushi Water boiler Can Get Dirty A Zojirushi water boiler can get dirty over time due to the buildup of mineral deposits, impurities, and bacteria. Hard water, which contains higher levels of minerals, can contribute to mineral buildup in the water boiler, while impurities and bacteria can accumulate if the water boiler is not emptied and cleaned regularly. This can affect the performance of the water boiler, cause the water to taste bad, and even pose a health risk. Important factors to consider when maintaining a Zojirushi water boiler. The type of water used in the water boiler: Try using filtered or distilled water that can reduce mineral buildup and improve the taste of the water. Proper storage of the water boiler: When not in use, it’s important to store the water boiler in a dry place with the lid open to prevent mold and bacteria growth. This will also help to extend the life of the appliance and maintain its performance. ALSO READ How to Prevent and Remove Rust from Clothes with Baking… How to Remove Water Stains From Quartz Countertops How To Remove Rust From Cast Iron With Salt and… How to clean Zojirushi water boiler with vinegar By following the recommended cleaning methods and taking the necessary precautions, you can keep your water boiler in top condition for years to come. Fill the water tank with a mixture of half water and half white vinegar. Let it sit for 30 minutes. Drain the mixture and rinse the tank several times with water. Fill the tank with freshwater and boil it to remove any remaining vinegar taste. Drain the fresh water and let the water boiler cool before use. Repeat this process once every 2-3 months to keep your Zojirushi water boiler clean and fresh. Tips to Prevent your Zojirushi Water Boiler from Getting Dirty Use filtered or distilled water and avoid using hard water: Using filtered or distilled water can reduce mineral buildup in the water boiler and minimize the need for cleaning. Empty the water tank after use: Helps you to prevent the buildup of bacteria and other impurities in the water boiler. Clean the water boiler regularly: Regular cleaning of your Zojirushi Water boiler will help you to prevent mineral buildup and maintain the quality of the water. Store the water boiler properly: When not in use, store the water boiler in a dry place with the lid open to prevent mold and bacteria growth. Conclusion In conclusion, cleaning a Zojirushi water boiler with vinegar is a simple and effective way to remove mineral buildup, impurities, and bacteria. Regular cleaning and maintenance, along with using filtered or distilled water, storing the water boiler properly with the lid open, and avoiding hard water, can help to keep your Zojirushi water boiler in top condition and ensure the quality, taste, and safety of the water. So, take the time to properly care for your Zojirushi water boiler and enjoy hot water anytime, anywhere.

How to Clean Office Chair Wheels – The Best Way to Clean Office Chair Wheels

how to clean office chair wheels

If your chair wheels has stopped rolling or you just want to clean your office chair wheels. In this post we will guide you step by step on how to clean office chair wheels.   The wheels of a dirty chair wheels usually stop rolliong as well as they can damage the floors. the question is how the office chair gets dirty? The office chair wheels stops moving and rolling by getting dirty from dirt or hair. In this ultimate chair wheels cleaning guide, you will see what are steps to clean office chair wheels and how easy it is. Let’s Get Started to Cleaning Office Chair Wheels Before we start the process let us tell you more about office chair wheels. Types of the chair wheels There are several types of casters on the market. Let me tell you how many varieties of office chair wheels available to you. Traditional Chairs Industrial Chairs Modern Chairs Vintage Chairs Transitional Chairs Glam Chairs Fabric Chairs There are more as this article is about how to clean office chair wheels, It make no sencce to add all but you can visit next link to see 36 types of chairs. Remove Hair: How to Clean Office Chair Wheels Hair Follow this simple and easy process to remove hair and dirt from you office chair wheels to fix it’s not rolling issues. Remove the caster wheels from the chair by turning it upside down. Try opening the wheels with a nose plier following the video above. To remove hair from an office chair, utilise the nose plier or a kitchen teezer to pull the adhered hairs. Soak the sticky wheels in a tub of warm soapy water to remove filth and clean them. Allow it to soak for 10 minutes. The filth should be easy to remove. To remove the residues, wipe the casters with a towel or microfiber cloth. You may either let them to dry naturally or manually. Attach the wheels to the base once again. Place the wheels in hot water to facilitate wheel disassembly. In addition, the wheels will get softer. Second Mathod: Remove Hair from Office Chair Wheels Witout Disassembling the Wheels To begin, pluck as many hairs as possible using a tweezer. Duct tape may be used to attach and pull the hair. If your tweezer cannot reach the hairs, try a bottle opener or nail cutter. The curving nail-cutters bottle-openers might be handy for eliminating trapped hairs.