Electric Water Heater Not Working? Troubleshoot and Repair a Water Heater

Electric Water Heater Not Working Troubleshoot and Repair a Water Heater

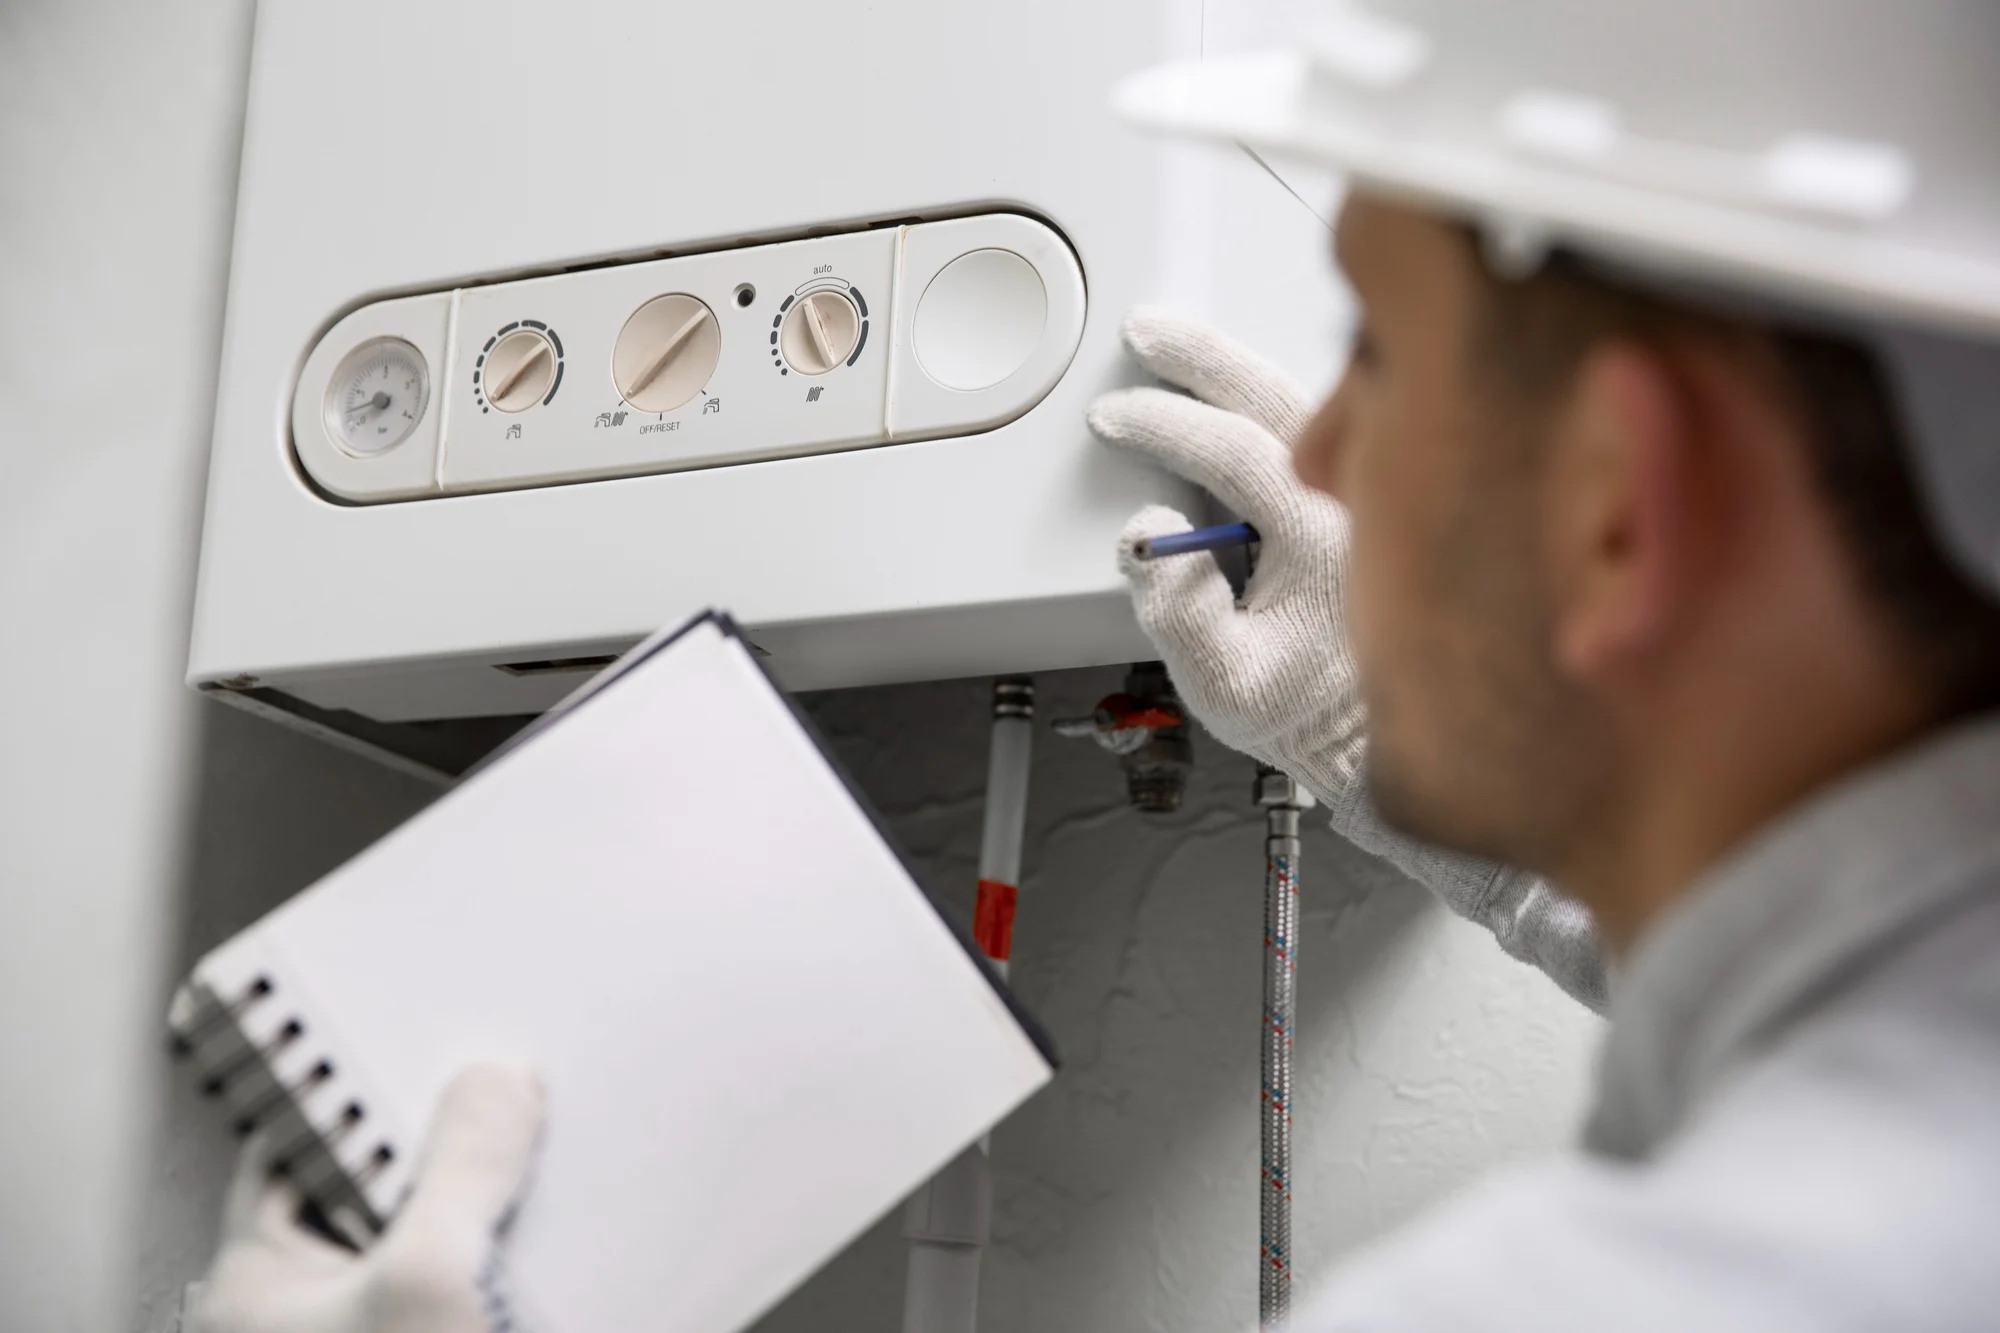
Is your electric water heater not working, want to repir it? in this article you’ll find possible ways for hwo to repair a water heater. A water heater is an item that is necessary in the majority of homes. They offer warm water for activities such as taking a bath, washing the dishes, and doing the laundry. On the other hand, just like any other machine, a water heater might develop problems and stop working properly, leaving you without any hot water It is not always simple, but if you have enough knowledge, you can save money and avoid having to purchase a new water heater by making repairs to the existing one instead. In this article, we will discuss how to troubleshoot and repair water heater by going through these five primary considerations. Troubleshhot and Repair an Electric Water Heater Always do follwoing things for troubleshooting an electric water heater. Identify the Problem Check the Power Supply Check the Thermostat Check the Heating Element Replace the Faulty Parts It is also recommended to hire an expert to troubleshoot and repair your electric water heater check about it on reparacoes24hesquentadores.pt Hot Water Heater Repair Cost While repairing a water heater by a professional the average cost for water heater is arround $300-700 it varies depending on faults and replacements of faulty parts. Electric Water Heater Not Working! How To Repiar It If you electric water heater is not working and want to know how to repair a water heater then following steps might help you to repair water heater. 1. Identify the Problem Step one in fixing a water heater is to figure out what’s wrong with it. Problems with water temperature, leaking, or unusual noises? If you are unsure, consult the owner’s manual, which should contain a troubleshooting section. There is a lot of information available about typical issues and how to fix them. Finding the source of the issue is the first step towards fixing it. 2. Check the Power Supply Examine the power supply Before attempting any kind of fix, double check that the power supply has been turned off. This is significant because working on a water heater while it is still plugged in might be perilous. Stop the flow of electricity to the water heater by switching off the breaker or fuse that supplies power to it. If your water heater runs on gas, you should shut off the gas supply valve. 3. Check the Thermostat The temperature of the water is controlled by a device called the thermostat. It’s possible that the thermostat is broken, which would explain why the water won’t heat up. Using a multimeter, you can check to see if the thermostat works by measuring the voltage. If the voltage is low or zero, the thermostat needs to be replaced because it is not working properly. 4. Check the Heating Element The heating element is the part of the water heater that heats the water. In the event that the water does not heat up, the problem may lie with the heating element. With a multimeter, you can measure the resistance to see if the heating element is working right. In the event that the resistance is high or infinite, the heating element will need to be changed. 5. Replace the Faulty Parts After you have located the malfunctioning component, you can next decide whether or not to replace it. You can get replacement parts at a local hardware store or on the internet. Be cautious to disconnect the power supply to the water heater before attempting to replace any of its components. Be sure to carry out each step in accordance with either the owner’s handbook or the instructions that came with the new item. Conclusion In the end, all you need to fix a water heater is some knowledge, some patience, and some persistence. You can save money and avoid having to buy a new water heater if you adhere to the five recommendations that have been presented above. Always remember to cut off the power supply before doing any repairs, and always be sure to follow the instructions provided by the manufacturer. Frequently Asked Questions How do I know if my water heater needs repair? Water that is not hot, water that has changed color or smell, or noises or leaks coming from the water heater are all classic indicators that it requires maintenance. Also, if your water heater is older than ten years, you might want to think about getting a new one. Can I repair my water heater myself? Some fixes are simple enough to tackle on your own, like a broken thermostat or heating element, but for anything more involved, you should probably call in a professional plumber or HVAC contractor. It’s not worth the risk to try fixing your water heater on your own. How much does it cost to repair a water heater? The expense of repairing a broken water heater depends on a number of factors, including the nature of the damage, the water heater’s age and condition, and the local labor rate. Some fixes can be made for a few hundred dollars, while others might cost several thousand. Before beginning any kind of repair work, it’s wise to receive an estimate from a qualified expert. it costs arround $300-$700

How To Clean Inside Car Windows Without Streaks? Easy Guide

How To Clean Inside Car Windows Without Streaks

Car windows are one of the essential parts of keeping your car clean inside. See how to clean inside car windows without streaks.  Nonetheless, they may be a major hassle to clean! Sometimes, you want to clean them but need the right equipment, or even if everything is correct, you need someone’s help to get it done. Several products out there claim to help you quickly clean the inside of your car windows, but they could be better. After cleaning, they often streak, splatter, or leave streaks on the glass. Therefore, you should be cautious while choosing them. Many people wonder how to clean inside car windows without streaks, but the answer is less evident than expected, especially if you’re a novice in cleaning and washing stuff. To keep your problem in mind, we will provide you with some helpful information on how to clean inside car windows without streaks. How to Clean Inside Car Windows Without Streaks These ways are going to help you a lot to clean car windows. ALSO READ Top 10 Best Microfiber Car Cloths Of 2022 | Must… Top 3 Best Interior Car Cleaners In 2022 (Review &… How To Remove Rust From A Car Without Sanding –… 1. Identify An Appropriate Location To Wash The first step that requires cleaning your car windows is finding the appropriate workplace. It has to be tucked away somewhere that won’t become too hot or be exposed to strong winds.  Also, there shouldn’t be any unnecessary furniture or clutter. Take the microfiber towel or cloth you prepared with the car window cleaner. First, you’ll want to deal with the external windows on one side, then the other, and finally, the interiors in that sequence. 2. Clean The Dust Clean the area of any loose dirt, sand, or dust with your cloth before applying the solution. You must take this precaution to avoid damaging the surface in the future by causing abrasion or scratching. 3. Apply The Solution With a Spray Bottle After spraying the solution on the windows, they may be wiped off with a dry cloth. To avoid streaks, avoid spraying too much at once. Check to see if your applications are uniform in size and shape. It is also advised that spraying be done in phases. The solution will dry and leave unattractive blotches if you stream all the windows at once and work too slowly. Use the minimum power necessary to remove the tough stains without harming your car’s glass. Instead of scrubbing circularly, employ up-and-down or back-and-forth strokes. Continue wiping until all dirt and dust have been removed from the area. Putting in the time and energy required will be well compensated for in the end.Continue wiping until all dirt and dust have been removed from the area. Putting in the time and energy required will be well compensated for in the end. 4. Take Extra Care With Tough Stains Tighter pressure is required for more tenacious stains, such as those left by bird droppings and splattered bugs. Another option is to spritz the solution on top and let it sit for a few minutes. It needs time to work on the stain before it can be wiped away easily. Wash the windscreen and the car’s front end while you’re at it. Your rear hand’s strength can be put to good use. Rubber seals require your attention. If you want to get into the crevices here, use a toothbrush. Take special care with the windshield wipers. 5. Use a Clean Cloth To Polish The Surface Change to a clean one now. Apply the solutions to it and use it to buff the surface. Remember that sparkling perfection is the final aim. 6. Continue Washing The Inside Windows If you’re finishing up the exterior, don’t worry; you can just reverse your work and tackle the inside. Doing business from the comfort of your car is thus a viable alternative. If you need to clean the windshield, do it from the safety of the passenger seat. While cleaning your car windows, spray the cleaning solution on the cloth or towel before washing the glass. Doing so guarantees residue-free upholstery and carpets in your car, no matter how fast they leak. This is the secret to streak-free window cleaning on the inside of your car. To finish, allow the windows to dry naturally. Applying a sealer or water-repellent is another option. Doing so will ensure that water will roll off your windows in the future. Conclusion: If you are worried that your car windows might not be as clean as they could be, look at the ways we’ve shared above and try them the next time you’re tackling this task. They might help keep your windows dirty-free in between washes! These methods will help you properly clean the windows on your car. The most straightforward tools are often the best; you only sometimes need expensive products to do the job. That’s it! If you follow our simple instructions, you can clean your car windows to a streak-free shine saving you the trouble of later cleaning them again. Freequently Asked Questions, FAQs How long does it take to clean the glass on a car’s interior? The time it takes for the water to evaporate is proportional to the amount of filth on the windows and the amount of time you have to wait. The best way to tell if your windows are clean is by looking at them. If they look streaky, give them another wipe with a dry cloth. Try a different cleaning method if you still see streaks after repeated wiping. How often should I wipe down the rear window of my car? Cleaning your car windows is a daily task, but it can quickly get dirty. If you’re cleaning your windows after every drive, you may want to consider doing a more thorough job once a week or so. This will keep dirt and debris from building up on your windows and create streaks that … Read more

How to Prevent and Stop Condensation Between Double Glazing (Total Guide)

Condensation Between Double Glazing

What is Condensation Between Double Glazing, want to know?. If yes! then you will know everything about Double Glazing and a step-by-step guide to prevent and stop condensation between Double Glazing. Double glazing has become more popular with homeowners all over the world because it cuts down on noise pollution and makes homes more comfortable. Condensation between the panes of glass, however, is a common issue with double glazing. In this article, we’ll look into the root causes of condensation between panes of glass and the measures that can be taken to eliminate the problem. What causes Double Glazing condensation? Condensation between double glazing occurs due to temperature differences between the inside and outside of a home. When there is a temperature gradient between the inside and outside of a window or door, condensation can form on the inside pane. Moisture between the panes of glass is not only annoying, but it could also hurt the window if it is not taken care of. Condensation between panes of glass can also be brought on by poor window quality. Moisture can seep in through the cracks between the panes of glass if the window was poorly made or installed. Also, if the window isn’t opened enough, moisture can build up inside the house and cause condensation to form on the glass. Repair Condensation Between Double Glazing? Video By: Crystal Clear Window Works  How To Prevent Condensation Between Double Glazing? If you install and take care of your double-glazed windows the right way, condensation won’t form between the panes of glass. What you can do about condensation: Here are some ways to keep condensation from occurring: 1. Ensure the windows are properly installed. The windows must be placed properly, with a tight seal around the perimeter. If you do this, you may be able to reduce the amount of condensation that forms in the air gap between your windows. ALSO READ How to Clean Zojirushi Water Boiler with Vinegar (Ultimate Guide) Cleaning Tips: How To Clean Wooden doors Step-By-Step Guide And… What Is The Best Homemade Window Cleaning Solution – Tips… 2. Improve ventilation Most of the time, condensation on windows is caused by too much moisture inside the house. This can be fixed by letting in more air. Extractor fans or ordinary window openings are two easy ways to accomplish this. 3. Use a dehumidifier With the help of a dehumidifier, condensation on windows can be stopped by getting rid of the extra moisture in the air. 4 .Replace damaged windows If the window’s seal is broken or it is not operating properly, you should get a new window to keep the air from escaping from between the panes. 5. Use low-emissivity (low-e) glass Condensation between double glazing can be avoided by using low-e glass, which helps to lessen the temperature differential between the indoors and outdoors. Conclusion: As a homeowner, condensation between your windows can be both annoying and expensive. This problem can be avoided, however, by maintaining the windows and checking that they were installed correctly. It’s crucial to respond quickly if you see condensation collecting between the panes of glass in order to keep the window in good condition as well as to keep the home’s temperature and humidity consistent and comfortable. Freequently Asked Questions, FAQs Can condensation between double glazing be fixed? Yes, it can be fixed. If the window’s seal is broken or damaged, it may be necessary to replace the window. If the window is properly sealed and the moisture buildup is inside, you can stop condensation by letting in more air or using a dehumidifier. Is condensation between double glazed windows dangerous? Condensation between panes of glass may be annoying and ugly, but it poses no health risk to home occupants. But if you don’t do something about the moisture, it will eventually wear away at the glass itself. Can condensation between double glazing affect the energy efficiency of a home? Yes, condensation between panes of glass can reduce a home’s thermal efficiency. If there is moisture between the panes of a window, it may lose some of its insulating value. This could lead to higher energy costs.

Top 10 Best Experts Dog Insurance Companies of 2023

Dog insurance is a type of insurance that helps pet owners cover veterinary expenses when their dog gets sick or injured. Just like humans, dogs can suffer accidents or illnesses that require expensive treatment. Dog insurance can help owners avoid financial problems in these situations. Experts Best Dog Insurance Companies For 2023 As pet owners, we all want to give our furry friends the best care possible. That’s why choosing the right dog insurance provider is so important. With so many choices on the market, it can be difficult to decide which company offers the best coverage and price for your furry friend’s needs. That’s why we’ve compiled a list of The 10 Experts Best Dog Insurance Companies For 2023 based on expert opinions and reviews. Whether you’re just starting out or switching companies, this guide will help you make an informed decision and provide your furry friend with the protection and care he deserves. Benefits of purchasing dog insurance Peace of mind: Knowing you have a safety net to cover unexpected veterinary expenses can give you peace of mind and reduce stress. Better access to veterinary care: With dog insurance, you can afford to take your dog to the vet when needed without worrying about the cost. Cost savings: The cost of veterinarian treatment may quickly add up, especially in an emergency. In the long term, dog insurance can help you save money by decreasing or eliminating out-of-pocket payments. Customized coverage: Dog insurance policies may be personalized to your dog’s individual needs, allowing you to select the coverage choices so that your furry friends get the care they need without spending too much money. Factors to consider when choosing dog insurance include Coverage options: Some policies only cover accidents, while others cover illnesses, hereditary diseases, and routine treatments. Cost of premiums: The cost of dog insurance can vary depending on your dog’s age, breed, and medical history, as well as the coverage options you choose. It is important to compare premiums from different insurers to ensure you are getting a good deal. Deductibles and reimbursement rates: Most dog insurance policies require a deductible to be paid before coverage goes into effect. For most policies, the deductible you can afford is most important. Also, check the reimbursement rate (the percentage of the vet bill that the insurance company will cover) to make sure it is reasonable. Coverage limits: Many dog insurance policies have a maximum limit per claim, per year, or for the life of the policy. It is important to choose a policy with a coverage amount high enough to cover all expenses. Exclusions and limitations: For example, some policies exclude certain hereditary conditions or limit coverage for pre-existing conditions. Customer service and reputation: Look for companies with good reviews from other pet owners and make sure customer service is readily available. Based on these factors, you can choose a dog insurance policy that provides adequate coverage for your dog and fits within your budget. Best Dog Insurance Companies For 2023 Below is the list of the best dog insurance companies for 2023, based on factors such as coverage options, costs, and customer reviews. 1. Healthy Paws Healthy Paws is one of the best dog insurance companies and has a reputation for good customer service. It has a good reputation and is one of the most popular dog insurance companies in the UK. Healthy Paws has no annual or lifetime payment limits and covers up to 90% of veterinary expenses. Prices vary depending on the age, breed, and location of the dog. ALSO READ How to Clean Zojirushi Water Boiler with Vinegar (Ultimate Guide) Cleaning Tips: How To Clean Wooden doors Step-By-Step Guide And… What Is The Best Homemade Window Cleaning Solution – Tips… 2. Petplan Petplan offers comprehensive accident and illness coverage, as well as hereditary diseases and dental care. Deductibles and reimbursement options are customizable, with no annual or lifetime limits. Prices vary depending on the age, breed, and location of the dog. 3. Trupanion Offers customizable deductible options and no reimbursement limits. Trupanion covers up to 90% of veterinary expenses. Prices depend on the dog’s age, breed, and location. 4. Embrace Embrace offers comprehensive coverage for accidents, illnesses, hereditary diseases, and alternative treatments. Deductible and reimbursement options are customizable and there are no deductible limits. Embrace also offers a health plan that covers routine checkups. Prices vary depending on the dog’s age, breed, and location. 5. Nationwide Nationwide Offers customizable deductible and reimbursement options. Nationwide also offers a health plan that covers routine checkups. Prices vary depending on the dog’s age, breed, and location. 6. ManyPets ManyPets offers customizable coverage for accidents, illnesses, and medical care, including vaccinations and routine checkups. There is no out-of-pocket limit and up to 90% of veterinary expenses are covered. ManyPets prices vary depending on the dog’s age, breed, and location. 7. SPOT SPOT offers comprehensive insurance that covers accidents, illnesses, and hereditary disorders. It has no cost limit and covers up to 90% of veterinary expenses. The SPOT also offers medical coverage for routine check-ups. Prices vary depending on the age, breed, and location of the dog. 8. Figo Figo offers comprehensive coverage for accidents, hereditary diseases, and illnesses, as well as alternative treatments and behavioral issues. Customizable deductible and coinsurance options are available and there is no deductible limit. Figo covers up to 100% of veterinary expenses. Rates depend on the dog’s age, breed, and location. 9. Pumpkin Pumpkin offers comprehensive coverage for accidents, illnesses, and hereditary diseases, as well as behavioral and wellness care. Deductibles and coverage options are customizable, and there are no deductible limits. Pumpkin covers up to 90% of veterinary expenses. Rates depend on the dog’s age, breed, and location. 10. PetsBest PetsBest offers customizable coverage for accidents, illnesses, and medical treatment, including routine checkups and vaccinations. The insurance has no deductible and covers up to 90% of veterinary expenses. Pets Best also offers additional coverage for dental care. Prices depend on the dog’s … Read more

What is The Best Way to Clean Grill Grates? (5 Mathods)

what is the best way to clean grill grates

Looking for the best way to clean grill grates? Keep reading, this article will be the best choice for you. Many people consider grilling to be a vital part of their summer routine, but cleaning the grill grates may be a tedious task. It is essential to ensure that the grill grates are kept clean in order to maintain hygienic conditions and to ensure that food is cooked uniformly. Here are five different suggestions for the most effective technique to clean the grates of a grill. So are you ready to see what are these best ways to clean grill grates? In this post, We have shared 5 best ways to clean grill grates with aluminum foil, baking soda, vinegar and more possible ways. By following these simple techniques, you can easily remove grease and grime from your grill grates, making them look like new. 5 Best Way to Clean Grill Grates 1. Clean grill grates with grill brush Cleaning barbecue grates using a grill brush is a simple and cost-effective method. After you have finished cooking, use the brush to scrape the grates while they are still hot. The heat will assist in separating any debris that may be present, making it much simpler to remove. If you want the best result, make sure you use a brush that is of high quality and has bristles that are not easily bent. ALSO READ How To Clean 5 Gallon Water Jug in 6 Easy… How to Clean Zojirushi Water Boiler with Vinegar (Ultimate Guide) Which Kitchen Countertops Are The Best? (Answered) 2. Clean grill grates with aluminum foil Cleaning the grill grates using aluminium foil is another common method that can be used. When the grates are still hot, roll up a sheet of aluminium foil into a ball and use it to scrub them clean. The foil makes it simple to clear the grates of any debris or leftover food particles, leaving them spotless and ready for their next assignment. 3. Clean grill grates with Vinegar Grill grates can be cleaned with vinegar, which is a natural cleaning product that can be purchased at most grocery stores. Spray the solution onto the grates after combining vinegar and water in a spraay bottle in a ratio of equal parts each. After letting it sit for a few minutes, scrape it thoroughly with a grill brush. To clean the grates, give them a good soaking in water and then pat them dry with a fresh towel. 4. Clean grill grates with baking soda Baking soda is another natural cleaning product that can be utilised for the purpose of cleaning the grate of a barbecue. First, make a paste with the baking soda and water, and then apply the paste to the grate openings. After letting it sit for a few minutes, scrape it thoroughly with a grill brush. To clean the grates, give them a good soaking in water and then pat them dry with a fresh towel. 5. Clean grill grates with steam cleaner Grill grates can be effectively cleaned without the use of any harmful chemicals if you have a steam cleaner. To clean the grates, you need only add water to the steam cleaner and then utilise the steam to do the job. Because of the high temperature of the steam, any debris that is present will become loose and easy to clean with a grill brush. Conclusion: In conclusion, ensuring that the grates of your grill are clean is essential for maintaining proper hygiene as well as maximising the flavour of the items you grill. Each of the five approaches detailed in this article is an efficient way to clean grill grates; however, selecting the one that is best for you will primarily depend on your own personal preferences as well as the grill grates that you have. You can enjoy risk-free and delectable cooking outside for the entirety of the summer if you pay attention to these pointers and routinely clean the grates of your grill. FAQs What is the best way to clean grill grates? To clean grill grates, heat the grill for 15 minutes and then brush them with a grill brush. If the residue is really stubborn, try scraping it off with a ball of aluminium foil or a grill scraper. The grates can also be soaked in hot, soapy water for an hour before being scrubbed clean. How often should I clean my grill grates? The grate of the barbecue should be cleaned after each use. This will prevent trash and food particles from building up over time, which would make cleaning it more difficult in the future. Can I clean my grill grates in the dishwasher? No, the dishwasher is not the suitable place to clean the grates from your grill. The grates are susceptible to damage from the high heat and water pressure, which can lead them to rust. Always clean your grill using a grill brush or one of the other methods described in the previous paragraph.

How To Clean Water Tank Without Removing Water

How To Clean Water Tank Without Removing Water

How To Clean Water Tank Without Removing Water. Water tanks are a necessity in most households. However, if you do not clean them after every 6-7 months, then they can be dirty and unsanitary. If your water tank has been cleaned for a while, it can cause problems for your family and home. You should regularly inspect and clean your home’s water tank. Although cleaning the tank itself is very easy, removing and replacing the water can be pretty troublesome, you can also see here how to clean water tank filter. In this post we will share step-by-step guide on how to clean water tank without removing water from it. This guide is perfect if you’re wondering how to clean a water tank without removing water. You’ll find detailed instructions for quickly and easily disinfecting your water storage tank. How To Clean Water Tank Without Removing Water Siphoning The term “siphoning” refers to the simple act of transferring contents from one container to another. It’s a great technique to clean out the sediment at the bottom of your tank without turning off the water supply. Using this method, those living in homes with smaller water storage tanks might save money. However, if you’d prefer to make do with what you already have, we have developed a detailed guide on constructing a siphon for your work. Find a length of bendable plastic tubing. Ensure that it is long enough to reach the base of your tank. Then, you may finish it off using a standard kitchen funnel. Soak the tube in water until the horn is halfway complete. Verify that any air leaks have been plugged in. Hold the tube vertically with a watertight gasket over the open end to prevent water from leaking. To move the tube around within the tank, you need to connect it to a long pole. When complete, you may lower the tube’s funnel end into the tank while holding a bucket at the other end. All of the sediments in your tank will be collected here. Then, remove the plug and let the vacuum pressure clean the tank. An electrically powered siphoning system, like the ones used for cleaning swimming pools, may be appropriate for individuals who utilize larger water storage tanks. It does the same thing, but at a more expensive rate. ALSO READ How To Clean 5 Gallon Water Jug in 6 Easy… How to Clean Zojirushi Water Boiler with Vinegar (Ultimate Guide) Which Kitchen Countertops Are The Best? (Answered) Other Methods Cleansing agents are often injected into the washing water through a dosing pump, typically air-driven, and a fitting attached to the deck’s washing pipe. There is no longer a need for a dosing pump when the cleaning agent is introduced to the suction side of the washing water pump. Reduced precision in dosage and more effort are two consequences. To increase the cleaning power of washing, rather than just diluting the water with cleaning agents, you may add the cleaning agents straight to the washing water. It is recommended to wash for 1-2 hours. The final rinse is performed in either saltwater or freshwater, depending on the loaded product. Conclusion: Therefore, it is concluded that it is the most critical job to clean the water tank of your house. Your family’s health is worth the four to six hours it will take you to clean the complete water tank. Several companies provide affordable tank cleaning services. But follow our guides that are very easy to apply, and you will get great results. But be careful while using detergents and any chemicals, and also clean them thoroughly so that it should not mix with water. We are certain that you will find our essay to be both entertaining and informative. FAQs How do I clean my water tank with warm water? You can use a simple technique to clean your water tank. Put some dish soap drops into a spray bottle of hot water and use it to clean the water tank. Then, spray the area around your water tank until it begins to foam. After 5 minutes, give it a good rinse to eliminate any lingering soap. Can I use my pressure washer to clean my water tank? Yes, you can use a pressure washer to clean your water tank. However, we recommend using a siphon hose with a high-pressure nozzle on it, as this will ensure that all of the debris is removed from the bottom of the tank. How do I remove rust stains from my water tank? You can use a wire brush on the inside of your water tank to scrape off any rust stains that have built up over time. There may be a need to replace the whole tank if there is a significant amount of rust.

How to Clean Silver Ring at Home | Top 5 Mathods

how to clean silver ring at home

Learn how to clean silver ring at home. Silver rings are the favorite items in the collection of jewelry of most ladies. They love to wear it, but some carelessness may damage it. Most people consider them useless, no dear, don’t make such mistakes. We have come up with fresh ideas to clean your silver rings. After trying these methods, you will witness these rings again shine in your hands and make them beautiful. Thus the blackish look will disappear in a few minutes, and you will find them as they were. In this post, we will share easy step-by-step guide to on how to clean silver ring at home with 5 efficient methods. So, without moving around, let’s move towards the complete detail about them. How To Clean Silver Rings – Top 5 Ways These are the best methods to clean silver rings that will provide lots of benefits to you. 1. Clean Silver Ring With Polish The most effective method to help gain an original look to your ring is to clean it with polish. If you want to polish your rings, these are the measures you need to do. Get a clean, wet cloth and put a dab of polish on it. Then rub it on your silver ring up and down. Never use it circularly because the scratches may become apparent. Fabric tarnish may be avoided by repeatedly reversing the fabric. When you’ve rubbed the rings long enough, please give them a quick rinsing with warm water and thoroughly dry them with a dry towel. ALSO READ 5 Best Moving Companies in Chicago to Help You Make… How to Hire Contractor for Home Renovations in 2022 Which Kitchen Countertops Are The Best? (Answered) 2. Cleaning Sliver Ring With Salt And Towel If you want your ring to look natural, then don’t forget to apply this method. Combine 3 tablespoons of salt, the juice of a lemon, and a cup of boiling water. Drop your ring in this solution and let it remain for about 5 minutes. Take caution since they might be hot when removed.  Use a gentle towel to dry the jewelry. 3. Clean Silver Jewlery With Aluminum Foil And Baking Soda This is the best home remedy to clean the tarnish of your silver ring. You will see a difference in no time. Take a bowl and then use aluminum foil as a lining. Add baking soda and pour some hot water. Just throw in your silver jewelry and walk away for up to three minutes.  Take caution while removing the rings since they may still be hot. Use a gentle towel to dry them. 4. Using Toothpaste To Clean Silver Ring at Home Another method looks strange to apply for cleaning the silver ring. Take a little toothpaste and then use a dish wash sponge to rub this paste on a silver ring. Although the toothpaste helped a little, it wasn’t enough to eliminate the tarnish. Instead of fading the whole work, it came off in clumps. The rubbing of the brush may cause some scratching, so be careful while applying it. 5. Use Ketchup To Clean Silver Rings It is not used to eat with yummy foods but can also be used for cleaning purposes, especially for silver. It looks funny but believe me, you will wonder after seeing its excellent results. Apply some ketchup on a toothbrush to scrub the silver rings clean. Warm water should be used to wash off, and a soft towel to dry off afterward. You will see a shine on the ring, and you will be able to wear it in your beautiful hands. Conclusion: Here you have found the best methods to solve your problems. Additionally, these are easy to apply, and everything will be available at home. These methods are a blessing in disguise to clean your silver rings. You’ll notice a change for the better if you give it a go right away. We hope that you get enough information and tarnish from your rings will disappear. FAQs How to protect silver jewelry from tarnish? Preventing silver from tarnishing is as simple as taking a few precautions. When you keep the jewelry out of the box and expose it to air, it will damage you significantly. Please place them in a velvet box; thus, your jewelry will not be affected by the air, and you will find them new whenever you wear them. What should we keep out of the silver while cleaning it? A firm bristle brush will leave a permanent scratch in the silver. Silver-specific cleansers sometimes include chemicals that harm the material rather than clean it. So, you should refrain from using these items while cleaning the silver.

How To Clean Zebra Blinds – Find Simple and Easy Way to Clean Zebra Blinds

how to clean zebra blinds

Learn how to clean zebra blinds with our quick and easy step-by-step guide. A zebra blind is a type of window coverings that has a pattern of black and white stripes. To stop heat loss and offer security, they are frequently used in houses, workplaces, and other commercial structures. Zebra blinds are a best way to add color and interest to your home. They’re also a great source of privacy since they can be used as a complete barrier between rooms or even as an actual door. what are the zebra blinds? know 5 things of zebra blinds. In this post, we will provide you with a easy and step-by-step guide on “how to clean zebra blinds“.  Zebra blinds are excellent windows for any room in your house, providing privacy and light control. However, like any other type of blinds, they can collect dust and dirt over time. Therefore, it’s essential to know how to clean zebra blinds properly to keep them looking new and fresh for years to come. Basic Tips For Cleaning Zebra Blinds Before cleaning a zebra blind, be sure not to damage its surface with rough cleaning products. A good way to clean your zebra blind is using a soft cloth with gentle soap or detergent. After washing it off with water, you can gently use an old toothbrush or toothpaste to scrub the dirt off your blinds’ surface. Cleaning your zebra blinds is just as easy as cleaning any other window. You’ll first want to remove the curtains from the frame, then take a damp cloth and wipe down the entire surface of the window. Use water-based cleaners on your windows because they won’t damage your curtains or drapes. But take caution; in place of soap, you can clean Zebra blinds by using washing liquid for sensitive fabrics or a product made for hand washing. Never use a sponge or brush to clean the fabric, even if the stains are very bad! Steer clear of harsh chemicals because they might discolor clothing. How To Clean Clean Zebra Blinds In Quick And Simple Ways If you’re looking for a quick, simple way to clean your zebra blinds, there are three steps you should follow: Remove the blinds from their frames by lifting them off the top rail. This will allow you access to all areas of the fabric and make it easier to wipe away dust and dirt with a damp cloth. Once all stains have been removed, apply a small amount of dish soap (as little as half a teaspoon) onto a cloth pad or paper towel and wipe down all areas that need cleaning. The soap will help break up any residue left behind by previous spills or stains, making them easier to remove later down the road! Once all stains have been removed, dry off any remaining moisture using another clean cloth or paper towel. ALSO READ 5 Best Moving Companies in Chicago to Help You Make… How to Hire Contractor for Home Renovations in 2022 Which Kitchen Countertops Are The Best? (Answered) 5 Mathods To Clean Zebra Blinds We are going to share 5 diffrent mathods with you to clean your zebra blinds, you can apply any mathod to easily and effectively clean them. 1. Clean Zebra Blinds Using Damp cloth The first method uses water and a cloth or sponge to wipe down the surface. This will remove any dirt, dust, or grime from the surface of your Zebra Blinds so they can be easily cleaned again later on down the road! Clean the inside of the blind with a damp cloth. Use mild detergent to clean the outside of the blind. Wipe down any dirt collected on the frame or railings with a damp cloth or sponge. 2. Hand Cleaning Method Hand-cleaning involves scrubbing the fabric with a brush or rag until it’s clean. This requires some elbow grease but should take a little bit of time! 3. Cleaning Zebra Blinds With Vacuum Machine Using a machine like a vacuum cleaner or steam cleaner can help remove stains and dirt from your blinds much faster than using your hands alone (although they still need regular cleaning). Unscrew the frame from the window and remove all the linings. Clean all the dust off the cloth’s inner side using a vacuum cleaner with a brush attachment. Put some warm water into a bowl, add some mild soap, and sponge down each section of fabric until they’re all clean and wet with water (you can use paper towels if desired). 4. Cleaning Zebra Blinds With Toothpaste If there is a lot of dirt, then take some toothpaste and apply it to the surface of the blind. Then wipe it with a damp cloth and repeat this process until no more dirt is visible on the surface of the blind. 5. Clean Zebra Blinds With Steam cleaner Consider using a steam cleaner if you’re looking for tricks to keep your blinds clean without heavy-duty scrubbing. It’s quick, easy, and effective and will save you time in the long run! Conclusion: If you’re looking for tricks to clean your zebra blinds, you’ve come to the right place! We’ve shared our top tips and tricks for keeping them clean. If you have any FAQs about how to clean zebra blinds, feel free to reach out. We’re always happy to help! We hope that you’ve learned a lot from this article. We hope you’ll use the information to clean your blinds and make them look new!

How To Clean 5 Gallon Water Jug in 6 Easy Steps

How To Clean 5 Gallon Water Jug In 6 Easy Steps

Using my 6-step process, cleaning a 5 gallon water Jug is simple. Today in this post, we will share a 6 step guide for how to clean 5 gallon water jug. Drinking water bottles are commonly made of plastic, which is lightweight. You cannot use them repeatedly. However, when it comes to hard plastic water bottles, they should last a long time. As an example, 5-gallon containers or a sports bottle can be used. Cleaning 5 Gallon Water Jug (Basic Steps) The first step in cleaning your jug is to remove any plastic wrap or other materials that may have been left on top of the bottle when you filled it up with water at the store. Then, wash off any dirt and debris around the mouthpiece with soap and warm water. Next, take the lid off your bottle and rinse all the inside parts with warm water so they are completely clean. Please ensure no cracks or holes in these parts because they could allow dirt into your bottle! Finally, dry all parts thoroughly before putting them back together again–this will keep them from getting moldy over time! TIP:  If you use hot water to rinse plastic bottles, the plastic may leach carcinogens into your water. Store water bottles in a cool, dry place away from direct sunlight to help prevent mold and bacteria growth. ALSO READ How to Hire Contractor for Home Renovations in 2022 How to Clean TV Screen Without Streaks – A Quick… Which Kitchen Countertops Are The Best? (Answered) 6 Methods To Clean 5 Gallon Water Jug: Cleaning your water jug is important to keep it clean and germ-free. You want to ensure that the water inside your bottle does not become contaminated, which can lead to a bacterial infection. Cleaning a 5 gallon water jug; there are many ways to go about it. Here are some of the most common methods and how they work. 1. Cleaning 5 Gallon Water Jug With Warm, Soapy Water Use warm soapy water and scrub with a soft brush or sponge. This method works best for those with hard water conditions who need to remove mineral deposits from their water bottles. 2. Use Of Woodash Wood ash is one of the earliest known natural cleansers. Wood ash was commonly used to clean bottles even before introducing dishwashing soaps. It cleans bottles, removes odors, and even disinfects them. Wood ash can be placed directly on the bottles and washed away with a sponge and warm water. 3. Dishwashing Put your bottle in the dishwasher on the lowest heat setting possible (no soap) and run through a rinse cycle with hot water added until all of the soap is removed; then dry thoroughly with a cloth towel before storing away for future use! 4. How To Clean 5 Gallon Water Jug With Vinegar And Salt Pour at least two cups of white vinegar into a bowl, add 2 tablespoons of salt (optional), and stir until salt dissolves completely before pouring over the bottle cap and filling it with hot water from the faucet until the full level reaches the top of the cap (do not submerge). Swish around inside cap until all lint is gone; then rinse well with clear water (do not submerge). 6. Clean 5 Gallon Watter Jug Using Rice Water Hydrogen peroxide has been shown to kill germs and bacteria, so it’s perfect for cleaning a 5-gallon water bottle. Just pour some into a bowl or cup and add some water; then dip your lid until it starts bubbling. When it does, rinse any excess with running water so none of the hydrogen peroxides gets left behind! 5. Cleansing Water Bottle Through Hydrogen Peroxide The mixture of starch and citric acid in rice water aids in the removal of grease. Fill the bottle with rice water and leave it for around 30 minutes. After that, scrub the bodttle thoroughly and wash it under warm water to remove the unique scent of rice water.d Avoid Using Bleech Or Harm chemicals While Washing the bottle: If you’re seeking a technique to clean your glass water bottle, look no further. First, you must ensure that your water bottle is clean and free of contaminants. You can do this by washing it in hot soapy water or with a dishwasher on the highest setting. Second, avoid using bleach or other harsh chemicals on the outside of your bottle. These can damage the surface of the glass and make it more difficult for you to see through your water bottle when you’re drinking from it. Third, try not to drop your water bottle onto hard surfaces–this can cause damage! Finally, once you’ve cleaned your water bottle with soap and warm water (or dishwashing liquid), run it under cold water for about ten minutes so that any leftover dirt falls off easily into the sink bowl or tub drain. We’re almost done! Hard plastic water bottles are undeniably reusable. You must, however, take special care of such bottles. Otherwise, algae and other potentially hazardous microorganisms may grow within the bottle. In this essay, I attempted to explain how to clean a 5-gallon water bottle in various ways. I hope you can now complete the task without difficulty.

How To Clean Glass Table In 3 Easy Mathods (Step-by-Step Guide)

how to clean glass table

Learn how to clean glass table with our step-by-step expert guide. The glass table is one of the most common tables you’ll find in homes worldwide. Glass table easy to clean, but it can be difficult to keep looking good and new. When you’re looking for ways to spruce up your home, cleaning glass tables is one of the best options. Glass tables can be cleaned using different types of cleaners, including various household chemicals such as vinegar and lemon juice. Fortunately, achieving a sparkling clean glass tabletop is a relatively simple task. Today in this post, you’ll discover four effective methods to clean your glass tabletop and restore its shine. Follow these tips to remove stubborn stains and achieve a streak-free finish. 1. Clean Glass Table With Baking Soda And Vinegar Cleaning a glass table with baking soda and vinegar is an eco-friendly and effective way to remove stains and grime. These common household ingredients can work wonders on a dirty glass tabletop. Step 1: Pour equal parts water and vinegar into a small container for later use. To make your cleaning solution, combine the water and vinegar. The size of your glass tabletop determines the quantity you make. Begin by combining 1 cup (0.24 L) of water and vinegar, then add more later if necessary. While you make the baking soda paste, set aside the mixture. Step 2: Make a paste with 0.5 cup (0.12 L) baking soda and at least 3 teaspoons (44 mL) water. To clean the glass surface without harsh chemicals, create a thick mixture by combining baking soda and water in a small basin. This mixture can be used effectively to clean the glass surface. The method is eco-friendly and safe. Step 3: Using a sponge, apply the baking soda mixture to the table. After dipping the sponge into the basin, rub the paste mixture over the table in circular, sweeping motions. Strive to be as meticulous as you can, and make sure to cover the entire surface of the glass. Choose a soft sponge that won’t scratch or leave marks on the glass. Use a soft sponge that will not leave marks or scratches on the glass. When spreading the baking soda, avoid using items such as steel wool. Step 4: Use a sponge dipped in the vinegar mixture to rinse the table. Use lengthy, sweeping motions to clean the table after soaking the sponge in the vinegar solution. Continually rinse the baking soda until all of it is gone. Based on the size of your table, this can take a while. Consider keeping a small basin or bucket near the table’s edges to capture any vinegar that spills off the table. Step 5: Wipe the glass with a squeegee and allow it to dry. Run a plastic squeegee along the table in straight lines. To remove any extra fluid from the table, work in a grid pattern. After you’ve finished cleaning the table, let it air dry. Continue to catch any extra fluid in a spare container or bucket. A squeegee can be purchased in the car supply department of a store or online ALSO READ How to Hire Contractor for Home Renovations in 2022 How to Clean TV Screen Without Streaks – A Quick… Which Kitchen Countertops Are The Best? (Answered) 2. Clean Glass Table Spraying with Glass Cleaner or Vinegar Looking for an easy way to clean your glass table? Spraying it with glass cleaner or vinegar can be a simple and effective solution. Here’s what you need to know. Step 1: Spray the surface with glass cleaner. Use the amount of product specified on the bottle. Make sure to cover all regions and corners of the table with spray. To avoid streaks, wipe any visible debris from the table with a microfiber cloth or other soft material before spraying on the cleaner. Step 2: If you don’t want to use a glass cleaner, use white vinegar instead. Vinegar can be used to clean dirt and grime from a table. Fill a small spray bottle halfway with white vinegar for easier application. Spray until the entire surface of the table is fully covered. Step 3: To thoroughly wipe the glass, use lengthy, circular strokes. Rub the cleaning solution into the table’s surface with a microfiber cloth. Wipe clean with a lint-free cloth, as lint can make your table appear dusty and cause streaks. 3. Taking Preventative Action Place coasters beneath liquids to prevent the appearance of drink residue. Place your drinks on coasters to prevent rings from developing on the surface. Keep at least a dozen on hand in case you have guests. Cork and sandstone are excellent choices since they do not attach to the glass. Use newspaper to remove minor imperfections. If something spills on your glass table, wipe it down with a little newspaper in small, circular strokes. You can also use newspaper instead of a microfiber cloth when applying cleaning agents. Clean your table daily to keep it looking new and shining. Wipe down your glass table regularly to avoid removing a lot of filth and debris all at once. Depending on how frequently you use the table, set aside a few minutes each week or month to wipe the glass. If you live with others, consider alternating cleaning responsibilities. Conclusion: In this article, I’ve shown you how to clean your glass table. I hope that you were able to learn something new about this process and the products needed for it. If you have any question, please feel free to contact us at any time. We would love to help you out!