10 Clever Cleaning Hacks for Busy Professionals

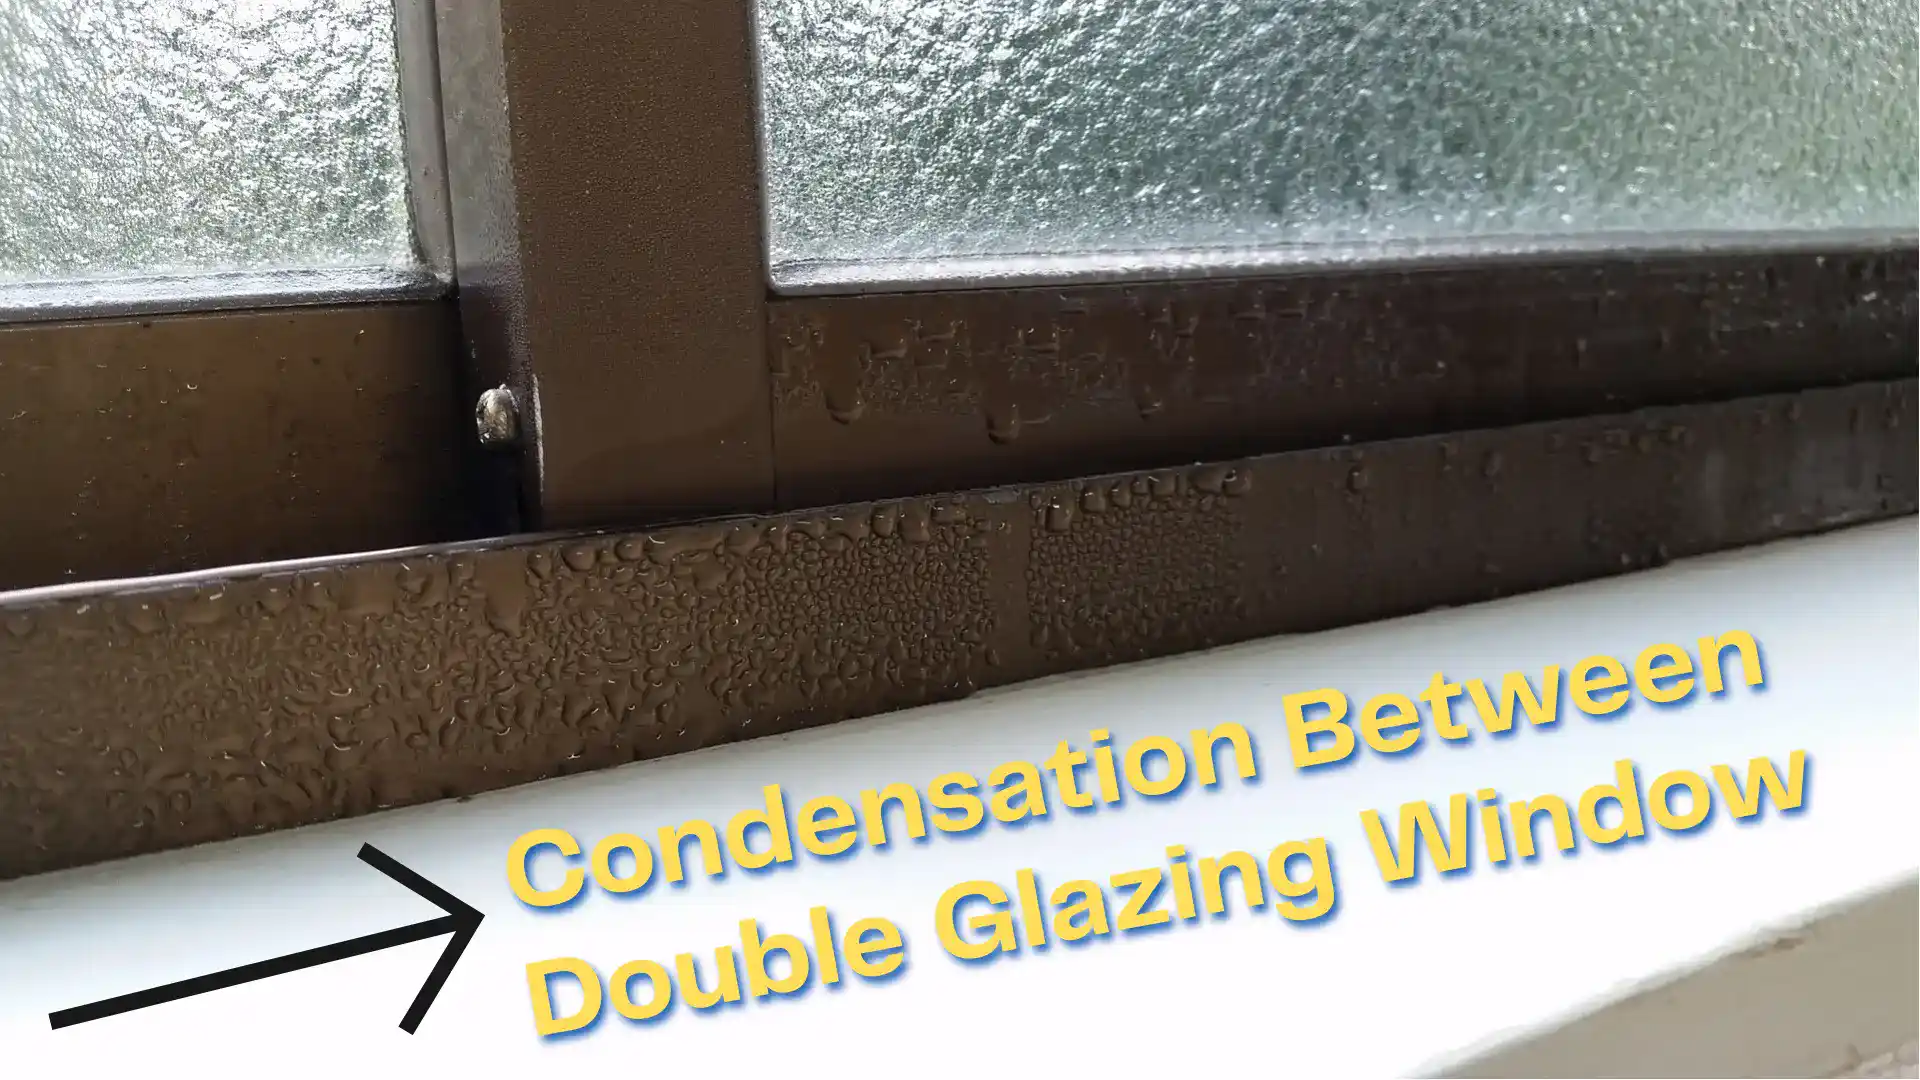
Written by Jake Michael is a writer for Daily Poppins 10 Clever Cleaning Hacks for Busy Professionals Keeping a home clean and organised can sometimes prove a difficult challenge for both experienced professionals and new recruits as they may not have time to devote hours to cleaning every week. This is especially true as data from the Office of National Statistics showed that over a quarter of UK adults now opted to work hybrid from home and the office, meaning a significant increase in workers returning to the workplace this year. You May Also Like What do Window Cleaners Use in Best Temperature to Wash Outside Windows Where can I buy pure water Load More 10 Clever Cleaning Hacks for Busy Professionals As travelling to the office and working on site can seriously impact how often you can thoroughly maintain your home, with 61% of Brits being motivated to tidy up only when they have free time, there are several cleaning hacks to consider that will make the process more effective and efficient. From using a dishwasher tablet to clean oven racks to applying vinegar to your shower to remove grime, we explore 10 innovative cleaning solutions for busy workers that use common household items that will keep your home in great condition without sacrificing your valuable time and energy. 1 – Clean Your Oven Racks With Dishwasher Tablets Cleaning oven racks can be a difficult and arduous task but using a dishwasher tablet can make the process much easier. Dishwasher tablets include strong cleaning ingredients that can dissolve difficult stains and grime, making them an excellent choice for cleaning oven racks. Begin by filling the sink with water hot enough to dissolve the dishwasher tablet (30 degrees or more). Place 1 or 2 dishwasher tablets into the water and submerge as much of the oven rack as you can into the sink. You can either leave the racks to soak overnight or while you are working from the office or at home, which is enough time for the solution to break down stubborn grease and food particles. Once ready, drain the sink of the solution, rinse the oven racks thoroughly with hot water and use a brush to further remove any remaining residue. Either dry the oven racks with a clean towel or via a drying rack before placing them back in the oven again. This hack means that you can benefit from a sparkling clean oven rack without spending too much of your free time removing stubborn stains manually. 2 – Use a Paste to Wipe Dirty Oven Interiors Continuing on with oven cleaning tips, having to clean the oven can be a difficult and long process, but creating a paste made up of baking soda and water, this chore can be much easier. Pour the baking soda and water into a bowl and mix thoroughly to form a thick consistency. Before applying the paste, remove as much loose debris from the oven interior as possible and then use a scraper to apply the paste to the walls. Make sure to focus on areas where dirt and grease are most prominent. Be careful not to apply the paste on any heating or electrical elements as this can cause a fire hazard. Let the paste sit for two hours while the sodium bicarbonate works to lift the grime. After two hours, use a damp cloth to wipe the paste away, scrubbing thoroughly in certain stubborn areas. Use another dry cloth to wipe down any remaining residue from the walls. 3 – Use a Lint Roller on Various Surfaces While working, it is easy to not notice how quickly surfaces and furniture in the home can accumulate dust and dirt, especially if you have a pet at home. Fortunately, using a lint roller on furniture, floors, curtains and even lampshades can make cleaning your home a quick and easy task. The lint roller’s adhesive surface effectively collects hair and dirt without damaging the surface or fabric of the object. Additionally, using a slightly damp cloth to moisten the surface you are cleaning can make the lint roller more effective at removing stubborn dirt and hair. Overall, using a lint roller regularly on furniture and surfaces in your home as a quick task helps you to easily keep on top of dirt and dust growth, keeping your home fresh and clean and avoiding developing respiratory problems like asthma. 4 – Apply a Vinegar Solution to Your Windows Layers of debris and grime build up on your windows cause significant issues that many may not realise. Over time, the buildup of dirt can harm the opacity of the window glass and can even lead to allergic reactions in the worst cases. Cleaning your windows and mirrors with a vinegar and water solution is an effective, efficient and environmentally friendly method of removing streaks and grime from your windows. The acidic qualities of vinegar help break down grease and filth, while water dilutes it for a simple application. The solution is safe to use on glass, chrome and stainless steel, however, you avoid using the mixture on natural stone and marble surfaces as it can cause etching. This method using basic ingredients that can easily be found in your home along with a microfiber cloth will quickly let you clean your windows and mirrors without the need for harsh chemicals. 5 – Use White Vinegar to Rid Your Showerhead of Dirt As a working professional, keeping your home clean and tidy can often fall to the bottom of your to-do list. You may not notice the mineral deposits and dust accumulating on the showerhead over time, leading to a clogged shower head that creates an overall displeasing appearance, lowers water pressure and can even lead to increased energy bills. Cleaning your shower head is an easy and affordable chore that hosts multiple hygienic and money-saving benefits and simply requires white vinegar. Detach the showerhead, place it in a tub of white vinegar, … Read more

How to Clean Curtains Without Washing Them

How to Clean Curtains Without Washing Them Curtains are an important element in the design of any home, but they can be difficult to maintain and clean properly. Even if cleaning your curtains is an option, you should keep in mind that it is not always feasible or possible. The good news is that there are a few different methods you can use to clean your curtains other than washing them. In this article, we’ll discuss some of the best ways to clean curtains without washing them. You May Also Like How to Choose the Right Commercial What do Professional Window Cleaners Use Why is My Toilet Bubbling When Load More Here’s How to Clean Curtains Without Washing Them The following are the steps you can take to clean curtions without washing the curtions: 1. Vacuuming: Cleaning curtains by vacuuming them is one of the most straightforward methods that does not include washing the curtains. To remove the dust and grime that have accumulated on your curtains in a careful manner, use a vacuum cleaner that has a brush attachment. For the best possible outcome, you should make sure to hoover both sides of the drapes. 2. Steam Cleaning: Cleaning Curtains with a Steam Cleaner Another method for cleaning curtains that does not involve washing them is to use a steam cleaner. Your drapes can be cleaned and sanitized at the same time by using steam cleaning, which will also help remove dirt and stains. Be sure to use a low heat setting, and try not to keep the steam cleaner stationary in one area for an excessive amount of time. 3. Dry Cleaning: If your window coverings are made of fragile or expensive materials, it is likely in your best interest to have them dry cleaned. Send your drapes to a professional dry cleaner that specializes in cleaning drapes and valances for the best results. Before taking your curtains to be dry cleaned, you should first ensure that you have read and understood the cleaning instructions that are printed on them. 4. Spot Cleaning: Cleaning Individual Stains or Marks Spot cleaning may be an option worth considering for removing individual minor stains or marks from your curtains. Make a solution with a little bit of water and gentle detergent, and then use a clean cloth to dab at the stain in a gentle manner. Before applying the solution to the entire curtain, you should do a preliminary test on an inconspicuous part of the fabric to guarantee that it will not deteriorate the material. 5. Fabric Freshener: If your drapes just need a simple refresh, you can use a fabric freshener to do the trick. Spray the fabric freshener all over your drapes, and then hang them up to dry in the fresh air. Be careful to select an air freshener for your curtains that is safe for the material that they are made of and will not damage the fabric. Conclusion In conclusion, cleaning curtains so that they don’t need to be washed is an excellent way to keep them looking their best without the inconvenience of having to wash them. You have a number of choices at your disposal to help you maintain the cleanliness and freshness of your curtains, including the use of a vacuum, a steam cleaner, a spot cleaner, or a fabric refresher. Therefore, the next time you need to clean your curtains, give these options some thought and go with the one that suits your needs and preferences the most. Frequently Asked Questions Can I use a vacuum cleaner to clean my curtains without washing them? Yes, cleaning curtains by vacuuming them rather than washing them is an effective way to clean them. To remove the dust and grime that have accumulated on your curtains in a careful manner, use a hoover cleaner that has a brush attachment. Is dry cleaning a good option for cleaning curtains without washing them? Yes, having your curtains dry cleaned is a viable option, especially if they are made of delicate or expensive fabrics. Send them to a dry cleaner that specializes in curtains to have them cleaned. Can I spot-clean my curtains without washing them? Yes. If you only have a few little stains or marks on your curtains, then spot cleaning is a great solution. Using a clean cloth and a small amount of mild detergent in water, blot the stain gently. Before using the solution on the entire curtain, test it on a tiny, hidden area to be sure it doesn’t ruin the fabric.

How to Clean the Fridge with Baking Soda and Vinegar

How to Clean the Fridge with Baking Soda and Vinegar

Maintaining a healthy home environment includes keeping the refrigerator clean. Leaks and spills can compromise food safety and lead to unpleasant odors over time. Cleaning your refrigerator is a breeze and requires only a few common household materials, like baking soda and vinegar. In this article, we will explain how to clean your refrigerator with baking soda and vinegar. You May Also Like Spring Cleaning Tips and Tricks: The 3 Top Ranked Best Spin Scrubbers How To Clean Stairs Carpet By Load More Materials:    vinegar Warm water Microfiber  Baking soda White cloth or sponge Spray bottle (optional) Instructions:   Take all of the food products out of the refrigerator and place them in a cooler or another location that is kept at a chilly temperature. In a bowl or spray bottle, combine equal parts warm water and white vinegar to make a cleaning solution. Clean the inside of the refrigerator by wiping down the surfaces with a microfiber cloth or sponge that has been dipped in the cleaning solution. Pay extra attention to any areas that have stains or spills on them. Baking soda can be sprinkled directly onto surfaces that have harder stains, and then the area can be scrubbed with a damp cloth or sponge. Baking soda will assist in the removal of the stain and will eliminate any odors that may be present. After rinsing the sponge or towel with warm water, continue cleaning the refrigerator in the same manner until all of its surfaces are spotless. Before replacing the food items in the refrigerator, you can give it an extra boost of freshness by sprinkling a little bit of baking soda on the bottom of the appliance. Conclusion: In conclusion, using baking soda and vinegar to clean and deodorize your refrigerator is a breeze. You can maintain the cleanliness and safety of your refrigerator with just a little bit of effort and some common household items. Maintaining a healthy home environment is as simple as remembering to clean your refrigerator on a regular basis without using any toxic chemicals. FAQs Q: Is it safe to use baking soda and vinegar in the fridge? A: Yes. Both baking soda and vinegar are common kitchen cleaners since they are nontoxic and biodegradable. The combination of baking soda’s mild abrasiveness and vinegar’s natural disinfecting properties makes for an effective stain- and odor-removing cleaning solution Q: How often should I clean my fridge? It is suggested that you clean your refrigerator at least once every three months. On the other hand, if you detect any spills or stains, it is best to wipe them up as soon as possible in order to prevent the formation of bacteria and bad odors Q: Can I use other cleaning products in the fridge? Harsh chemicals and abrasive cleaning products should be avoided in the refrigerator because they can leave residue that could contaminate food. If you must clean your refrigerator, always use natural items like baking soda and vinegar, or look for products made specifically for cleaning refrigerators.

How to Get Dried Dog Pee Out of Carpet Diy

How to Get Dried Dog Pee Out of Carpet Diy

Accidents can occur even with the best-trained pets, as every pet owner knows all too well. When your dog has an accident and urinates on the carpet, it can be one of the most frustrating things to happen. It can leave an unpleasant smell if it isn’t cleaned correctly, and the stain is bad enough. These are five do-it-yourself strategies for removing dried dog urine from the carpet. 1. Act fast The first and most critical stage is to take action as soon as possible. The pee will become much more difficult to remove from the carpet the longer it is allowed to lie there. As soon as you realize that there has been an accident, quickly grab some paper towels or a clean cloth and try to soak up as much of the urine as you can. Rub the stain as little as possible because doing so will just spread the pee further into the carpet fibers. You May Also Like How to Prevent and Stop Condensation Kitchenaid Refrigerator Ice Maker Not Working How to Clean the Fridge with Load More 2. Use a vinegar solution A solution made of vinegar is known to be one of the most efficient do-it-yourself methods for cleaning dried dog urine from carpet. Fill a spray bottle with white vinegar and water in equal parts, shake well, and apply liberally to the stain. After letting the solution sit for 10 to 15 minutes, blot the area with a clean cloth to get rid of any extra water. 3. Try baking soda Baking soda is another powerful tool you can use to clean your own carpets. After you have blotted up as much of the pee as you can, liberally sprinkle baking soda over the stain that was left behind. When it has sat for a few hours, the baking soda can be removed with a vacuum. This will assist in eliminating the odor and removing any stains that are still there. 4. Use an enzymatic cleaner Enzymatic cleaners were made so that they could break down the proteins in urine and other organic waste. Choose a cleaner that is designed especially for removing pet stains, and be sure to read and follow all of the directions on the product’s label. It may take these cleaners a little longer to operate than other methods, but they are very effective and will leave your carpet feeling clean and fresh after use. 5. Call in the professionals If you have tried each of these do-it-yourself techniques but the stain continues to persist, it is possible that it is time to bring in the experts. A professional carpet cleaning business will have the equipment and the experience necessary to remove even the most stubborn stains from your carpet, leaving it to appear and smell just like it did when it was first installed. Conclusion In conclusion, accidents happen, and when your dog pees on your carpet, it can be annoying. But, with the help of these five do-it-yourself procedures, you will be able to remove dried dog urine from your carpet and bring it back to its previous splendor. It is important to remember to act fast, use a vinegar solution or baking soda, attempt an enzymatic cleaner, and, if required, bring in the pros. FAQs What is the first step to getting dried dog pee out of carpet? Use as many paper towels as necessary to soak up as much urine as you can. It is best to avoid scratching the area because doing so may spread the pee even further into the carpet. What household items can be used to clean dried dog pee from carpet? Spray the affected area with a mixture of white vinegar and water that has been mixed together in a spray bottle. Repeat the process of blotting the affected area with a clean cloth until the stain is gone. How do you prevent dogs from urinating on the carpet? Use positive reinforcement to encourage your dog to go outside while you are training him to do so. If you keep the living environment of your dog clean and free of odors caused by urine, it will be less likely for them to soil the carpet.

These Glosclean’s laundry detergent sheets are amazing!

Finding the appropriate detergent can make a world of difference when it comes to doing one’s personal laundry. It is not always easy to decide which product to buy when there are so many possibilities now accessible on the market. Nevertheless, if you are looking for a laundry detergent that is not only efficient but also handy, your search is over because Glosclean now offers laundry detergent sheets that are eco-friendly. Glosclean Laundry Detergent Sheets 83  4/5 Glosclean Laundry Detergent Shhets eco-friendly, Safe and esay to use, cost effective BUY IT ON Glosclean Amazon What Are Glosclean Laundry Detergent Sheets? Sheets of Glosclean, an eco-friendly detergent, are effective and safe to use. The convenience and efficiency of detergent strips make them ideal for use in regular household laundry. Sheets of laundry detergent can be used in both high-efficiency washing machines and by hand to eliminate even the most stubborn stains. Eco-friendly detergent tabs swiftly and thoroughly dissolve in water. You May Also Like Spring Cleaning Tips and Tricks: The Green Cleaning- What is it and TOP 5 Best Cleaning Tips For Load More Why are they amazing? Detergent-free liquids lack a lot of amazing qualities. These are gentle on fabrics while efficiently removing stains. The hypoallergenic, all-natural components in Glossclean’s laundry detergent sheets are kind to delicate skin. This concentrated detergent leaves laundry smelling fresh and looking clean. The laundry detergent leaves no soapy residue behind because of its low-foaming formula. This product has a clean, pleasant aroma. Fabrics including cotton, linen, and synthetics, as well as undergarments, can all be safely washed with detergent washing sheets. Eco-Friendly and Sustainable If you are seeking a laundry detergent that is kind to the environment, Glosclean laundry detergent sheets are an excellent option to consider. These sheets are made with materials that come from plants. They don’t have any harsh chemicals, phosphates, or added scents. Moreover, they do not contain any artificial fragrances. In addition, the fact that the sheets are biodegradable makes them an environmentally responsible choice when it comes to laundry maintenance. Convenient and Easy to Use Glosclean laundry detergent sheets offer an outstanding combination of portability and simplicity in their application. These sheets are pre-measured, which makes it simple to determine the right amount of detergent to use. Also, the fact that they are tiny and lightweight makes them an excellent choice for traveling. You only need to place one sheet into the washing machine, and then everything will be fine. There will be no more need for measuring, there will be no more accidents, and there will be no more dirty liquid detergents. Cost-Effective Glosclean laundry detergent sheets are an option that will save you money when compared to more conventional liquid detergents. Because the ideal quantity of detergent is contained on each sheet, you won’t have to worry about wasting any of the product and will end up saving money. Because of how effective they are, you can also use them in cold water, which is another way to cut down on the money you spend on energy. How to Use Glosclean Laundry Detergent Sheets The application of Glosclean laundry detergent sheets is as simple as it gets. To clean your linens, simply drop one or two into the washing machine with the rest of your laundry. You might wish to use two sheets of detergent if you have a large load or if the objects you are washing are particularly dirty. In most cases, a single sheet will be adequate to cover the burden. Conclusion In conclusion, Glosclean laundry detergent sheets are an incredible product that are bringing about a revolution in the way that laundry care is performed. They are not only very effective, but they are also easy to use, good for the environment, and cheap. Glosclean laundry detergent sheets are the product to use if you are seeking a technique to clean your clothes that is not only simple but also environmentally friendly. If you do, you won’t ever want to use regular liquid detergents again after you’ve experienced how well they work.

How to Choose the Right Commercial Window Cleaning Company for Your Business?

How to Choose the Right Commercial Window Cleaning Company for Your Business

First impressions last, dirty windows can make the look of your company bad and leave a negative impact on your clients. So, it is essential to clean your windows to keep them clean inside and outside. A clean, well-maintained, and attractive exterior can create positive impressions on your employees and clients. Windows that are not cleaned regularly can cause permanent damage as the accumulated pollutants permanently cover the glass. Cleaning office windows can be risky, especially when they are in ard-to-reach areas. It is required to have your windows cleaned by window cleaning professionals. Nowadays, there are lots of window cleaning companies available on the web that claims that they are the best. So, it is a must to do your research before choosing any company for your window cleaning needs. Whether you are looking for industrial, office, corporate, or buildings window cleaning, ensure that the company you choose provides you with custom and reliable commercial window cleaning packages. So that you can get the most value from your existing services will save you big bucks in the long run. Thus, it seems difficult to choose a commercial window cleaning for your business. Here are a few things that you need to consider before opting for any cleaning company. Stay tuned for this article. You May Also Like How to Clean Wood Furniture with How To Use Scotch Brite Lint How to Remove Adhesive From Wall Load More 1. License and Insuranced Opt for a company that protects their cleaning experts with appropriate insurance coverage and license. Ask them for the additional certification because it is always a good sign of professionalism. Window cleaning includes risky tasks such as high-rise window cleaning, if any worker is injured while working on your property then it can be difficult for you if they don’t have the proper insurance to cover it. Besides this, make sure the company is ready to take charge if the window cleaner causes an accident that damages your property such as glass and hardware breakage. 2. References and Testimonials from Other Clients Don’t hesitate to ask questions directly to a window cleaning company. Ask the company for their past work and previous clients. Reach out to their previous clients to know what services they offered, pricing, and if possible before & after results pictures. It will give you a clear idea about the company which you are going to choose. Moreover, do proper research online about the company to ensure you are hiring a professional, reputed & trustworthy company. Look for their reviews on different-2 websites such as Google, Facebook, Linkedin, and other social platforms. 3. High Quality Cleaning Equipment & Products Commercial window cleaning can be tricky, especially if your office is located on higher floors. It requires high rise tools and equipment to get the job done safely and professionally. So, before choosing window cleaning experts, ensure they are equipped with high quality cleaning equipment, tools and advanced technologies. Also, ask your cleaning company if they provide window cleaning services after business hours to avoid interruption. Moreover, they should use high quality products that not only provide you streak-free and spotless window cleaning but make your windows shine for longer. Also, they use products which are eco-friendly, biodegradable and not harmful. 4. High Safety Standards A reputed and professional commercial window cleaning firm always upholds appropriate safety standards to protect employees. Due to the extreme height of buildings, it is a must to check workers’ medical conditions. If the workers have balance issues, high or low blood pressure, and diabetes health issues then it could affect their performance and safety. Also, workers should be aware of all essential equipment such as safety hazards, site assessment, ladders, electrical hazards, tripping and falling hazards, and many more. 5. Pre-Screened Employees Does the company perform background checks on its employees? Feel free to ask this question directly to your window cleaning company. Whether their workers are without a criminal history. What is their interview process? These things are crucial for hiring trustworthy window cleaners as you will give access to your office where you possibly keep sensitive files. 6. Employee Training Last but not least, dangerous jobs like High rise window cleaning requires extensive knowledge and training. So, don’t hesitate to ask questions about staff training. Ask them if their staff is capable to work on high-rise and multi-stories buildings to avoid an accident during work. The employees should know what equipment to use, understand the safety features of the equipment, and how to use them effectively. Therefore, window cleaning experts must be highly skilled and experienced for working at heights. Conclusion In Conclusion, hiring a reliable and trustworthy window company might be a challenging task, so take your time and do your research before finalizing. Check for their online reviews, client references, past work, and how long they have been in the company. Besides this, look for what they include in their services, and pricing and read the written contract carefully to avoid any confusion in the end. Also, ensure the company offers custom packages and window cleaning services as per your office window cleaning needs because every building and office is different.

How to Remove Adhesive From Wall Without Damaging Paint

How to Remove Adhesive From Wall Without Damaging Paint

In today’s article you will learn how to remove adhesive from wall without damaging paint. We all want our creative ideas to be valued before anyone else does. That’s why we go to extreme measures like buying a wall sticker or decal or covering a wall with a signboard or picture frame. But it results in damaging the wall. are you looking for solid mathod for how to remove strong adhesive from wall? you are at best post. You have a problem with one wall covered with 3M adhesive tape. The adhesive has been there for years, and you have tried to remove it, but it will not disappear, don’t worry following our step-by-step guide you will be able to permanently get rid of unwanted sticky adhesive on your wall. Removing 3M adhesive from walls without damaging paint can be daunting. There are different types of adhesives, and their removal requires other techniques. Learn how to remove double sided foam tape from wall. Are you ready to how to remove strong adhesive from wall covered with tape and glue by using special techniques? This article contains advice on how to get rid of that tenacious glue. So keep reading it to get benefit from it. Tips To Remove Adhesive From Wall Without Damaging Paint Here are beneficial tips to get rid of these adhesives from the wall. These will help you to save your precious time. 1. Use Heat To begin, you might try melting the glue using heat. You may use this to safely peel the adhesive off the wall. To make the glue more permanent, heat the area using a hair dryer or an iron. This will help soften the glue and make removing it easier by rubbing it with a wet rag or sponge. 2. Spray Solvent If you do not remove the adhesive from your wall, spray it with solvent to dissolve the adhesive molecules that hold it together. The solvent will help break down the bond between the two surfaces to remove them quickly.  You can also use lacquer thinner or denatured alcohol, but acetone works best because it’s less likely to damage paint if you accidentally get some on it. Use a clean, dry towel or cloth to remove any lingering solvent after spraying. 3. Apply Pressure With a high-pressure water system or sandblasting, you may remove stubborn construction adhesives from rocks, bricks, concrete, and other hard materials. Remember that while water pressure and sandblasting are adequate, they may leave some markings on the surface of the rock, bricks, or other hard materials you’re working with. 4. Use Vinyl Scraper A vinyl scraper is a tool that has been used for many years. It can be used to scrape off the glue from the wall, even if it has been stuck on for a long time.  This tool’s biggest feature is that it won’t damage your walls or leave any sticky residue behind after use. It is also straightforward to use and requires no special skills or experience to operate correctly. 5. Use Epoxy Paste Epoxy paste is another method that can be used to remove 3m adhesive from your walls that will not damage them. This type of paste comprises two parts: an adhesive that sticks onto your wall and another that contains a dissolving agent that speeds up the process of removing the glue after application. Conclusion Therefore, it is concluded that it is difficult to remove the adhesives from the wall. It takes a lot of time to scratch them, which will be frustrating. But we have made it easy for you to remove them by providing unique tips. Apply these tips individually, and finally, you will know what technique to use; removing 3M adhesive from a wall should be pretty straightforward. Then you can paint on the wall without worrying about its uneven surfaces. Keep reading it, as it will help you a lot. Frequently Asked Questions How can we get rid of sticker wall residue? When it comes to removing sticker residue off walls, you have a few choices. Use the hair dryer on the coolest setting for the greatest results. A putty knife or razor blade can also remove the residue. It’s also possible to use WD-40 or Goo Gone. How can we remove the glue without damaging the paint? Certain solvents might get rid of the adhesive but leave the paint intact. In terms of accessibility and cost, acetone is frequently used. Solvents like butyl acetate and xylene can also safely remove glue from painted surfaces without ruining the paint.

How To Clean Inside Car Windows Without Streaks? Easy Guide

How To Clean Inside Car Windows Without Streaks

Car windows are one of the essential parts of keeping your car clean inside. See how to clean inside car windows without streaks.  Nonetheless, they may be a major hassle to clean! Sometimes, you want to clean them but need the right equipment, or even if everything is correct, you need someone’s help to get it done. Several products out there claim to help you quickly clean the inside of your car windows, but they could be better. After cleaning, they often streak, splatter, or leave streaks on the glass. Therefore, you should be cautious while choosing them. Many people wonder how to clean inside car windows without streaks, but the answer is less evident than expected, especially if you’re a novice in cleaning and washing stuff. To keep your problem in mind, we will provide you with some helpful information on how to clean inside car windows without streaks. How to Clean Inside Car Windows Without Streaks These ways are going to help you a lot to clean car windows. ALSO READ Top 10 Best Microfiber Car Cloths Of 2022 | Must… Top 3 Best Interior Car Cleaners In 2022 (Review &… How To Remove Rust From A Car Without Sanding –… 1. Identify An Appropriate Location To Wash The first step that requires cleaning your car windows is finding the appropriate workplace. It has to be tucked away somewhere that won’t become too hot or be exposed to strong winds.  Also, there shouldn’t be any unnecessary furniture or clutter. Take the microfiber towel or cloth you prepared with the car window cleaner. First, you’ll want to deal with the external windows on one side, then the other, and finally, the interiors in that sequence. 2. Clean The Dust Clean the area of any loose dirt, sand, or dust with your cloth before applying the solution. You must take this precaution to avoid damaging the surface in the future by causing abrasion or scratching. 3. Apply The Solution With a Spray Bottle After spraying the solution on the windows, they may be wiped off with a dry cloth. To avoid streaks, avoid spraying too much at once. Check to see if your applications are uniform in size and shape. It is also advised that spraying be done in phases. The solution will dry and leave unattractive blotches if you stream all the windows at once and work too slowly. Use the minimum power necessary to remove the tough stains without harming your car’s glass. Instead of scrubbing circularly, employ up-and-down or back-and-forth strokes. Continue wiping until all dirt and dust have been removed from the area. Putting in the time and energy required will be well compensated for in the end.Continue wiping until all dirt and dust have been removed from the area. Putting in the time and energy required will be well compensated for in the end. 4. Take Extra Care With Tough Stains Tighter pressure is required for more tenacious stains, such as those left by bird droppings and splattered bugs. Another option is to spritz the solution on top and let it sit for a few minutes. It needs time to work on the stain before it can be wiped away easily. Wash the windscreen and the car’s front end while you’re at it. Your rear hand’s strength can be put to good use. Rubber seals require your attention. If you want to get into the crevices here, use a toothbrush. Take special care with the windshield wipers. 5. Use a Clean Cloth To Polish The Surface Change to a clean one now. Apply the solutions to it and use it to buff the surface. Remember that sparkling perfection is the final aim. 6. Continue Washing The Inside Windows If you’re finishing up the exterior, don’t worry; you can just reverse your work and tackle the inside. Doing business from the comfort of your car is thus a viable alternative. If you need to clean the windshield, do it from the safety of the passenger seat. While cleaning your car windows, spray the cleaning solution on the cloth or towel before washing the glass. Doing so guarantees residue-free upholstery and carpets in your car, no matter how fast they leak. This is the secret to streak-free window cleaning on the inside of your car. To finish, allow the windows to dry naturally. Applying a sealer or water-repellent is another option. Doing so will ensure that water will roll off your windows in the future. Conclusion: If you are worried that your car windows might not be as clean as they could be, look at the ways we’ve shared above and try them the next time you’re tackling this task. They might help keep your windows dirty-free in between washes! These methods will help you properly clean the windows on your car. The most straightforward tools are often the best; you only sometimes need expensive products to do the job. That’s it! If you follow our simple instructions, you can clean your car windows to a streak-free shine saving you the trouble of later cleaning them again. Freequently Asked Questions, FAQs How long does it take to clean the glass on a car’s interior? The time it takes for the water to evaporate is proportional to the amount of filth on the windows and the amount of time you have to wait. The best way to tell if your windows are clean is by looking at them. If they look streaky, give them another wipe with a dry cloth. Try a different cleaning method if you still see streaks after repeated wiping. How often should I wipe down the rear window of my car? Cleaning your car windows is a daily task, but it can quickly get dirty. If you’re cleaning your windows after every drive, you may want to consider doing a more thorough job once a week or so. This will keep dirt and debris from building up on your windows and create streaks that … Read more

How to Prevent and Stop Condensation Between Double Glazing (Total Guide)

Condensation Between Double Glazing

What is Condensation Between Double Glazing, want to know?. If yes! then you will know everything about Double Glazing and a step-by-step guide to prevent and stop condensation between Double Glazing. Double glazing has become more popular with homeowners all over the world because it cuts down on noise pollution and makes homes more comfortable. Condensation between the panes of glass, however, is a common issue with double glazing. In this article, we’ll look into the root causes of condensation between panes of glass and the measures that can be taken to eliminate the problem. What causes Double Glazing condensation? Condensation between double glazing occurs due to temperature differences between the inside and outside of a home. When there is a temperature gradient between the inside and outside of a window or door, condensation can form on the inside pane. Moisture between the panes of glass is not only annoying, but it could also hurt the window if it is not taken care of. Condensation between panes of glass can also be brought on by poor window quality. Moisture can seep in through the cracks between the panes of glass if the window was poorly made or installed. Also, if the window isn’t opened enough, moisture can build up inside the house and cause condensation to form on the glass. Repair Condensation Between Double Glazing? Video By: Crystal Clear Window Works  How To Prevent Condensation Between Double Glazing? If you install and take care of your double-glazed windows the right way, condensation won’t form between the panes of glass. What you can do about condensation: Here are some ways to keep condensation from occurring: 1. Ensure the windows are properly installed. The windows must be placed properly, with a tight seal around the perimeter. If you do this, you may be able to reduce the amount of condensation that forms in the air gap between your windows. ALSO READ How to Clean Zojirushi Water Boiler with Vinegar (Ultimate Guide) Cleaning Tips: How To Clean Wooden doors Step-By-Step Guide And… What Is The Best Homemade Window Cleaning Solution – Tips… 2. Improve ventilation Most of the time, condensation on windows is caused by too much moisture inside the house. This can be fixed by letting in more air. Extractor fans or ordinary window openings are two easy ways to accomplish this. 3. Use a dehumidifier With the help of a dehumidifier, condensation on windows can be stopped by getting rid of the extra moisture in the air. 4 .Replace damaged windows If the window’s seal is broken or it is not operating properly, you should get a new window to keep the air from escaping from between the panes. 5. Use low-emissivity (low-e) glass Condensation between double glazing can be avoided by using low-e glass, which helps to lessen the temperature differential between the indoors and outdoors. Conclusion: As a homeowner, condensation between your windows can be both annoying and expensive. This problem can be avoided, however, by maintaining the windows and checking that they were installed correctly. It’s crucial to respond quickly if you see condensation collecting between the panes of glass in order to keep the window in good condition as well as to keep the home’s temperature and humidity consistent and comfortable. Freequently Asked Questions, FAQs Can condensation between double glazing be fixed? Yes, it can be fixed. If the window’s seal is broken or damaged, it may be necessary to replace the window. If the window is properly sealed and the moisture buildup is inside, you can stop condensation by letting in more air or using a dehumidifier. Is condensation between double glazed windows dangerous? Condensation between panes of glass may be annoying and ugly, but it poses no health risk to home occupants. But if you don’t do something about the moisture, it will eventually wear away at the glass itself. Can condensation between double glazing affect the energy efficiency of a home? Yes, condensation between panes of glass can reduce a home’s thermal efficiency. If there is moisture between the panes of a window, it may lose some of its insulating value. This could lead to higher energy costs.

How To Clean Water Tank Without Removing Water

How To Clean Water Tank Without Removing Water

How To Clean Water Tank Without Removing Water. Water tanks are a necessity in most households. However, if you do not clean them after every 6-7 months, then they can be dirty and unsanitary. If your water tank has been cleaned for a while, it can cause problems for your family and home. You should regularly inspect and clean your home’s water tank. Although cleaning the tank itself is very easy, removing and replacing the water can be pretty troublesome, you can also see here how to clean water tank filter. In this post we will share step-by-step guide on how to clean water tank without removing water from it. This guide is perfect if you’re wondering how to clean a water tank without removing water. You’ll find detailed instructions for quickly and easily disinfecting your water storage tank. How To Clean Water Tank Without Removing Water Siphoning The term “siphoning” refers to the simple act of transferring contents from one container to another. It’s a great technique to clean out the sediment at the bottom of your tank without turning off the water supply. Using this method, those living in homes with smaller water storage tanks might save money. However, if you’d prefer to make do with what you already have, we have developed a detailed guide on constructing a siphon for your work. Find a length of bendable plastic tubing. Ensure that it is long enough to reach the base of your tank. Then, you may finish it off using a standard kitchen funnel. Soak the tube in water until the horn is halfway complete. Verify that any air leaks have been plugged in. Hold the tube vertically with a watertight gasket over the open end to prevent water from leaking. To move the tube around within the tank, you need to connect it to a long pole. When complete, you may lower the tube’s funnel end into the tank while holding a bucket at the other end. All of the sediments in your tank will be collected here. Then, remove the plug and let the vacuum pressure clean the tank. An electrically powered siphoning system, like the ones used for cleaning swimming pools, may be appropriate for individuals who utilize larger water storage tanks. It does the same thing, but at a more expensive rate. ALSO READ How To Clean 5 Gallon Water Jug in 6 Easy… How to Clean Zojirushi Water Boiler with Vinegar (Ultimate Guide) Which Kitchen Countertops Are The Best? (Answered) Other Methods Cleansing agents are often injected into the washing water through a dosing pump, typically air-driven, and a fitting attached to the deck’s washing pipe. There is no longer a need for a dosing pump when the cleaning agent is introduced to the suction side of the washing water pump. Reduced precision in dosage and more effort are two consequences. To increase the cleaning power of washing, rather than just diluting the water with cleaning agents, you may add the cleaning agents straight to the washing water. It is recommended to wash for 1-2 hours. The final rinse is performed in either saltwater or freshwater, depending on the loaded product. Conclusion: Therefore, it is concluded that it is the most critical job to clean the water tank of your house. Your family’s health is worth the four to six hours it will take you to clean the complete water tank. Several companies provide affordable tank cleaning services. But follow our guides that are very easy to apply, and you will get great results. But be careful while using detergents and any chemicals, and also clean them thoroughly so that it should not mix with water. We are certain that you will find our essay to be both entertaining and informative. FAQs How do I clean my water tank with warm water? You can use a simple technique to clean your water tank. Put some dish soap drops into a spray bottle of hot water and use it to clean the water tank. Then, spray the area around your water tank until it begins to foam. After 5 minutes, give it a good rinse to eliminate any lingering soap. Can I use my pressure washer to clean my water tank? Yes, you can use a pressure washer to clean your water tank. However, we recommend using a siphon hose with a high-pressure nozzle on it, as this will ensure that all of the debris is removed from the bottom of the tank. How do I remove rust stains from my water tank? You can use a wire brush on the inside of your water tank to scrape off any rust stains that have built up over time. There may be a need to replace the whole tank if there is a significant amount of rust.