Top 3 Pest Control Companies In Malaysia Price, Contact Details

Pest Control Companies In Malaysia

Are you annoyed of pests in your home and looking for the best pest control sservices in Malaysia? then you are at right place. In this post you’ll know top 3 pest control companies that work in Malaysia. Why do you need a pest control service and why should you hire professionals? Proper pest control is crucial for good building upkeep; occasionally a pest spray can’t address a pest problem on its own, and if you’re in a serious scenario, you should hire pest control professionals. Hire a Contarctor For Home Renovations and Remodeling Here Are the Top 3 Pest Control Companies in Malaysia Showing you thr list of well-known top 3 best compaines that offers best pest control services in Malayisa, these are professional in clearing ants, flies, mosquitos, bed bugs, flea/ticks, rodents and many. Best Pest Control Service Providers 1. Ridpest – Best Overall Ridpest aspires to be the best pest control solutions company with worldwide ambitions, providing its customers with a comprehensive range of highly effective pest treatments that use eco-friendly cutting-edge, technologies. Services for Disinfection General Pest Control Ridpest Termite Protection Plan Bed Bug Treatments Rat Control Food Safety Certification Pest Management Program AedesTech Mosquito Home System 2. Skill Termite Exterminator Skill Termite Exterminator is a well-established and most busy pest control company that has very professional workes and uses advance technology equipments for controling and cleaning, It’s a reliable company that offers pest control services all over Malasiya. 3. NPC Pest Control Services NPC Pest Control Services is a skilled and professional pest control personnel with hands-on expertise dealing with significant and well-established clients such as KFC Enterprises, AR College, and Malaysia Airlines among others. Mr. Steven the company owner holds a Pesticide Applicator License, which is relevant (PAL).  

Most Powerful And Best Battery Powered Leaf Blowers Of 2022

https://youtu.be/MAGd7p6Kj1Q There are numerous methods for removing leaves from a garden, but using a battery powered cordless leaf blower is the fastest, quiet, and clearest. Simply insert the batteries and squeeze the trigger. They are peaceful and give excellent workout. When it comes to removing a thick covering of moist or frozen leaves from long grass, we appreciate gas-engine blowers. If you detest the unavoidable fall leaf-raking, you might want to invest heavily in a cordless leaf blower. Here’s the list of some best top picks of leaf blowers that are cordless, battery powered, rechargable and powerfull, quieter, faster. The Best Battery Powered Leaf Blowers Of 2022 SnapFresh 20V Cordless Leaf Blower 159  4.5/5 The SnapFresh 20V cordless leaf blower for lawn care, snow removal, and car cleaning. It has copper motors & turbine technology, adjustable blowing tubes, an air velocity of 130 MPH $79.99 from SnapFresh SnapFreshTools.com Ego Power+ LB6504 Cordless Leaf Blower 3,517  4.5/5 Ego Power Speed 56-Volt Lithium-ion Cordless Leaf Blower with 5.0Ah Battery and Charger, Weather-resistant, 90 minutes of run time 15 minutes on Turbo, 200 minutes on low. $279.99 from Amazon Amazon.com Ryobi RY40440 Cordless Leaf Blower 94  3.7/5 $465 from Amazon Amazon.com DeWalt DCBL772X1 Cordless Leaf Blower 672  4.7/5 $210 from Amazon Amazon.com Greenworks BL80L2510 Cordless Leaf Blower 12,32  4.6/5 $263 from Amazon Amazon.com

Best And Easiest Way To Remove Leaves from Yard

Best And Easiest Way To Remove Leaves from Yard

What is the easiest way to remove leaves from yard? Your yard needs to be cleansed of all the leaves. why? There are a number of reasons why it is so crucial to remove the leaves from your lawn. Laying leaves on your lawn may prevent sunlight from reaching it, which will shorten the life of your lawn. The mulching process leaves behind shredded leaves, which are a fantastic way to let sunlight reach the grass underneath. The more you put off clearing the leaves, the longer it will take and the more work there will be. So make it a weekly aim to get rid of the leaves. Whatever the cause, it is obvious that keeping leaves off your lawn is an important aspect of appropriate lawn care and upkeep. Making sure your yard is leaf-free not only enhances its appearance but also benefits its health. Sunlight is blocked by the leaves. Prevent the leaves from spreading in your Yard. To prevent the leaves from spreading in your garden is our 1st step. Why? clearing leaves in one day is not initial solution, whenever you’ll clean them on next day or any other day they will fall again; and gain they will need to be removed and some people don’t want repeat it. So the better solution for that is reduce leaves from spreading. Hire a Professional to work on trees in your garden Prevent leaves from spreading in your lawn by cutting down unnecessary parts for your trees, trimming the trees from where the leaves are growing and falling faster. Hiring professional for trimming, cutting, killing the trees. We recommend MENCERS TREE SERVICES in USA  they are very professioanl tree trimming and pruning, tree removals, tree cabling and barcing, emergency storm damage, they will use potential idea to cut your trees from where leaves are falling more even your trees won’t look like cuted. Hire Mencer’s Tree Services The best and easiest way to remove leaves from yard Find a leaf removal tool You may already have a leaf removal tool in your garage or yard, If you don’t , you can easily buy one online or at a hardware, home improvement store. Leaf Rake Raking Raking with hand leaves is a simple and straightforward approach to remove leaves because it requires no special equipment and is also inexpensive and simple to perform yourself. All you need is a good leaf rake to collect those leaves, twigs, grass cuttings, and other debris out of your yard. Mulching Mulching is a popular option that is one of the greatest ways to get rid of leaves in your yard. Mulching is as simple as running a lawnmower over fallen leaves to shred them and mix them into the natural lawn. Not only will shred leaf particles blend in with the grass, but there will be no need to rake for hours. It’s a win-win situation. It’s fascinating to see how mulched leaves benefit lawns as the cuttings move through their natural life cycle. Leaf shards will settle into the soil, and microbes will begin the breakdown process. Leaf Blowing A leaf blower, or another gas or electric appliance for picking up leaves, is perhaps the fastest, best and easiest way to remove leaves from yard. Use the leaf blower to get the leaves off your lawn. Leaf blowers are useful when you need to get the job done quickly.

These Best Dishwasher Cleaner Tablets You Should Try To Clean Dish Washer Machine

If you have a extremely dirty dishwahser and want to get rid of dishwasher dirt, then you are at best place, you may need these best dishwasher clener tablets. Many people have trouble getting their dishwashers clean because they frequently accumulate grease, oil, and food stains from soiled plates, among other sources of grime.  Your life ought to be made easier by these tablets for cleaning the dishwasher. Dishwasher cleaner tablets can effectively get rid of calcium, limescale, hard water, odour, and smell. In addition to removing baked-on, dried-on food from tableware, and cookware,  Additionally, it should be compatible with your water hardness and safe and good for your dishwasher even it removes hard water and smell. The Best Dishwasher Cleaner Tablets Dishwashing cleansers tablets are widely accessible from every market, however not all of them are effective in cleaning dishwashers; some of them might even qualify as the “worst dishwasher cleaner.” This post will serve as the best guide for you to choose the best dishwasher cleaning tablets since we have reviewed and compiled our favourite list of the best cleaning tablets for your dishwashers. Finish Dishwasher Cleaner Tablets 19,509  4.6/5 Finish is the best overall in-wash dishwaher cleaner, Finish dishwasher cleaning tablets are recommended since they offer your dishwasher a brand-new appearance. $5.29 at Amazon Using finish cleaner tablets will make difficult-to-remove stains disappear. It specially cleans hard to reach places in your dishwahser and cleans dirt from hidden and essential parts and dirt from the spray arms and filter. of your dishwahser, these cleaner tablets also contain particles that can easily remove grease off surfaces. Affresh Dishwasher Cleaner 61,992  4.6/5 Affresh dishwasher cleanser tablets are useful for cleaning the drain and the dishwasher machine. Cleans the inside of all dishwasher types and makes. Septic system safe and EPA Safer Choice Certified in the United States $8.99 at Amazon Nearly 29,500 consumers on Amazon gave affresh dishwasher cleaner tablets five stars, claiming that “it works miracles on extremely dirty dishwashers”. According to one reviewer. “My glassware that I thought was forever engraved and destroyed came out like new” and after used Affresh tablets. Cutlery is the same way. The contrast is amazing.” Active Dishwasher Cleaner Tablets 3,344  4.5/5 Active Pack of 20 dishwasher cleaner and deodorizer tablets. Dishwasher tablets that are heavy duty and septic safe, as well as a natural remover for limescale, hard water, calcium, odour, and smell. $15.99 at Amazon Active dishwasher cleaner tablets are recomended by popular brands like KitchenAid, OXO etc even it’s own buyers because these are very best and mpost effective tablest for cleaning dishwahers. It can be used on on interior household or commercial automatic dishwasher machines. Fits with Bosch, Frigidair, Samsung, LG, Whirlpool, and Kitchenaid appliances. With a simple citric acid powder, you can clean your dishwashing machine and remove hardwater, scale, lime, grease, grime, stains, and more. Nearly 2,400 reviewers gave AVTIVE dishwasher cleaner tablets 5 stars, one reviewer said. We had minerals that had accumulated over time. Other brands were tried, but there was little improvement. I used two tablets and noticed fantastic results, so I ran it again,  “nothing to hate”.

How to Clean TV Screen Without Streaks – A Quick Guide For TV Screen Cleaning

How to Clean TV Screen Without Streaks - A Quick Guide For TV Screen Cleaning

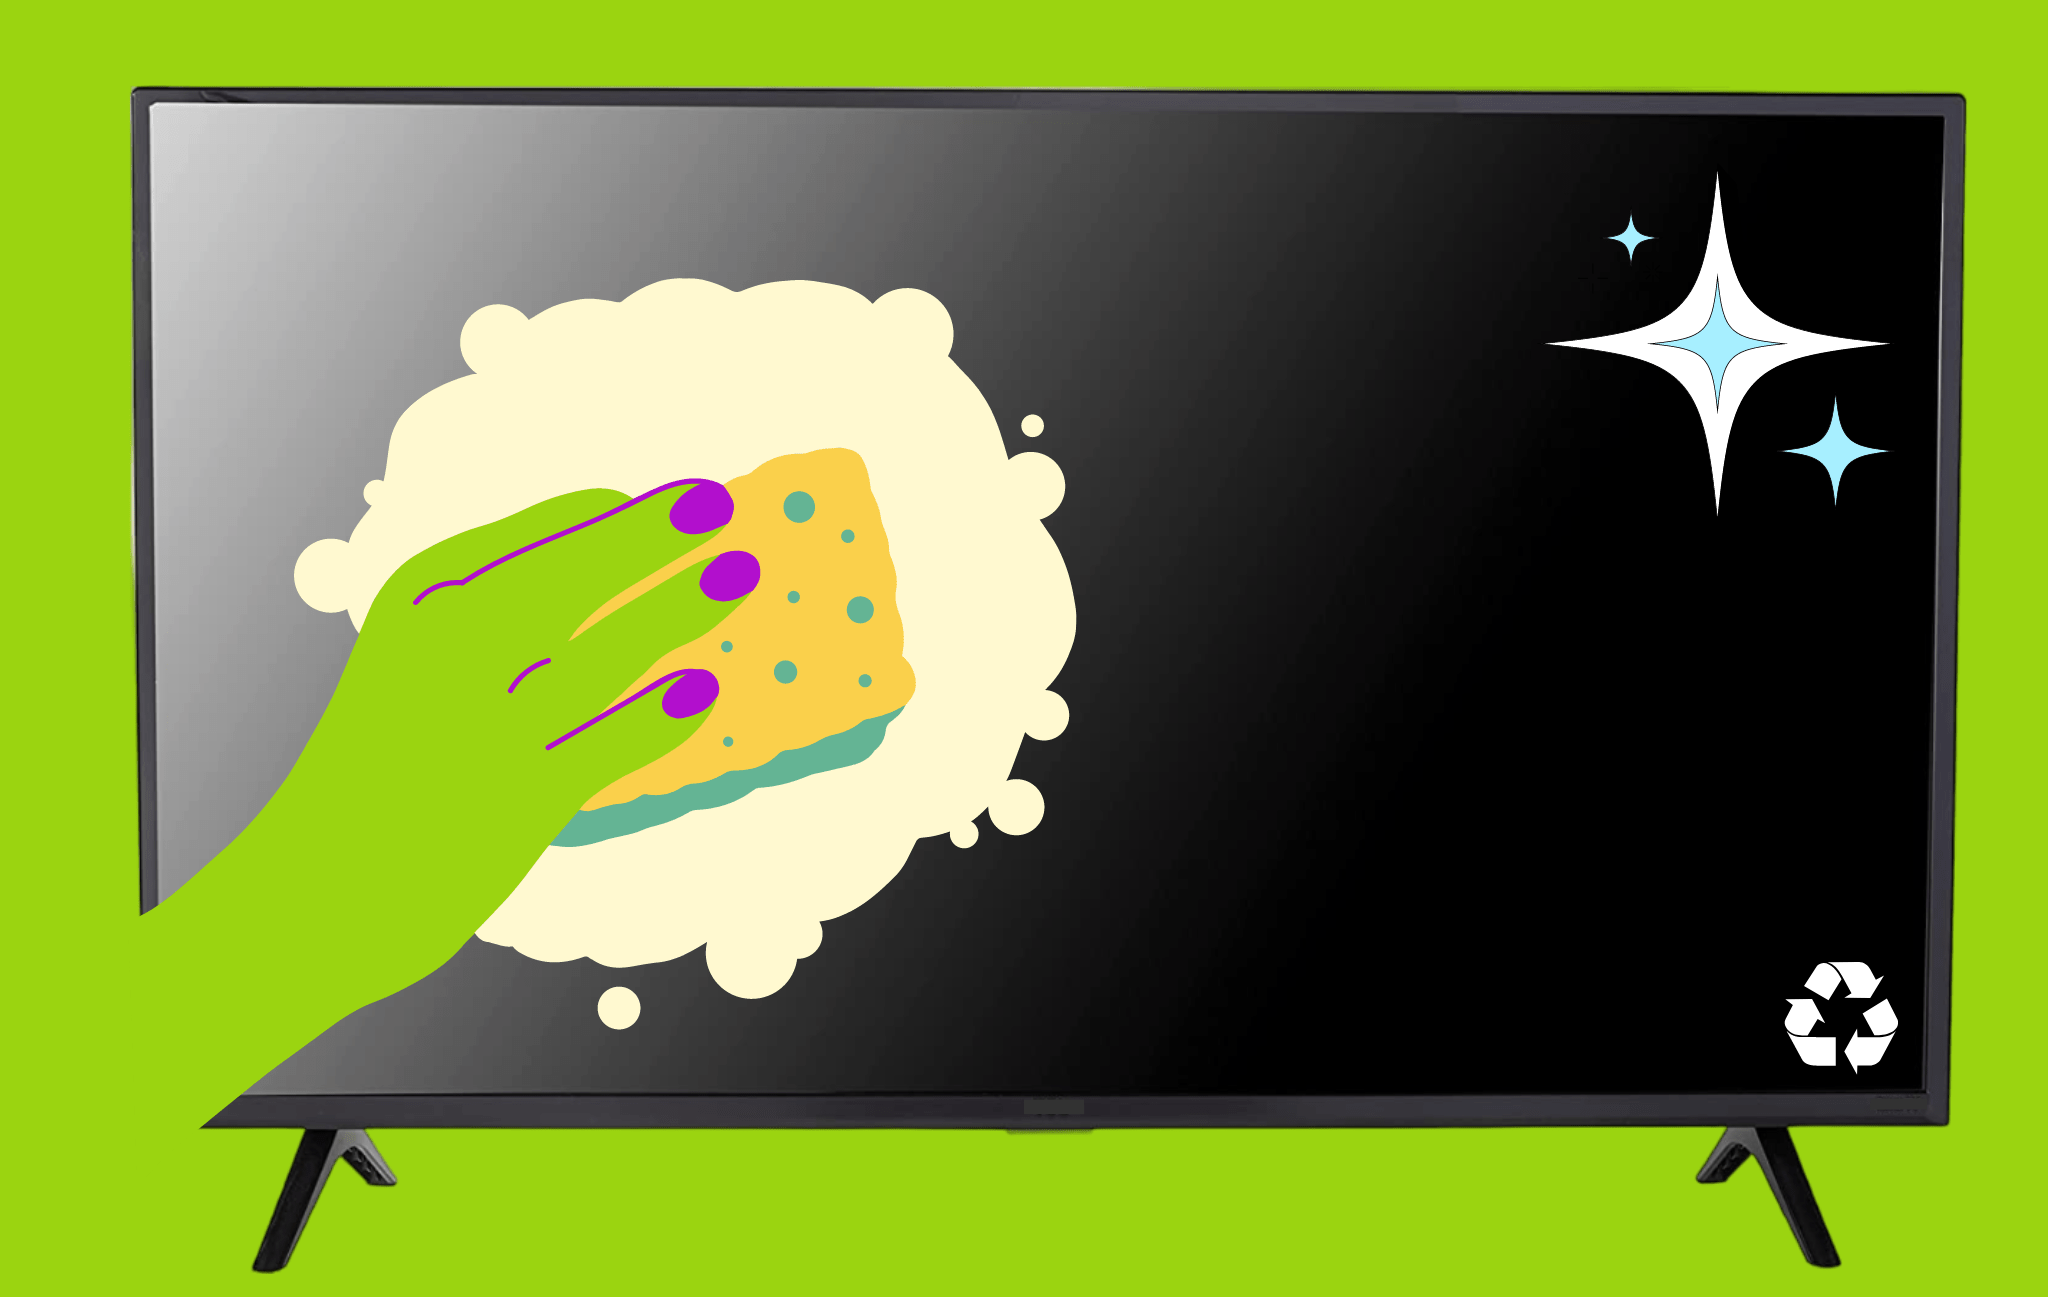
If you are looking for a guide to TV screens, then you have landed at the perfect place, In this post, we’ll teach you how to clean TV screen without streaks. Cleaning a television screen is as simple as wiping the surface with a microfiber cloth that has been wrung out and soaked in fresh water. While it is particularly effective at eradicating any smudges, fingerprints, and filth left behind by our energetic three-year-olds, it is poor at preventing the development of streaks across the entire surface that has been cleaned. The primary offender, in this case, is water, and you can tell it is at fault when you try to clean the screen’s surface with a brand-new cloth after concluding that a dirty rag was the issue but end up with many more streaks than you began with. Simply put, the water plus nothing solution lacks sufficient chemical components to prevent streaks from forming on your TV screen. In actuality, water has one negative effect that it does well: it leaves a thin film, particularly on LCD and LED panels, that works as extra static and attracts dust from all around the room, necessitating frequent cleaning. You can easily get away with this restriction if you take extra precautions to prevent dust buildup around the house, but what about the streaks? You’ll need to take a completely different strategy. ALSO READ:  How To Remove Rust From Stainless Steel How to clean a TV screen without damaging it I’ve included five simple methods below, although none is reliable for eliminating streaks. It is hard to accomplish this, especially with hands as little and unstable as a human’s on a surface as vast as a television. Use the techniques listed below, wash the surface gently and evenly, and perhaps, you’ll be fortunate enough to get an all-panel shine. Use vinegar and distilled water. Consider utilizing a water and white vinegar solution for streak-free cleaning results. Using a clean, soft microfiber cloth, gentleness and evenness when wiping the screen’s surface is more important than just adding vinegar to remove the streaks. By doing that, you’ll achieve the almost streak-free experience you’ve always desired—but your kids adore. Here’s how to apply the water and vinegar mixture: A mixture of white vinegar and distilled water should be thoroughly mixed. Since mineral water has the propensity to produce yellowish residue on the screen, making it appear unclean, we are using distilled water instead. Leave the mixture in the basin or container you combined, or pour the solution into a spray bottle. Get two or three flat, non-rugged microfiber cloths to clean the screen. These have a lower propensity to hold on to grit and other abrasive particles that could damage the screen’s surface. Like a cotton rag, microfiber rags work better than any other rag at capturing and holding onto the dirt and absorbing cleaning solutions more thoroughly. Their split fibers and precisely sized filaments are entirely responsible for this. In addition to all of these benefits, they are lint-free, so there is no fluff on the screen, which is unsightly and has the propensity to build up charge and harm the monitor. Any soft cloth other than microfiber is a manageable substitute (preferably lint-free). Your t-shirt, flannel shirt, mateless socks, and other items might qualify. Follow your senses and intuition. Use one of the dry cleaning cloths to quickly wipe down the TV screen to eliminate any accumulated dirt. This is essential for removing streaks because any dirt left on the screen can ultimately result in them when employing the solution. Spray or (dunk) a second cloth in the vinegar solution, if appropriate, and wring it out well so that it is only slightly saturated and not dripping wet. A damp cloth has the potential to introduce moisture into areas where it shouldn’t, leading to problems including failure, fire, and even electric shock. If the rag has too much moisture, more streaks may appear after the screen fully dries. So you must ensure that you reach a point where no solution leaks, even after firmly wringing the cloth. Use this cloth to spot-clean any grime or smudges off the screen’s surface. Then, lightly rub the screen in a defined pattern, ideally going from top to bottom and back up. By doing this, any streak formation will be reduced. Avoiding excessive pressure on the TV screen is crucial since it might eventually result in dead pixels, deleting the watching experience and increasing the number of streaks. Just move fast, gently, and according to a set pattern. When you’re finished with the screen, use the same cloth to clean the television’s base, frame, and other parts, such as the cord or auxiliary devices. Next, quickly wipe the screen with the third rag in the same manner, to leave it spotless. You now have a practically streak-free screen. Tips Before cleaning, make sure the TV is turned off. If you recently shut off the power, give it 15 minutes to settle or clean it first thing in the morning before turning on the television. Three benefits come from doing this: You can see all the smudges and spots that need to be cleaned. It makes the TV less prone to evaporation, greatly reducing streak formation likelihood. It’s the safest option since we’re dealing with electronics. While cleaning, the thought might suddenly cross your fairly confined mind to immediately spray the TV panel with the solution (like you would a typical window). Put an end to the thoughts right now. That’s a surefire recipe for disaster because the liquid can easily get to areas where the eyes shouldn’t be, like inside electronic components, where it could start malfunctioning. This may result in shock or present a fire risk. Use soap and distilled water. According to a Panasonic manual, feel free to use distilled water and soap when white vinegar is scarce in the home. Before using soap, be careful to read the manual for any cautions. If not, … Read more

The Best Cleaning Checklist for Office

The Best Cleaning Checklist for Office

If you are reading this, you may run your own business, and to increase productivity, you want to keep your office space clean and hygienic. On the other hand, keeping your office clean daily, weekly, or monthly can be an uphill task that takes time and effort. Two options are available to you for your office cleaning needs: either you can hire our skilled and reasonably priced office cleaning service, or you can assemble your team. Here is our best cleaning checklist for the office to use as a guide, no matter what decision you end up making. Advertisement Continue Reading Cleaning Checklist for Office Daily You can perform daily cleaning tasks in a small or medium-sized office to reduce the accumulation of dust and grime there. Reception areas in offices and the lobby Vacuum and mop bare floors and carpets. Cleaning and sanitizing trash cans. Removing smudges from glass surfaces. Cleaning metallic surfaces. Cleaning the tables, chairs, switches, and doorknobs. Dining Area and Washroom Cleaning and sanitizing trash can. Cleaning the toilet bowl and sink. Cleaning the mirror and vanity tops. Cleaning the flooring Advertisement Continue Reading Checklist for Weekly Office Cleaning If you need more time or staff to regularly clean your office, hire someone to do it once a week. Dealing with that dirt every day saves you time. For carpets and upholstery, deep cleaning. Scrubbing hardwood and bare floors. Using glass cleaners to clean glass surfaces. Cleaning the restroom, especially the sink and toilet. Cleaning and emptying trash cans. Advertisement Continue Reading Checklist for Monthly Office Cleaning This would include areas and components of your office that, once a month, need a thorough cleaning. It encourages a healthy workplace for all local employees. Cleaning the cooling coils, vents, and air ducts. Deep cleaning of rugs, carpets, and furniture Unfinished polishing floors. Deep cleaning the office’s confined spaces Checklist for Office Cleaning in Specific Areas We have finished categorizing the office cleaning checklist by frequency. Please provide the checklists for the reception, cubicles, break room, and restroom for each area of your office. Advertisement Continue Reading Checklist for Office Reception Dusting and floor mopping. Cleaning the doorknobs on the front door. Removing garbage cans. Arranging magazine and newspaper shelves Cleaning the upholstery and chairs Advertisement Continue Reading A Checklist for Office Cubicles Cleaning the dust from the shelves, tables, and cabinets. Removing garbage cans. Cleaning the keyboard, mouse, monitor, and computer of any dust. Cleaning the blinds, lamp shades, and window sills. Clean floors. Advertisement Continue Reading The Bathroom Cleaning Checklist Glass and mirror surfaces should be cleaned. Cleaning the cabinets and vanity tops. Cleaning the sink and toilet. Ensuring that there is sanitizer, liquid hand soap, and toilet paper. The hand dryer should be tested. Cleaning the flooring. Advertisement Continue Reading Area for a Break Remove any leftovers from the refrigerator. Clean the microwave and refrigerator on the inside and outside. A spotless coffee maker and water tap. Removing trash from dumpsters. Cleaning the countertops and sink. Cleaning the flooring. ALSO READ:  How To Clean Hair Brushes: A Step-By-Step Guide Benefits of a Clean Office A clean and hygienic work environment will guarantee your employees’ health and welfare. Your staff members are typically more effective, responsive, and creative when they are healthy and alert. Maintaining the cleanliness of the various spaces in your office benefits your staff and the company. Just set aside some time to complete the office cleaning checklists. You can hire us for our reasonably priced office cleaning service or designate specific personnel to handle this. Liked it? Share It! If you found this post much helpful then please don’t forget to share it with your friends and family to help them too, If you have any suggestions you are welcome, to help us to improve and provide quality content share your valuable opinion with us using visiting contact us page. Facebook Twitter Pinterest WhatsApp Reddit

Top Reasons For Cleaning The Bedroom – Why You Should Clean Your Bedroom?

The Best Cleaning Checklist for Office

You might remember your parents telling you to clean your bedroom when you were young. Today we will explain top reasons for cleaning the bedrooms. Parents start teaching their children the importance of responsibility and cleanliness at a very young age. One of the first tasks you should complete each day is this obligation. Why? The best part is that when the brush is wet, acrylic paint is easy to wash. Dry acrylic paint can make your day hectic. It sometimes results in the trash or damaged brushes completely. Is there a benefit to maintaining a spotless bedroom? Amazingly, the answer is: YES! The Top Reasons for Cleaning the Bedroom What are the reasons for cleaning your room? Here are a few reasons for cleaning the bedroom that will inspire you to do the same for the rest of your home.   Smaller tasks will motivate you to complete larger tasks. Making the task smaller is a major barrier to motivation for many people. Consider cleaning the floor in your bedroom. What if, instead of cleaning the floor, you concentrated on picking up the items on the floor first? You’d be surprised at how much smaller the remaining tasks would become if you spent less time imagining how big the task is and more time breaking it down into pieces. You know in your heart that your house needs to be cleaned this is why cleaning the bedroom is important. Start small and make your bed instead of thinking about how difficult and time-consuming the entire task may be. Making your bed will be a straightforward task that will make you feel accomplished and motivated. The more significant task at hand, your bedroom’s cleaning, will now seem a little more manageable. Make your bed every day, and you’ll soon feel inspired to tidy up your space. A clean bedroom will boost self-esteem, which will lead to increased motivation. Why should I clean my room everyday speech? ( To keep the room well-organized, for simplicity, for good breathing, and more ) Although maintaining a clean bedroom may seem simple, it isn’t. Maintaining a tidy bedroom demonstrates drive, planning, and control over your life. Hearing, “Wow, you have such a clean room.,” is one of the highest praises anyone can give you. I wish mine looked like this.” You feel more confident and proud of yourself when you receive compliments on your accomplishments. You’ll experience more self-confidence because you’re organized and in charge of your home’s most private space. It boosts your confidence in completing tasks by inspiring you to take on the day. You could walk with a slightly straighter back and a slightly raised head. You’ll be inspired to clean up yet another room in your home. A spotless room will improve your self-esteem and serve as a great starting point for cleaning the rest of your home. A good cleaning routine in your home will be encouraged by first cleaning your bedroom. Setting a standard for how you live begins with developing good cleaning habits. We’ve all been on a downward trajectory—your hour of procrastination results in a wasted day. You miss a day of exercise, and suddenly, you haven’t worked out all week. One unwashed dish in the sink quickly multiplies into a full load. Keeping your bedroom clean will help you develop the discipline needed to keep the rest of your house clean. You will start to notice everything is out of place as soon as the room is clean. Your bed will look unkempt, and a sock on the floor will look ridiculous. Your ability to start the day without a spotless room will soon be impossible. You will now start positive chain reactions as opposed to negative ones. You’ll want to create the same effect in your kitchen once you realize how much better you feel in a clean environment. In your kitchen, one soiled pan will stand out oddly. This upward spiral will produce a productive, self-driven, neat freak who will deal with any dirty area before the average Joe does. Benefits of Cleaning your Room It’s easy to become very lax when cleaning your room. All people should develop the habit of keeping their surroundings organized. The main point is that cleaning your personal space positively impacts your life. Many people should be aware that unorganized spaces lead to stress and fatigue. Being organized can be tedious because it naturally takes up a lot of our time, and time is frequently what we value most in our daily lives. Who wouldn’t feel overburdened by the long overdue to-do list that includes clearing your desk, washing and folding your clothes, and making meeting plans? As soon as you complete one task, another must be organized and cleaned. It is not difficult to understand that cleaning a room is typically the last thing on our minds. Sometimes we become exhausted before cleaning our rooms due to the considerable work and time required. Have you been in a clean environment and experienced an unexplainable sense of satisfaction? Many people lead busy lives with various daily responsibilities, including work, school, hobbies, and more, and frequently overlook the health benefits of maintaining a tidy home. You shouldn’t keep the space tidy for the benefit of anyone other than yourself. ALSO READ:  How To Clean Hair Brushes: A Step-By-Step Guide That is a space you should care about cleaning and keeping organized unless you share a bedroom. In any case, the most crucial thing is to establish a series of cleaning habits for the various rooms in the house to live in greater peace and harmony and to make it easier to get along with everyone you have to spend your days with. Maintaining order and cleanliness helps to have a clear mind, but so is the process. Numerous academic studies highlight how effective this set of exercises is at enhancing mental health. Important things to do to keep your room organized The Cleaning Professional team offers the following advice to … Read more

How to Clean Wood Cabinets And Make them Shine

How to Clean Wood Cabinets And Make them Shine

Are you searching for how to clean wood cabinets and make them shine? If yes! then you are right place. Wooden closets are a lovely and perfect addition to your home decor. Nevertheless, they can become unclean and grimy over time. You’ve probably experienced the oily and messy stains that can result from simply working or cleaning a routine. It’s time to restore the shine of your wooden cabinets to their original glory. What is the Best Way to Clean Wood Kitchen Cabinets? How to clean wood cabinets and what is the best way to clean wooden cabinets? The most used method to clean wood cabinets is vinegar, cleaning cabinets with vinegar is one of the most effective and easiest methods. In this post, we’ll teach you how to clean wood cabinets and make them shine. How to Clean Wood Cabinets And Make Them Shine How to clean sticky wood cabinets. Let’s Get Started Dust the Entire Corner of the Cupboards Likewise, you should dust the interior of your wood cupboards regularly to remove any indoor dust and dirt that may develop over time. because accessories are frequently collected here. You’ll like to keep it as clean as possible. Wipe the edges of lower cabinets for any spills or mess that has dropped during different work. This can invite ants, mosquitoes, and other insects into your house. After Dinner Cleaning Habit In the case of kitchen cabinets, develop an after-dinner habit to keep your wooden cupboards clean. Clean up your cabinets and buttons with a wet towel in between washing the dishes and scrubbing the floor for table scraps. This will effectively remove any dirt and grease before it becomes hard to remove, and tends to result in long-lasting, shining look cupboards. This simple habit has a significant impact on cleaning. ALSO READ:  How To Clean Wooden doors Step-By-Step Guide How to Clean Wood Cabinets With Vinegar As I previously stated, you can use costly cleaning agents to restore the appearance and feel of your wooden cupboards. A vinegar cleaner is a simple and non-toxic method for restoring the luster to your closets.  Mix one tablespoon of vinegar and hot water in a properly marked plastic bottle. Stir to combine. Sprinkle the solution on your cabinets and let it rest for at least two minutes before cleaning them. Clean with a paper towel. Try a very little dish cleanser and scrub if you face any notably greasy areas. Clean with the aggressive corner of the washcloth instead, as this may end up leaving scratch marks. Allow drying entirely. Use of Oily Soap If such homemade attempts fail, some marketing washers may work. When dealing with tricky lubricants, an oil-based soap is your best option. Using other oils to remove oily stains and oil spills from an edge is often the most effective method. Try this if you’ve tried all other possibilities. Wipe down Cupboard Accessories Thoroughly Wash them down with a cleaning solution as part of your regular cleaning routine to prevent the dispersal of microbes. When thoroughly cleaning, clean your knobs and buttons with a brush and warm, dishwashing liquid. This will remove any debris that has developed over the course. Conclusion Don’t give up if your cupboards appear to need renovation. Begin with a thorough clean-up, and then modify your daily washing routine to assist you in keeping them looking new. In no time, your closets will be spotless.  Enjoy the new look of your wooden cupboards! Liked it? Share It! If you found this post much helpful then please don’t forget to share it with your friends and family to help them too, If you have any suggestions you are welcome, to help us to improve and provide quality content share your valuable opinion with us using visiting contact us page.

How To Remove Rust From Cast Iron With Salt and Vinegar ( Ultimate Guide )

How To Remove Rust From Cast Iron With Salt and Vinegar ( Ultimate Guide )

Are you facing rust on your favorite pan? Need to know how to remove rust from cast iron with salt and vinegar? No need to worry, here in this post we’ll discuss some important information regarding rusting iron and share an ultimate guide to clean cast iron with vinegar and baking soda, and salt. As we know that there are a lot of methods used to remove rust from iron but the use of salt and vinegar always has a prior position in all. One of the finest iron cleaning methods to remove undesired rust from your pans is the use of vinegar diluted with water. Advertisement Continue Reading So, if your cast iron pan is trapped with rust, squeeze out the vinegar and you’ll have it going to shine like new in no time. Let’s come to the point How to Get Rid of Rust On Cast Iron with Vinegar There are several methods for using vinegar to prevent rust from metal. Dip the Utensils in Vinegar for an Hour: Remove rust from cast iron with vinegar is the easiest solution. Soak the object in vinegar for sometime. Allow it to soak for 10-60 minutes, based on the severity of the rust. Some people consider putting salt to the vinegar solution,up to a glass per litre of white vinegar, or half a cup per gallon jug. How long to soak cast iron in vinegar? Soak the cast iron for around nine hours in the vinegar, and keep it checking until the vinegar dissolves the rust from your pan then you can get it off the vinegar. Advertisement Continue Reading Rinse with Wire Gauge Now after dipping for an hour take the item out of vinegar solution and clean it with aluminium foil or wire gauge. In case of large object like bicycle , motor bike or other heavy machinery you can use a rolled ball of aluminium foil. Firstly dip foil in diluted vinegar solution and then use it to wipe rust from metal. On the other hand, you can also soak old clothes or napkins in vinegar but then just put them on the material to absorb before rinsing. Always wear rubber gloves because your hands will turn black and it some time damage skin while rinsing off the rough surface. It also prevent not to notice odour like vinegar for the entire day. ALSO READ:  Best Kitchen Counter Tops Of 2022 Remove Rust From Cast Iron Using Baking Soda: After removing as much rust as possible it is essential to neutralize the acidic effect. Firstly wash the item. Then soak the material in hot water to neutralize the acidic effect of the vinegar. You can also use baking soda for entire satisfaction. Dissolve a cup of baking powder in warm water and let it for approximately 10 to 15 minutes. Now remove the object from the baking soda and clean it with warm water. The key point to notice is that baking soda is also a good rust removal substance. You can use it directly on scrub to get rid of rust from item. How To Remove Rust From Cast Iron Using Salt Removing rust from cast iron with salt is very easy. Just follow these simple steps and make your pan again new. Put some sea salt or coarse-grained salt into the object. Scrub the cast with a piece of leather or potato half. To remove the rust and buff any surfaces, rinse, heat, and repeat as necessary. Coated the Material: After removal of rust you should wrapped or seal the material. Yo can use paint, water proof substance, wax or use any oil.It will most likely be determined by the type of material you are attempting to seal as well as its usage objective. Advertisement Continue Reading Final Verdict: I hope that you found this article interesting in preventing corrosion with vinegar. Vinegar is an amazing natural washing powder that is also inexpensive, so I hope it works well for your rust removal needs. The vinegar-washing process is a tried-and-true way to remove rust from a cast iron pan. If you implement those guidelines, there’s a good possibility your crockery will return to life. Enjoy the clean utensils! Liked it? Share It! If you found this post much helpful then please don’t forget to share it with your friends and family to help them too, If you have any suggestions you are welcome, to help us to improve and provide quality content share your valuable opinion with us using visiting contact us page. Facebook Twitter Pinterest WhatsApp Reddit

How To Clean Rust From Stainless Steel

How To Clean Rust From Stainless Steel

Looking for how to clean rust from stainless steel appliances?. Rust is the big enemy of your crockery. When stainless steel rusts, it can destroy the metal’s visual appearance and, if left unchecked, it can deteriorate the material’s performance and durability. There are various techniques you can use right at home to clean and maintain your stainless steel, some of which require less time and effort than others.  If you’re searching for “how to remove rust from stainless steel utensils, OR “clean rust off stainless steel sinks” and more appliances made of stainless steel. you are at the right place, In this post, We will provide and step by step guide for how to clean rust from stainless steel kitchen appliances like; a sink, fridge, watch, grill, knife, etc. Top Methods to Clean Rust from Steel: Here are some top methods we can apply to remove rust from stainless steel, and one of them is the most used method which is to remove rust from stainless steel with backing soda. Cream of Tartar Lime Juice Baking Soda Oxalic Acid Detergent and Potatoes ALSO READ:  Best Kitchen Counter Tops Of 2022 Procedure Using Cream of Tartar Cleaning rust from stainless steel with Cream Tartar is a good idea. To begin, mix a few droplets of lime juice with one teaspoon of cream tartar. This will result in a dough, which you can then apply to any rusting places on your steel material. Then you’ll need a gentle foam to squeeze the dough over any noticeable rust stains on the surface of the metal. After you’ve handled all of the oxidizing places, simply wash away the dough with some other wet sponge and dry the steel with a dish woven fabric. Remove Rust From Stainless Steel Using Lime Juice This tried-and-true technique for removing rust appearance from surfaces of stainless steel involves combining equal parts baking powder and lime juice to form a dough. This dough is then used to fully cover the rust stains on the surface of the metal before being washed away with a damp cloth. If this does not simply eliminate the oxidative damage, use the paste again and allow it to sit for half an hour before expelling. If you don’t have any lime juice, lemon will work just as well. The procedure of Baking Soda Coating We want an easy and simple method to do cleaning tasks, backing soda comes always first in every cleaning procedure, and that’s why you hit most searches like this; how to clean rust from stainless steel using backing soda.   This is a very simple washing process that only requires two cups of water and baking powder. Make a dough denser enough just to disperse over each corrosion placed on your steel material, and then squish the dough over the exterior with a clean cloth in the path of the steel grain. Then, simply use a moist paper towel to wash the exterior and sweep away any remaining develop. Use of Acid Oxalic Acid Oxalate is an efficient rust blot cleanser, but because it is a bigger and more powerful chemical, it should only be used as a last resort. Implement oxalic acid in the rusted area. Read the bundle instructions to make sure you’re using this securely. To use a gentle, soapy sponge, massage the oxalic acid in the way of the steel grain. Thoroughly rinse and clean with a soft microfiber or piece of cloth. Detergent and Potatoes To remove rust from stainless steel plates and cutlery, use a potato and detergent. Split a potato in quarters and rub soap into the flesh. Allow the potato to rest for an hour or two after inserting the utensil. Take the utensil out and wash it as normal. Conclusion: Do not even give this up if you are not able to eliminate the corrosion from your surfaces of stainless steel using any of the processes outlined above. You can use possible solutions, such as sodium bicarbonate and water powder, or any acidic product. For the toughest stains, use any commercial chemical, which will bring far more cleaning power to endure on your corroded surfaces. Liked it? Share It! If you found this post much helpful then please don’t forget to share it with your friends and family to help them too, If you have any suggestions you are welcome, to help us to improve and provide quality content share your valuable opinion with us using visiting contact us page.