Air Conditioner Preventive Maintenance Checklist

What would happen if the air conditioning system at your company stopped working? The temperature and humidity in your place of business could rise quickly, putting your products at risk. A broken air conditioner is a surefire way to put a damper on business if you own a storefront or other establishment where clients must come inside the premises to do business. You May Also Like What do Window Cleaners Use in Is a Leather Sofa Good for Best Temperature to Wash Outside Windows Load More Preventative maintenance is the best defense against a broken air conditioner. Using this Preventive Maintenance Checklist for Air Conditioners, you can keep an eye on one of the most important systems in your business and catch and fix minor issues before they escalate. All four seasons require a distinct approach from your air conditioning unit. If you reside in a colder region, you spend a large chunk of each year with your heating system running. A chilly air conditioner is practically essential in warmer climates for the better part of the year. Preventive HVAC system maintenance is best organized by season, no matter where you live. The following is a list of some essential actions that should be performed as part of an air conditioner’s preventative maintenance: Perform a thorough inspection, cleaning, or replacement of the air filters. Check to see if the evaporator and condenser coils need to be cleaned, and do so if they do. It is important to check the amount of refrigerant and add more if it is low. Perform a visual inspection and thorough cleaning of the condensate drain line. Make sure the thermostat is adjusted correctly, and if it isn’t, replace the batteries. Check the condition of the fan blades and the motor, and apply lubricant if it’s required. Perform a thorough inspection of the electrical connections, and if necessary, either tighten or replace them. Check the outdoor unit for any kind of debris, and clean it up if it needs it. Check to see if there are any leaks in the ducting, and seal them if there are. Check that the system is functioning correctly. If you give your air conditioner the preventative maintenance it needs on a regular basis, you can help it last longer, which will save you money in the long run, and it can also improve how efficiently it uses energy. At the very least once every year, it is strongly suggested that you have your air conditioner inspected and maintained by a qualified HVAC specialist who can conduct these tasks to the highest of standards.

Where are the Coils on a Frigidaire Refrigerator?

If you’re wondering where the coils on your Frigidaire refrigerator are, you’re not alone. The coils are a vital component of the cooling system in the refrigerator, and they play an important function in preserving the quality and safety of the food that you store within. This article is going to take you through the process of locating the coils on a Frigidaire refrigerator as well as discuss the significance of ensuring that they are always clean.  You May Also Like What is the Cost of Retractable What is Attic Mold – When Where are the Coils on a Load More   The coils of a Frigidaire refrigerator are normally located at the back of the appliance, concealed behind a panel made of metal or plastic. Depending on the type, some refrigerators also have them situated underneath the appliance. The removal of heat from the refrigerant by these coils is what makes it possible for the interior of the refrigerator to remain at a cool temperature. Your Frigidaire refrigerator’s coils may eventually acquire a layer of dust, dirt, and other particles over the course of time. This buildup has the potential to reduce the efficiency of the coils, which in turn can lead to a range of issues, including the following:  1.    Reduce cooling process: A decrease in cooling performance occurs when the coils are unclean because this causes them to be less efficient at removing heat from the refrigerant, which in turn can cause the temperatures within the refrigerator to rise 2.    Increased usage of energy: The operation of a filthy coil consumes more energy than that of a clean coil, which can lead to an increase in the cost of your monthly energy bill. 3.   Reduced longevity: When the coils in your refrigerator are overworked because of buildup, it can cause them to wear out faster, which in turn reduces the total lifespan of your refrigerator.   It is essential to do routine coil cleaning on your Frigidaire refrigerator if you want it to continue operating efficiently. To accomplish this, unplug the refrigerator first, and then remove the panel that is covering the coils on the inside of the appliance. Remove any dust or dirt from the coils using a hoover cleaner that has a brush attachment, and do it in a careful manner. Be sure to clean the whole surface of the coils, as well as any adjacent locations that could possibly have dirt accumulated in them.

How to Clean the Fridge with Baking Soda and Vinegar

How to Clean the Fridge with Baking Soda and Vinegar

Maintaining a healthy home environment includes keeping the refrigerator clean. Leaks and spills can compromise food safety and lead to unpleasant odors over time. Cleaning your refrigerator is a breeze and requires only a few common household materials, like baking soda and vinegar. In this article, we will explain how to clean your refrigerator with baking soda and vinegar. You May Also Like Spring Cleaning Tips and Tricks: The 3 Top Ranked Best Spin Scrubbers How To Clean Stairs Carpet By Load More Materials:    vinegar Warm water Microfiber  Baking soda White cloth or sponge Spray bottle (optional) Instructions:   Take all of the food products out of the refrigerator and place them in a cooler or another location that is kept at a chilly temperature. In a bowl or spray bottle, combine equal parts warm water and white vinegar to make a cleaning solution. Clean the inside of the refrigerator by wiping down the surfaces with a microfiber cloth or sponge that has been dipped in the cleaning solution. Pay extra attention to any areas that have stains or spills on them. Baking soda can be sprinkled directly onto surfaces that have harder stains, and then the area can be scrubbed with a damp cloth or sponge. Baking soda will assist in the removal of the stain and will eliminate any odors that may be present. After rinsing the sponge or towel with warm water, continue cleaning the refrigerator in the same manner until all of its surfaces are spotless. Before replacing the food items in the refrigerator, you can give it an extra boost of freshness by sprinkling a little bit of baking soda on the bottom of the appliance. Conclusion: In conclusion, using baking soda and vinegar to clean and deodorize your refrigerator is a breeze. You can maintain the cleanliness and safety of your refrigerator with just a little bit of effort and some common household items. Maintaining a healthy home environment is as simple as remembering to clean your refrigerator on a regular basis without using any toxic chemicals. FAQs Q: Is it safe to use baking soda and vinegar in the fridge? A: Yes. Both baking soda and vinegar are common kitchen cleaners since they are nontoxic and biodegradable. The combination of baking soda’s mild abrasiveness and vinegar’s natural disinfecting properties makes for an effective stain- and odor-removing cleaning solution Q: How often should I clean my fridge? It is suggested that you clean your refrigerator at least once every three months. On the other hand, if you detect any spills or stains, it is best to wipe them up as soon as possible in order to prevent the formation of bacteria and bad odors Q: Can I use other cleaning products in the fridge? Harsh chemicals and abrasive cleaning products should be avoided in the refrigerator because they can leave residue that could contaminate food. If you must clean your refrigerator, always use natural items like baking soda and vinegar, or look for products made specifically for cleaning refrigerators.

Why is My Toilet Bubbling When the Shower is Running?

Why is My Toilet Bubbling When the Shower is Running

If you’ve ever witnessed bubbles coming from your toilet when you ran the shower, you’ve probably wondered what might be creating such an odd phenomenon. This problem could have a number of causes, and in this article, we will look at five of the most typical explanations for why your toilet bubbles when the shower is running You May Also Like Where are the Coils on a Air Conditioner Preventive Maintenance Checklist Can I use Compressed Air to Load More Why is My Toilet Bubbling When the Shower is Running? 1. Clogged Drain Vent A blocked drain vent may be the source of bubbling sounds coming from the toilet. It’s important to keep drain vents clear of trash and other obstacles so air can move freely through your plumbing system and prevent water from backing up. Because of the obstruction, your toilet bowl may fill with air, causing annoying bubbling and gurgling sounds. 2. Partially blocked drain line A drain line that is just partially obstructed is yet another potential reason why your toilet is bubbling. If your shower and toilet share a drain line, a clog in either fixture’s drain line might cause water to back up into your toilet bowl, which can lead to the formation of air bubbles. There are numerous potential causes of this clog, including hair, soap scum, and other types of debris. 3. Water Pressure Issues Problems with the water pressure in the home are sometimes the root cause of a bubbling toilet. If the water pressure in your home is too high, it can cause air to become trapped in your plumbing system, which will cause your toilet bowl to gurgle and bubble. This can be remedied by lowering your water pressure. Another factor that might contribute to this problem is low water pressure, which makes it easier for air to get into your pipes. 4. Improperly installed plumbing Poor plumbing installation could be to blame if you have a bubbling toilet every time you turn on the shower. Incorrectly connecting the shower and toilet drain lines, for instance, might lead to the accumulation of air in the bowl of the latter. Similarly, a buildup of air in your plumbing system might cause your toilet to bubble if it is not ventilated properly. 5. Main Sewer Line Issues Finally, problems with the main sewer system can lead to toilets bubbling when the shower is turned on. Water can back up in your pipes and cause air bubbles in your toilet if your sewage line is obstructed or broken. The diagnosis and repair of this problem are probably best left to licensed plumbers. Conclusion: In conclusion, if you notice bubbling coming from your toilet while you run the shower, there are a few different potential explanations to consider. A clogged drain vent, a partially blocked drain line, poor water pressure, improperly installed plumbing, or issues with the main sewer line could all result in problems. You will be able to take action to identify and fix the problem if you are aware of these probable reasons. As a result, you may be able to avoid more significant plumbing problems in the future. FAQs: Is the toilet bubbling when the shower is running a serious problem? If your toilet is bubbling, it could be an indication of a more serious problem with your plumbing. If you want to be sure the problem doesn’t get worse, get a plumber to come take a look at it and fix it. Can I fix the toilet bubbling myself? You may be able to fix a toilet that is bubbling on your own by removing any obstructions or debris from the pipes. A professional plumber should be called if the issue persists or is related to the main sewer line. Why is my toilet bubbling when I run the shower? A clogged drain vent, a partially blocked drain line, high water pressure, poorly installed plumbing, or a problem with the main sewer line are all possibilities.

What is the Cost of Retractable Awning Installed?

What is the Cost of Retractable Awning Installed?

Looking for What is the Cost of Retractable Awnings Installed? This article is specifically posted for those who are interested in knowing all about retractable awnings, including how they work, their benefits, their advantages and disadvantages, estimated costs to install the retractable awnings. Retractable awnings are an excellent investment for homeowners who want to enhance the functionality and aesthetics of their outdoor living spaces. These awnings are versatile and can be used to provide shade and shelter in a variety of settings, from patios and decks to outdoor dining areas and even hot tubs. But before you can enjoy the benefits of a retractable awning, you need to know what they are, how they work, and how much the Amazing Awnings cost to install. What is a Retractable Awning? A retractable awning is a type of shading system that can be extended or retracted as needed. It consists of a fabric canopy that is attached to a frame that is mounted on the exterior of a building, such as a home or a commercial property. The frame can be either manual or motorized, and the awning can be operated using a hand crank or a remote control. When extended, the awning provides shade and protection from the sun and rain. When retracted, it remains hidden from view and out of the way. How Does a Retractable Awning Work? Retractable awnings work by using a system of arms and a torsion bar to extend and retract the fabric canopy. When the awning is extended, the arms and bar create tension that holds the canopy in place. When the awning is retracted, the tension is released, and the canopy rolls up onto a roller that is mounted on the frame. Benefits of Retractable Awnings Retractable awnings have numerous benefits, including: Sun Protection: Retractable awnings provide good protection from the sun’s harmful UV rays, which can cause skin damage and increase the risk of skin cancer. With a retractable awning, you can enjoy your outdoor living spaces without worrying about sunburns or heatstroke. Energy Efficiency: Retractable awnings can help reduce energy costs by keeping your home cooler in the summer. By blocking the sun’s rays, the awning can reduce the amount of heat that enters your home, which means you won’t need to rely on your air conditioning system as much. Versatility: Retractable awnings are versatile and can be used in a variety of settings, from decks and patios to outdoor dining areas and even hot tubs. Aesthetics: Retractable awnings come in a variety of colors and styles, so you can choose one that complements the look of your home. Pros and Cons of Retractable Awnings Pros: Retractable awnings provide excellent sun protection and can help reduce energy costs. They are versatile and can be used in a variety of settings. Retractable awnings come in a variety of colors and styles, so you can choose one that complements the look of your home. Cons: Retractable awnings can be expensive to install. They require periodic maintenance to keep them in good condition. Retractable awnings can be damaged by wind and heavy rain. Cost of Retractable Awnings The cost of a retractable awning varies depending on the size of the awning, the type of frame, and the level of customization. On average, you can expect to pay between $1,400 and $3,000 for a high-quality retractable awning installed by a professional. If you opt for a motorized frame, you can expect to pay an additional $500 to $1,000. Conclusion: Retractable awnings are an excellent investment for homeowners who want to enhance the functionality and aesthetics of their outdoor living spaces. While they can be expensive to install, the benefits they provide, such as sun protection, energy efficiency

10 Tips for Saving Water at Home While Cleaning

10 Tips for Saving Water at Home While Cleaning

  As the world’s population continues to grow, water scarcity is becoming an increasingly pressing issue. Conserving water is a responsibility we all share, and it’s something we can all contribute to. Cleaning is an essential part of our daily routine, and it’s one area where we can save a lot of water. Here are ten tips for saving water at home while cleaning. 1. Use a bucket instead of a hose When cleaning outside surfaces such as driveways, patios, or decks, use a bucket instead of a hose. A bucket allows you to control the amount of water you use, and it prevents wastage. A hose can waste up to 20 gallons of water per minute, so switching to a bucket can make a big difference. 2. Fix any leaks A leaky faucet can waste a lot of water over time. It’s estimated that a dripping faucet can waste up to 5 gallons of water per day. Fixing any leaks in your home is an easy way to save water, and it can also help you save money on your water bill. 3. Use a broom instead of a hose When cleaning your driveway or sidewalk, use a broom instead of a hose. Sweeping is an effective way to clean, and it uses far less water than using a hose. 4. Don’t leave the water running When cleaning dishes, don’t leave the water running. Instead, fill up one sink with soapy water and another sink with rinse water. This method uses less water than leaving the tap running continuously. You can install a water treatment plant at home to purify water and put it back to the ground.  5. Use a low-flow showerhead A low-flow showerhead can save a lot of water. They use less water than traditional shower heads, but they still provide a comfortable showering experience. If you don’t have a low-flow showerhead, consider installing one to save water. 6. Use a pool cover You May Also Like What do Professional Window Cleaners Use How to Make Deionized Water for Why is My Toilet Bubbling When Load More If you have a pool, using a pool cover can save a lot of water. A cover can reduce evaporation, which is one of the biggest causes of water loss in a pool. 7. Fix any toilet leaks A leaking toilet can waste a lot of water. It’s estimated that a leaking toilet can waste up to 200 gallons of water per day. Fixing any leaks in your toilet can save a significant amount of water. 8. Only run the dishwasher when it’s full When using your dishwasher, only run it when it’s full. Running a half-empty dishwasher wastes water and energy.  9. Use a commercial car wash When washing your car, consider using a commercial car wash instead of washing it at home. Commercial car washes use less water than washing a car at home, and they also recycle the water they use. 10. Reuse water When cleaning fruits and vegetables, save the water you use and reuse it to water your plants. You can also save the water you use to rinse dishes and use it to clean your floors or toilets. Conclusion: Saving water is something we all need to take seriously. These ten tips for saving water at home while cleaning are easy to implement and can make a significant difference. By following these tips, you can help conserve water and save money on your water bill. FAQs Q.What are some other ways I can save water at home? A. Some other ways to save water include fixing any leaks, taking shorter showers, and using a low-flow toilet. Q. How much water does a typical car wash use? A typical car wash uses around 45 gallons of water per car. Q. How much water can I save by using a low-flow showerhead? By using a low-flow showerhead, you can save up to 2.5 gallons of water per minute, which can add up to significant water savings over time. Q. How can I tell if my toilet is leaking? One way to tell if your toilet is leaking is to add food coloring to the toilet tank. If the color appears in the bowl without flushing, then you have a leak. Q. Can reusing water for cleaning be harmful? A. Reusing water for cleaning is generally safe as long as it’s not contaminated with harmful chemicals or bacteria. Make sure to use common sense and only reuse water that’s safe for cleaning purposes.

What do Professional Window Cleaners Use to Clean Windows

What do Professional Window Cleaners Use to Clean Windows

What do Professional Window Cleaners Use to Clean Windows Professional window cleaners use a variety of instruments and cleaning chemicals to create sparkling, clean windows. Maintaining a polished and professional image is key to the upkeep of any structure, whether residential or commercial. One of the most important aspects of this is keeping the windows clean. In this article, we will discuss what professional window cleaners use to clean windows. You May Also Like Where are the Coils on a Air Conditioner Preventive Maintenance Checklist Can I use Compressed Air to Load More Tools Used by Professional Window Cleaners 1. Squeegees: When cleaning windows, squeegees are indispensable. They’re used to dry the windows after they’ve been cleaned with water and cleaning solution, and they come in a variety of sizes and forms. Professional window cleaners frequently utilize a high-quality squeegee with a rubber blade. 2. Scrubbers: Cleaning solutions are applied to the windows, and the filth and grime are scrubbed away with the help of a scrubber. They are typically manufactured from synthetic materials and are available in a wide range of sizes and forms. 3. Extension Poles: Professional window cleaners use extension poles to clean difficult-to-reach windows. These poles are frequently made of lightweight aluminum or carbon fiber and can be changed to different lengths. 4. Ladders: Professional window cleaners use ladders to access windows that are higher up. They work on ladders that are strong, robust, and secure.  Cleaning Solutions Used by Professional Window Cleaners 1. Water and soap: Professional window washers typically use a solution made up of a blend of water and soap. Soap and water work together to remove filth, with the soap first helping to break it down. 2. Vinegar: Professional window washers often use vinegar since it is an efficient cleaning solution. When used with water, it effectively eliminates mineral deposits and stains caused by hard water. 3. Ammonia: Cleaning windows with ammonia is a certain way to get rid of any grit or filth that refuses to budge. However, it should be used with caution because it can cause harm if not employed correctly. 4. Specialized Cleaners: Professional window cleaners also make use of cleaning products that have been formulated for use on windows of a particular type. For stained or colored glass, for instance, they might use a special cleaning. Conclusion: Professional window cleaners have a wide arsenal of tools and detergents at their disposal to get windows looking like new. Cleaning equipment includes squeegees, scrubbers, extension poles, and ladders, while cleaning solutions include water and soap, vinegar, ammonia, and specialized cleaners.  A professional window cleaner will have the necessary experience, training, and competence to get the job done right. The safest and most thorough method of washing windows is to hire a professional window cleaning service.

How to Clean a Sofa at Home Without a Vacuum Cleaner

How to clean a sofa at home without a vacuum cleaner

One of the pieces of furniture in a home that gets the most use is the sofa, and as a result, it may rapidly get stained, dirty, and dusty. There are some people who don’t have access to vacuum cleaners, despite the fact that they are an effective instrument for cleaning sofas. There are, fortunately, a few other ways to clean a sofa at home that do not involve using a hoover. In this article, we will discuss a few of the methods that may be used to maintain the cleanliness and odorless atmosphere of your sofa. You May Also Like Spring Cleaning Tips and Tricks: The 3 Top Ranked Best Spin Scrubbers How To Clean Stairs Carpet By Load More Brushing If you don’t have a vacuum, you can easily clean your couch by brushing it. When cleaning your sofa, you should either use a brush with hard bristles or a brush with soft bristles, depending on the type of fabric it is made of. Start from the top and work your way down the sofa as you brush in the direction of the fibers. Dust and debris tend to collect in the crevices and joints, so be sure to give those areas special attention. Once you’ve gone over the entire sofa with the brush, use a clean, damp cloth to finish the cleaning process. Baking Soda Baking soda is a powerful cleaner that could remove stains and odors from your sofa. It also works great as an upholstery cleaner. It’s important to liberally sprinkle baking soda over your couch and ensure that all areas are covered. When the 15 minutes are up, use a brush with stiff bristles to gently scrub the sofa while the baking soda is still wet. Once you’ve scrubbed the entire sofa, use a clean, wet cloth to finish the job Vinegar Vinegar is another effective cleaning chemical that can assist you in removing stains and odors from your sofa. White vinegar and water should be combined in a spray container and then thoroughly shaken before use. Your sofa should be sprayed with the solution, making sure that all areas are covered. After allowing the solution to sit there for at least 15 minutes, wipe it down with a fresh cloth that has been dampened with water. Cornstarch Cornflour is a powder that has a high absorption rate and can be used to help eliminate odors and stains from your sofa. Cornflour should be liberally sprinkled all over the surface of your sofa, and you should make sure that all regions are covered. After allowing the cornflour to sit for at least 15 minutes, gently scrub the sofa with a brush that has stiff bristles while being careful not to scratch the fabric. After you have scrubbed the entire sofa, wipe it down with a fresh cloth that has been dampened in water. Steam Cleaning A sofa may be cleaned efficiently with a steam cleaner. Turn on the steam cleaner and fill the water tank. Once the steam has built up, use the attachment to thoroughly clean your sofa, starting at the top and working your way down. Dust and filth tend to collect in cracks and crevices, so it’s important to give those areas special attention Conclusion: In conclusion, you can clean your couch without a hoover by employing these techniques. Your sofa can be kept neat and tidy with regular brushing as well as cleaning with baking soda, vinegar, cornflour, or steam. Maintaining a regular cleaning routine for your sofa will not only keep it looking excellent but will also help it last longer. FAQs Is steam cleaning a good alternative to vacuuming my sofa? Yes, cleaning your sofa without using a hoover can be accomplished successfully through the use of steam cleaning. Can I use a regular cloth to wipe down my sofa after cleaning it without a vacuum cleaner? Yes, after cleaning your sofa without a hoover, you can wipe it down with a clean, moist towel. This will aid in the removal of any remaining cleaning residue. What cleaning agent can I use to remove stains and odors from my sofa without a vacuum cleaner? You can clean your sofa with baking soda, vinegar, or cornflour to get rid of stains and unpleasant odors. Your couch will look and smell like new after using these all-natural products.  

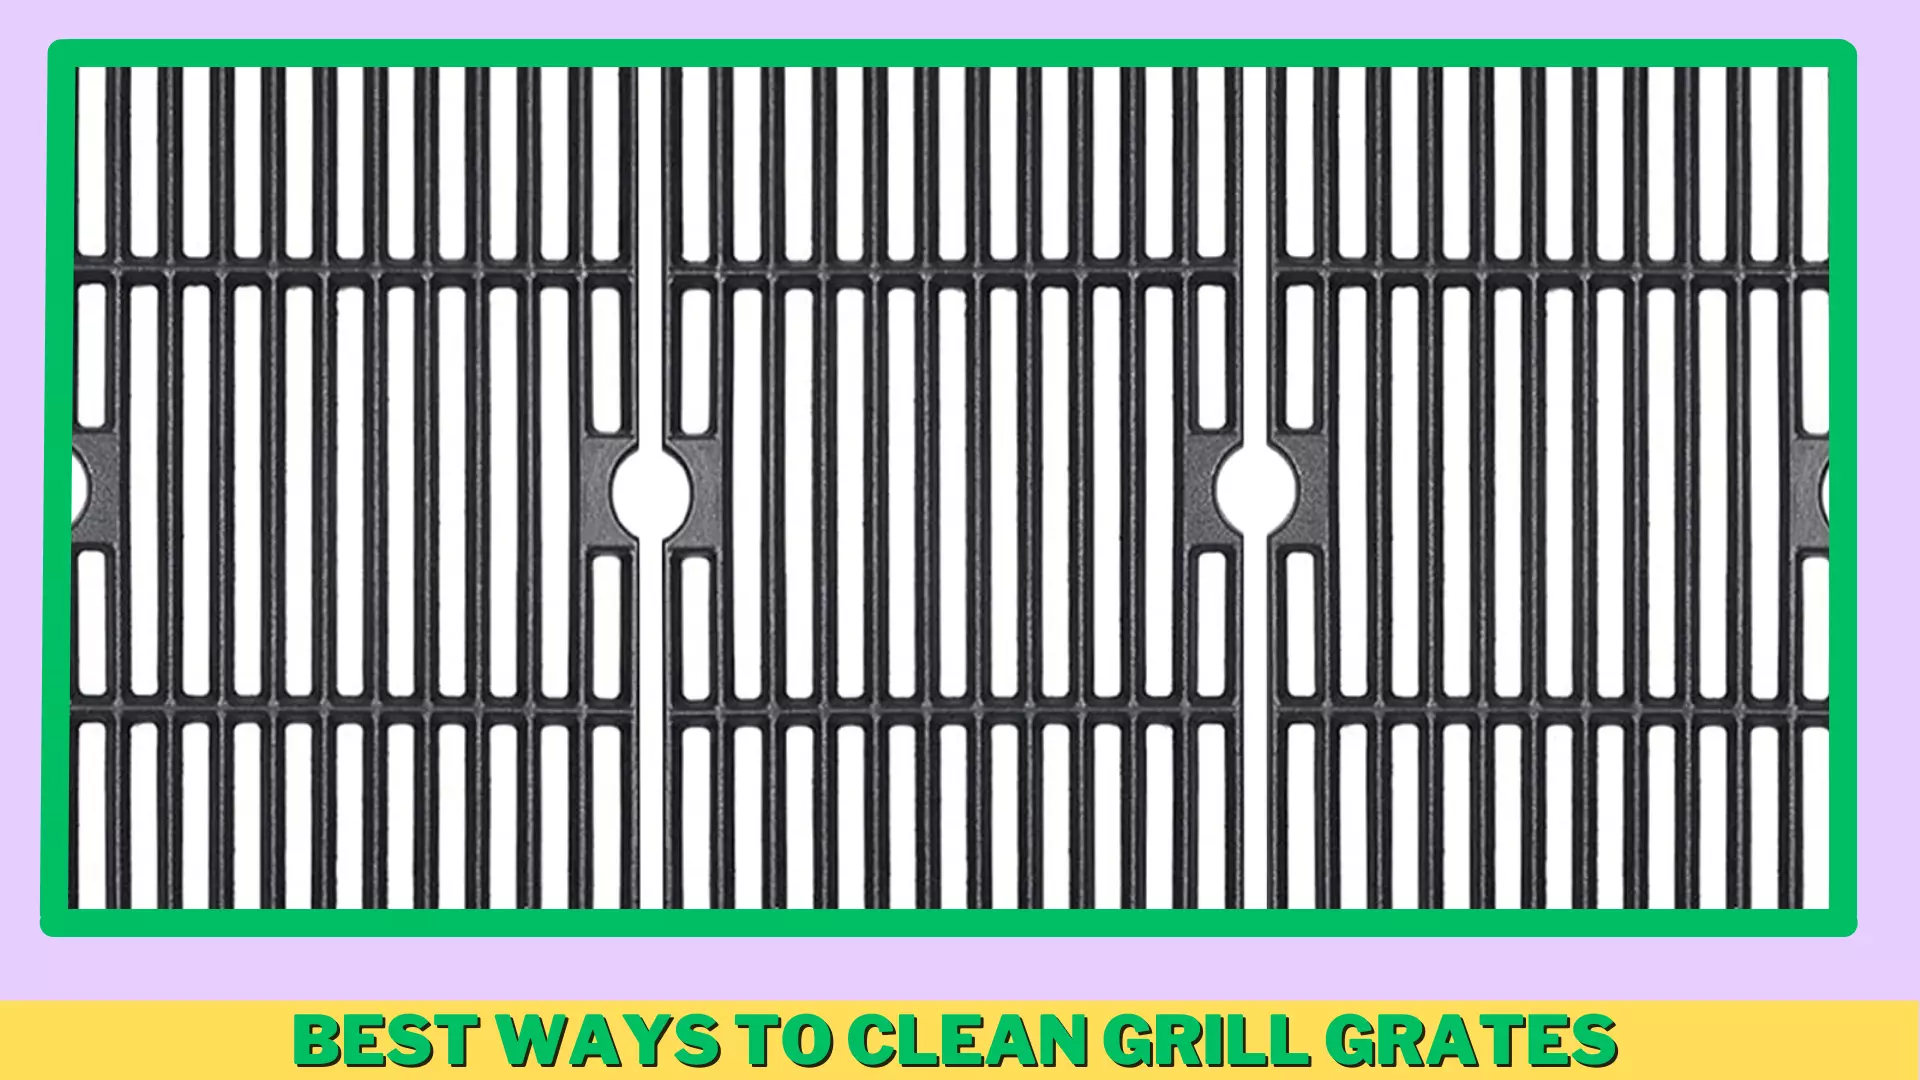
What is The Best Way to Clean Grill Grates? (5 Mathods)

what is the best way to clean grill grates

Looking for the best way to clean grill grates? Keep reading, this article will be the best choice for you. Many people consider grilling to be a vital part of their summer routine, but cleaning the grill grates may be a tedious task. It is essential to ensure that the grill grates are kept clean in order to maintain hygienic conditions and to ensure that food is cooked uniformly. Here are five different suggestions for the most effective technique to clean the grates of a grill. So are you ready to see what are these best ways to clean grill grates? In this post, We have shared 5 best ways to clean grill grates with aluminum foil, baking soda, vinegar and more possible ways. By following these simple techniques, you can easily remove grease and grime from your grill grates, making them look like new. 5 Best Way to Clean Grill Grates 1. Clean grill grates with grill brush Cleaning barbecue grates using a grill brush is a simple and cost-effective method. After you have finished cooking, use the brush to scrape the grates while they are still hot. The heat will assist in separating any debris that may be present, making it much simpler to remove. If you want the best result, make sure you use a brush that is of high quality and has bristles that are not easily bent. ALSO READ How To Clean 5 Gallon Water Jug in 6 Easy… How to Clean Zojirushi Water Boiler with Vinegar (Ultimate Guide) Which Kitchen Countertops Are The Best? (Answered) 2. Clean grill grates with aluminum foil Cleaning the grill grates using aluminium foil is another common method that can be used. When the grates are still hot, roll up a sheet of aluminium foil into a ball and use it to scrub them clean. The foil makes it simple to clear the grates of any debris or leftover food particles, leaving them spotless and ready for their next assignment. 3. Clean grill grates with Vinegar Grill grates can be cleaned with vinegar, which is a natural cleaning product that can be purchased at most grocery stores. Spray the solution onto the grates after combining vinegar and water in a spraay bottle in a ratio of equal parts each. After letting it sit for a few minutes, scrape it thoroughly with a grill brush. To clean the grates, give them a good soaking in water and then pat them dry with a fresh towel. 4. Clean grill grates with baking soda Baking soda is another natural cleaning product that can be utilised for the purpose of cleaning the grate of a barbecue. First, make a paste with the baking soda and water, and then apply the paste to the grate openings. After letting it sit for a few minutes, scrape it thoroughly with a grill brush. To clean the grates, give them a good soaking in water and then pat them dry with a fresh towel. 5. Clean grill grates with steam cleaner Grill grates can be effectively cleaned without the use of any harmful chemicals if you have a steam cleaner. To clean the grates, you need only add water to the steam cleaner and then utilise the steam to do the job. Because of the high temperature of the steam, any debris that is present will become loose and easy to clean with a grill brush. Conclusion: In conclusion, ensuring that the grates of your grill are clean is essential for maintaining proper hygiene as well as maximising the flavour of the items you grill. Each of the five approaches detailed in this article is an efficient way to clean grill grates; however, selecting the one that is best for you will primarily depend on your own personal preferences as well as the grill grates that you have. You can enjoy risk-free and delectable cooking outside for the entirety of the summer if you pay attention to these pointers and routinely clean the grates of your grill. FAQs What is the best way to clean grill grates? To clean grill grates, heat the grill for 15 minutes and then brush them with a grill brush. If the residue is really stubborn, try scraping it off with a ball of aluminium foil or a grill scraper. The grates can also be soaked in hot, soapy water for an hour before being scrubbed clean. How often should I clean my grill grates? The grate of the barbecue should be cleaned after each use. This will prevent trash and food particles from building up over time, which would make cleaning it more difficult in the future. Can I clean my grill grates in the dishwasher? No, the dishwasher is not the suitable place to clean the grates from your grill. The grates are susceptible to damage from the high heat and water pressure, which can lead them to rust. Always clean your grill using a grill brush or one of the other methods described in the previous paragraph.

How to Clean TV Screen Without Streaks – A Quick Guide For TV Screen Cleaning

How to Clean TV Screen Without Streaks - A Quick Guide For TV Screen Cleaning

If you are looking for a guide to TV screens, then you have landed at the perfect place, In this post, we’ll teach you how to clean TV screen without streaks. Cleaning a television screen is as simple as wiping the surface with a microfiber cloth that has been wrung out and soaked in fresh water. While it is particularly effective at eradicating any smudges, fingerprints, and filth left behind by our energetic three-year-olds, it is poor at preventing the development of streaks across the entire surface that has been cleaned. The primary offender, in this case, is water, and you can tell it is at fault when you try to clean the screen’s surface with a brand-new cloth after concluding that a dirty rag was the issue but end up with many more streaks than you began with. Simply put, the water plus nothing solution lacks sufficient chemical components to prevent streaks from forming on your TV screen. In actuality, water has one negative effect that it does well: it leaves a thin film, particularly on LCD and LED panels, that works as extra static and attracts dust from all around the room, necessitating frequent cleaning. You can easily get away with this restriction if you take extra precautions to prevent dust buildup around the house, but what about the streaks? You’ll need to take a completely different strategy. ALSO READ:  How To Remove Rust From Stainless Steel How to clean a TV screen without damaging it I’ve included five simple methods below, although none is reliable for eliminating streaks. It is hard to accomplish this, especially with hands as little and unstable as a human’s on a surface as vast as a television. Use the techniques listed below, wash the surface gently and evenly, and perhaps, you’ll be fortunate enough to get an all-panel shine. Use vinegar and distilled water. Consider utilizing a water and white vinegar solution for streak-free cleaning results. Using a clean, soft microfiber cloth, gentleness and evenness when wiping the screen’s surface is more important than just adding vinegar to remove the streaks. By doing that, you’ll achieve the almost streak-free experience you’ve always desired—but your kids adore. Here’s how to apply the water and vinegar mixture: A mixture of white vinegar and distilled water should be thoroughly mixed. Since mineral water has the propensity to produce yellowish residue on the screen, making it appear unclean, we are using distilled water instead. Leave the mixture in the basin or container you combined, or pour the solution into a spray bottle. Get two or three flat, non-rugged microfiber cloths to clean the screen. These have a lower propensity to hold on to grit and other abrasive particles that could damage the screen’s surface. Like a cotton rag, microfiber rags work better than any other rag at capturing and holding onto the dirt and absorbing cleaning solutions more thoroughly. Their split fibers and precisely sized filaments are entirely responsible for this. In addition to all of these benefits, they are lint-free, so there is no fluff on the screen, which is unsightly and has the propensity to build up charge and harm the monitor. Any soft cloth other than microfiber is a manageable substitute (preferably lint-free). Your t-shirt, flannel shirt, mateless socks, and other items might qualify. Follow your senses and intuition. Use one of the dry cleaning cloths to quickly wipe down the TV screen to eliminate any accumulated dirt. This is essential for removing streaks because any dirt left on the screen can ultimately result in them when employing the solution. Spray or (dunk) a second cloth in the vinegar solution, if appropriate, and wring it out well so that it is only slightly saturated and not dripping wet. A damp cloth has the potential to introduce moisture into areas where it shouldn’t, leading to problems including failure, fire, and even electric shock. If the rag has too much moisture, more streaks may appear after the screen fully dries. So you must ensure that you reach a point where no solution leaks, even after firmly wringing the cloth. Use this cloth to spot-clean any grime or smudges off the screen’s surface. Then, lightly rub the screen in a defined pattern, ideally going from top to bottom and back up. By doing this, any streak formation will be reduced. Avoiding excessive pressure on the TV screen is crucial since it might eventually result in dead pixels, deleting the watching experience and increasing the number of streaks. Just move fast, gently, and according to a set pattern. When you’re finished with the screen, use the same cloth to clean the television’s base, frame, and other parts, such as the cord or auxiliary devices. Next, quickly wipe the screen with the third rag in the same manner, to leave it spotless. You now have a practically streak-free screen. Tips Before cleaning, make sure the TV is turned off. If you recently shut off the power, give it 15 minutes to settle or clean it first thing in the morning before turning on the television. Three benefits come from doing this: You can see all the smudges and spots that need to be cleaned. It makes the TV less prone to evaporation, greatly reducing streak formation likelihood. It’s the safest option since we’re dealing with electronics. While cleaning, the thought might suddenly cross your fairly confined mind to immediately spray the TV panel with the solution (like you would a typical window). Put an end to the thoughts right now. That’s a surefire recipe for disaster because the liquid can easily get to areas where the eyes shouldn’t be, like inside electronic components, where it could start malfunctioning. This may result in shock or present a fire risk. Use soap and distilled water. According to a Panasonic manual, feel free to use distilled water and soap when white vinegar is scarce in the home. Before using soap, be careful to read the manual for any cautions. If not, … Read more