Top 5 Best Move-In & Move-Out Cleaning Services

Top 5 Best Move-In & Move-Out Cleaning Services in Canada

Top 5 Best Move-In & Move-out Cleaning Services . Moving in & out can be a difficult and time-consuming process, but one of the most crucial aspects is leaving your old home or apartment in excellent condition.  This is where professional move-out cleaning services come in. These businesses specialise in deep cleaning services for homes and flats preparing for a move. With so many alternatives available, it can be tough to know where to begin. To make things easier, we’ve produced a list of Canada’s 5 best move-in and move-out cleaning services.  In this blog post, we’ll look at these companies, their services, and what distinguishes them from the competition. 1. Mrs.Clean Mrs Clean – Clean Solutions is a full-service cleaning company that offers residential cleaning and commercial cleaning services in Calgary and surrounding locations. A dependable and professional service. Mrs Clean provides cleaning services to people of all backgrounds in Calgary and its neighbouring areas. The organisation exists to assist you with keeping your home clean while saving you time and trouble. Their services include regular cleaning, move-in and move-out cleaning, disinfection services, spring cleaning and commercial cleaning Pros Cons 2. Molly Maid Molly Maid puts its cleaning specialists through rigorous, ongoing training to ensure that every standard is followed and every home is meticulously cleaned. Molly Maid, in addition to normal cleaning services, specialises in full move-out cleanings. The organisation describes its move-out cleaning services in detail, including a deep-cleaning-house checklist of all the tasks that should be accomplished after the home is empty. Molly Maid cleaners arrive within a 3- to 4-hour timeframe .Customers may be able to interact with a representative while making their reservation to obtain a more exact arrival timeframe.Customers will be relieved to learn that Molly Maid’s experts receive ongoing training to keep their skills and practice up to date-and effective. Pros Cons 3. Handy Furthermore, the site does not immediately give cleaners’ insurance details. Customers should be aware that Handy normally demands a 3-month contract for its services, however, this contract does not apply to move-out cleaning customers. Pros Cons 4. The Maids The Maids offer a 22-step cleaning method and an exclusive agreement with Mr Clean, which represents a high level of quality and professionalism in the industry. One of the best options for making a property ready for the next owner or tenant is The Maids. The service has 40 sites, and cleaners follow a strict 22-step process to ensure a thorough job.The Maids also have a great reputation, as seen by their marketing collaboration with the cleaning product behemoth Mr Clean. One thing to keep in mind is that many clients’ bids end up being far lower than the actual price they pay. One advantage is that The Maids will not charge customers if they need to reschedule an appointment . Pros Cons 5. Merry Maids The cleaning time is estimated by the client. Merry Maids is an award-winning cleaning service with 40 years of experience, making it an excellent choice for move-out cleaning. Merry Maids is a well-known and respected name in the industry, with over 40 years of expertise. Customers can be confident in the level of service they are receiving since the cleaning business presents them with visible move-out cleaning standards and emphasises its technician training requirements. The company has won the Women’s Choice Award for America’s Most Recommended Cleaning Service nine times, solidifying its position as a leading name in the cleaning industry. Pros Cons Conclusion To summarise, hiring a professional move-out cleaning service is a wise investment for anyone who wishes to leave their previous home or apartment in excellent condition. These firms offer thorough cleaning services that cover every nook and cranny of your home, ensuring that you leave a clean and tidy place. The best 5 move-out cleaning services in Canada provide a wide range of services, fair pricing, and a dedication to customer satisfaction. Because of their knowledge and attention to detail, you can concentrate on the exciting possibility of moving into your new house while they handle the cleaning. Explore More:

DIY Carpet Stain Removal – 6 Easy Steps from A Pro

DIY Carpet Stain Removal – 6 Easy Steps from A Pro

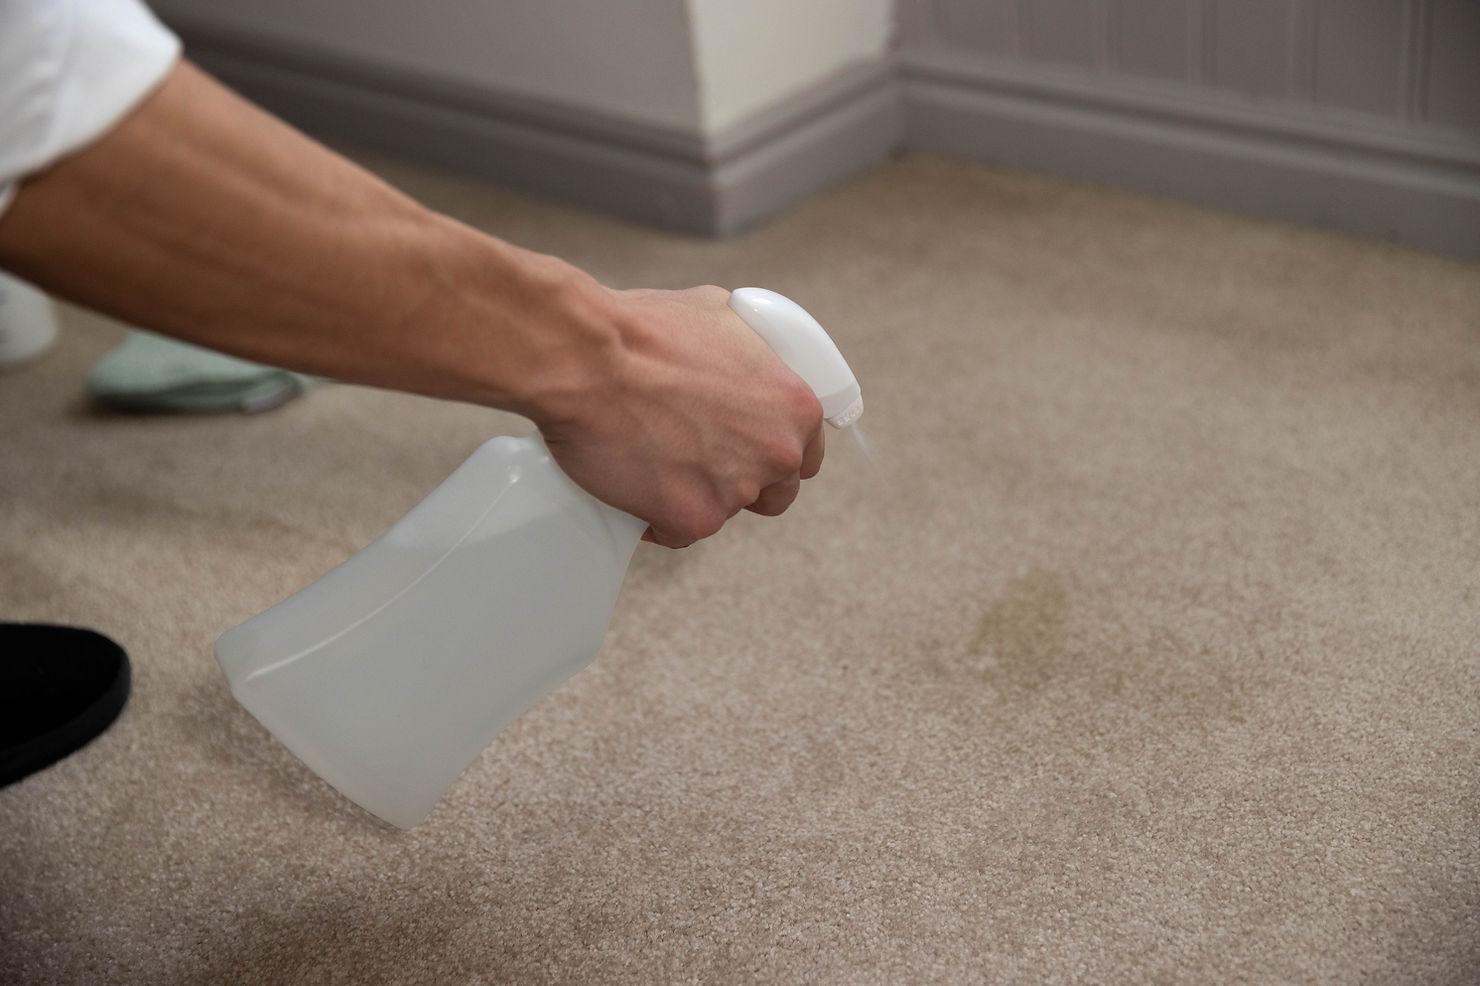
Are you tired of staring at that same stubborn stain on your carpet every day? Do you hesitate to hire a professional cleaner because it’s expensive? Well, the solution to your problem is simpler than you think! As a professional carpet cleaner, I’ll share with you the perfect method to remove stubborn stains safely and effectively without damaging your carpets. I’ve tried and tested different stain removers made with common home products and found the best solution that works. It’s simple, and once you’ve done it with one spot, you’ll be able to tackle any stain like a pro! Just beware, make sure to read through the whole article because there are some important disclosures and reminders so you don’t mess up. You got this! You May Also Like What do Window Cleaners Use in Best Temperature to Wash Outside Windows Where can I buy pure water Load More DIY Stain removal in five easy steps: There are some important factors to consider. Plumbers are experts in working with water supply systems and piping and more regarding water systems, and they are well-versed in building codes and safety regulations related to plumbing. They will be able to ensure that your hot water heater is installed correctly and safely, and they can address any issues that may arise during the installation process. Make the solution: You may also buy stain remover spray off the counter at your local store, but if you want to spare the drive and save some money, here’s the ingredients you’ll need to make this tried and tested stain removal solution. I’ve used it in homes to teach homeowners how to remove stains themselves and they love it. Stain removal solution formula: 1 tsp dish soap 2 cups isopropyl alcohol 1 cup water Mix all these ingredients into ideally an empty spray bottle and now you’re set. Vacuum up the spot: The second step in removing a stain from your carpet is to vacuum up any loose dirt or debris. Use a wet vac if you can (the ones that suck up liquids as well). Apply the stain removal chemical: Apply enough so it dampens the carpet fibers and covers the whole stain. As I said, you can buy one or make one using the ingredients I shared above. There are lots of different carpets out there so make sure to test your solution in a hidden area of the room to see if it changes the color of your carpet. If it doesn’t, your good to go. Use a metal spoon to press down on the area: Using a metal spoon, gently press down on the stained area to help lift the stain from the carpet fibers. You may scrub the area lightly to agitate the solution into the stain, but be careful not to scrub too hard as this can cause the carpet fibers to fray. Let the stain removal chemical sit for one to two minutes: After applying the stain removal chemical, allow it to sit on the stain for one to two minutes to give it time to work its magic. This will help to loosen and lift the stain from the carpet fibers. Blot the area with a towel or vacuum: Once the stain removal chemical has had time to work, use a towel or vacuum to blot or suction up the excess liquid. Be sure to blot gently. Ta-Da! If the stain is still there, try repeating the steps once more and you’ll most likely see an improvement. This method has been proven to be highly effective at removing stains from carpets and has been tested in many homes. However, it is important to note that it may not guarantee perfect, spotless results. This method will not be effective for melted wax or paint stains. Remember, the sooner you tackle the problem, the better your chances of successfully removing the stain! If you are dealing with a particularly stubborn stain, it may be necessary to seek the help of a professional carpet cleaner like us. This was Jonny from Breeze Cleaning and it was my pleasure helping you! Good luck!

Does a Plumber or Electrician Install a Hot Water Heater?

Does a Plumber or Electrician Install a Hot Water Heater? Here’s all the expected answers to this question. When it comes to install a hot water heater in your home, you may be wondering whether to call a plumber or an electrician for the job. While both professions have the skills to perform the Installation task of water heater, there are a few key differences to consider before making your decision,. You May Also Like What is the Cost of Retractable Where are the Coils on a What do Window Cleaners Use in Load More First, let’s have a look at what’s involved in installing a hot water heater. Typically, this process involves connecting the heater to your home’s water supply and installing any necessary wiring or electrical components. This means that both a plumber and an electrician could potentially handle the job. make the easy process of hot water heater installation by contacting well experienced plumber, South Adelaide Plumbing and Gas Why Choose a Plumber There are some important factors to consider. Plumbers are experts in working with water supply systems and piping and more regarding water systems, and they are well-versed in building codes and safety regulations related to plumbing. They will be able to ensure that your hot water heater is installed correctly and safely, and they can address any issues that may arise during the installation process. Why Choose an Electrician Electricians are skilled in working with electrical systems and wiring, which is an important aspect of hot water heater installation. They can make sure that your heater is wired correctly and that all electrical components are functioning properly. If you have an electric hot water heater, an electrician may be the best choice to handle the installation. Consulting with a Professional Ultimately, the decision of whether to hire a plumber or an electrician for your hot water heater installation will depend on your specific needs and circumstances. If you’re not sure which profession to call, you may want to consult with a professional to get their opinion. They can evaluate your home’s plumbing and electrical systems and recommend the best course of action. It’s worth noting that many plumbing and electrical companies offer comprehensive services that include hot water heater installation. Here is a company you may like to contact and get excelent services South Adelaide Plumbing and Gas. This means that you may be able to hire a single company to handle the entire job, from start to finish. This can save you time and hassle, and it can ensure that the installation is completed correctly and safely. Conclusion In conclusion, the decision of whether to hire a plumber or an electrician for hot water heater installation depends on your needs and circumstances. Consulting with a professional can help you make the best choice, and it’s important to always hire licensed and experienced professionals for plumbing or electrical work in your home.

10 Clever Cleaning Hacks for Busy Professionals

Written by Jake Michael is a writer for Daily Poppins 10 Clever Cleaning Hacks for Busy Professionals Keeping a home clean and organised can sometimes prove a difficult challenge for both experienced professionals and new recruits as they may not have time to devote hours to cleaning every week. This is especially true as data from the Office of National Statistics showed that over a quarter of UK adults now opted to work hybrid from home and the office, meaning a significant increase in workers returning to the workplace this year. You May Also Like What do Window Cleaners Use in Best Temperature to Wash Outside Windows Where can I buy pure water Load More 10 Clever Cleaning Hacks for Busy Professionals As travelling to the office and working on site can seriously impact how often you can thoroughly maintain your home, with 61% of Brits being motivated to tidy up only when they have free time, there are several cleaning hacks to consider that will make the process more effective and efficient. From using a dishwasher tablet to clean oven racks to applying vinegar to your shower to remove grime, we explore 10 innovative cleaning solutions for busy workers that use common household items that will keep your home in great condition without sacrificing your valuable time and energy. 1 – Clean Your Oven Racks With Dishwasher Tablets Cleaning oven racks can be a difficult and arduous task but using a dishwasher tablet can make the process much easier. Dishwasher tablets include strong cleaning ingredients that can dissolve difficult stains and grime, making them an excellent choice for cleaning oven racks. Begin by filling the sink with water hot enough to dissolve the dishwasher tablet (30 degrees or more). Place 1 or 2 dishwasher tablets into the water and submerge as much of the oven rack as you can into the sink. You can either leave the racks to soak overnight or while you are working from the office or at home, which is enough time for the solution to break down stubborn grease and food particles. Once ready, drain the sink of the solution, rinse the oven racks thoroughly with hot water and use a brush to further remove any remaining residue. Either dry the oven racks with a clean towel or via a drying rack before placing them back in the oven again. This hack means that you can benefit from a sparkling clean oven rack without spending too much of your free time removing stubborn stains manually. 2 – Use a Paste to Wipe Dirty Oven Interiors Continuing on with oven cleaning tips, having to clean the oven can be a difficult and long process, but creating a paste made up of baking soda and water, this chore can be much easier. Pour the baking soda and water into a bowl and mix thoroughly to form a thick consistency. Before applying the paste, remove as much loose debris from the oven interior as possible and then use a scraper to apply the paste to the walls. Make sure to focus on areas where dirt and grease are most prominent. Be careful not to apply the paste on any heating or electrical elements as this can cause a fire hazard. Let the paste sit for two hours while the sodium bicarbonate works to lift the grime. After two hours, use a damp cloth to wipe the paste away, scrubbing thoroughly in certain stubborn areas. Use another dry cloth to wipe down any remaining residue from the walls. 3 – Use a Lint Roller on Various Surfaces While working, it is easy to not notice how quickly surfaces and furniture in the home can accumulate dust and dirt, especially if you have a pet at home. Fortunately, using a lint roller on furniture, floors, curtains and even lampshades can make cleaning your home a quick and easy task. The lint roller’s adhesive surface effectively collects hair and dirt without damaging the surface or fabric of the object. Additionally, using a slightly damp cloth to moisten the surface you are cleaning can make the lint roller more effective at removing stubborn dirt and hair. Overall, using a lint roller regularly on furniture and surfaces in your home as a quick task helps you to easily keep on top of dirt and dust growth, keeping your home fresh and clean and avoiding developing respiratory problems like asthma. 4 – Apply a Vinegar Solution to Your Windows Layers of debris and grime build up on your windows cause significant issues that many may not realise. Over time, the buildup of dirt can harm the opacity of the window glass and can even lead to allergic reactions in the worst cases. Cleaning your windows and mirrors with a vinegar and water solution is an effective, efficient and environmentally friendly method of removing streaks and grime from your windows. The acidic qualities of vinegar help break down grease and filth, while water dilutes it for a simple application. The solution is safe to use on glass, chrome and stainless steel, however, you avoid using the mixture on natural stone and marble surfaces as it can cause etching. This method using basic ingredients that can easily be found in your home along with a microfiber cloth will quickly let you clean your windows and mirrors without the need for harsh chemicals. 5 – Use White Vinegar to Rid Your Showerhead of Dirt As a working professional, keeping your home clean and tidy can often fall to the bottom of your to-do list. You may not notice the mineral deposits and dust accumulating on the showerhead over time, leading to a clogged shower head that creates an overall displeasing appearance, lowers water pressure and can even lead to increased energy bills. Cleaning your shower head is an easy and affordable chore that hosts multiple hygienic and money-saving benefits and simply requires white vinegar. Detach the showerhead, place it in a tub of white vinegar, … Read more

How to Clean Curtains Without Washing Them

How to Clean Curtains Without Washing Them Curtains are an important element in the design of any home, but they can be difficult to maintain and clean properly. Even if cleaning your curtains is an option, you should keep in mind that it is not always feasible or possible. The good news is that there are a few different methods you can use to clean your curtains other than washing them. In this article, we’ll discuss some of the best ways to clean curtains without washing them. You May Also Like How to Choose the Right Commercial What do Professional Window Cleaners Use Why is My Toilet Bubbling When Load More Here’s How to Clean Curtains Without Washing Them The following are the steps you can take to clean curtions without washing the curtions: 1. Vacuuming: Cleaning curtains by vacuuming them is one of the most straightforward methods that does not include washing the curtains. To remove the dust and grime that have accumulated on your curtains in a careful manner, use a vacuum cleaner that has a brush attachment. For the best possible outcome, you should make sure to hoover both sides of the drapes. 2. Steam Cleaning: Cleaning Curtains with a Steam Cleaner Another method for cleaning curtains that does not involve washing them is to use a steam cleaner. Your drapes can be cleaned and sanitized at the same time by using steam cleaning, which will also help remove dirt and stains. Be sure to use a low heat setting, and try not to keep the steam cleaner stationary in one area for an excessive amount of time. 3. Dry Cleaning: If your window coverings are made of fragile or expensive materials, it is likely in your best interest to have them dry cleaned. Send your drapes to a professional dry cleaner that specializes in cleaning drapes and valances for the best results. Before taking your curtains to be dry cleaned, you should first ensure that you have read and understood the cleaning instructions that are printed on them. 4. Spot Cleaning: Cleaning Individual Stains or Marks Spot cleaning may be an option worth considering for removing individual minor stains or marks from your curtains. Make a solution with a little bit of water and gentle detergent, and then use a clean cloth to dab at the stain in a gentle manner. Before applying the solution to the entire curtain, you should do a preliminary test on an inconspicuous part of the fabric to guarantee that it will not deteriorate the material. 5. Fabric Freshener: If your drapes just need a simple refresh, you can use a fabric freshener to do the trick. Spray the fabric freshener all over your drapes, and then hang them up to dry in the fresh air. Be careful to select an air freshener for your curtains that is safe for the material that they are made of and will not damage the fabric. Conclusion In conclusion, cleaning curtains so that they don’t need to be washed is an excellent way to keep them looking their best without the inconvenience of having to wash them. You have a number of choices at your disposal to help you maintain the cleanliness and freshness of your curtains, including the use of a vacuum, a steam cleaner, a spot cleaner, or a fabric refresher. Therefore, the next time you need to clean your curtains, give these options some thought and go with the one that suits your needs and preferences the most. Frequently Asked Questions Can I use a vacuum cleaner to clean my curtains without washing them? Yes, cleaning curtains by vacuuming them rather than washing them is an effective way to clean them. To remove the dust and grime that have accumulated on your curtains in a careful manner, use a hoover cleaner that has a brush attachment. Is dry cleaning a good option for cleaning curtains without washing them? Yes, having your curtains dry cleaned is a viable option, especially if they are made of delicate or expensive fabrics. Send them to a dry cleaner that specializes in curtains to have them cleaned. Can I spot-clean my curtains without washing them? Yes. If you only have a few little stains or marks on your curtains, then spot cleaning is a great solution. Using a clean cloth and a small amount of mild detergent in water, blot the stain gently. Before using the solution on the entire curtain, test it on a tiny, hidden area to be sure it doesn’t ruin the fabric.

How to Make Deionized Water for Window Cleaning

How to Make deionized water for window cleaning Water that has had almost all of its mineral ions removed, such as calcium, magnesium, sodium, and chloride ions, is referred to as “deionized water” or “demineralized water.” This type of water is also known as “deionized water.” Ion exchange and reverse osmosis are two common methods that can be utilized in order to successfully remove these mineral ions. It is common practice to use deionized water for cleaning windows due to the fact that it does not leave any water spots or streaks on the surface of the glass. In this article, we will learn how to make deionized water for window cleaning. Here’s How to Make deionized water for window cleaning The following is an overview of the steps involved in producing deionized water for use in window cleaning:  Invest in or rent a water filtration device that can remove ions from the water. Tap water can have its pollutants and minerals removed with the help of these systems by passing it through a combination of carbon and resin filters. Gather the deionized water in a sanitary container, like a bucket or a tank, and place it there. Now that the water has been filtered, it can be used to clean windows.

Where can I buy pure water for window cleaning?

Where can I buy pure water for window cleaning? If you need pure water for window cleaning, you have numerous possibilities. Pure water is water that has been cleansed and filtered to eliminate impurities such as minerals and chemicals, making it free of any toxins that could leave streaks or stains on your windows. Pure water is sometimes referred to as “demineralized water.” The following are some places where you may purchase pure water for use in cleaning windows: So Let’s see where can you buy pure water for window cleaning? 1. Online retailers: You can find a wide variety of options at many of the internet stores that sell pure water for window cleaning. There are several online retailers that offer this service. Amazon, eBay, and Window Cleaning Warehouse are just a few examples of the numerous successful internet merchants. 2. Local window cleaning companies A good number of local window cleaning businesses include the provision of fresh water as an integral aspect of their services. Customers who would rather clean their own windows may also purchase bottled water from this establishment. You can conduct a search for local window cleaning companies in your region either on the internet or in the phone book. 3. Water purification companies Firms that specialize in purifying water by filtration and other processes are called water purification firms. These companies purify water for a variety of uses, including cleaning windows. You might do an internet search for local water purification companies in your area and then chat with them about the possibility of acquiring pure water for cleaning windows. 4. Home improvement stores In the cleaning supplies area of some home improvement stores, such as Home Depot and Lowe’s, you may be able to find pure water for use in window cleaning. Make sure you call your neighborhood shop and find out if they have this item. You May Also Like What is the Cost of Retractable Where are the Coils on a What do Window Cleaners Use in Load More 5. Car detailing shops Detailing shops for automobiles Detailing shops for automobiles typically use distilled water while cleaning the windows of customers’ vehicles and may make this product available for purchase. If you need pure water to clean your windows, you should inquire at the local vehicle detailing shops in your region to see whether they have it. Conclusion When getting pure water for the purpose of cleaning windows, it is absolutely necessary to make certain that the water is of an exceptionally high quality and is completely free of any pollutants. Additionally, you should take into account the cost and the quantity of pure water that the various vendors offer. You can fulfill your requirements for window washing with the assistance of pure water if you conduct a little bit of research first.

Best Temperature to Wash Outside Windows

Best Temperature to Wash Outside Windows. The outdoor windows of your home might be a challenge to clean, but it is absolutely necessary to do so in order to preserve their appearance and guarantee that they will continue to operate properly. When you are cleaning the windows on the outside of your home, the temperature at which you do the job is an important consideration. The temperature can have an impact on the cleaning solution’s efficacy as well as the outcomes you get. So what is the best temperature to wash outside windows? Outside window washing is best done on a cloudy day when the temperature is between 40 and 70 degrees Fahrenheit (4 and 21 degrees Celsius). These conditions are optimal for the cleaning solution to accomplish its job without drying out too soon, freezing, or evaporating. When cleaning windows on a hot day, you risk leaving streaks and smears behind because the cleaning solution dries too quickly. Too rapid a drying of the solution can make it difficult to wipe away, resulting in additional streaking and an extended cleaning process. Extremely low temperatures, on the other hand, have the potential to cause the cleaning solution to freeze before it has a chance to do its job, which makes the cleaning process both more difficult and less effective. In addition, washing windows on days that are very windy or sunny might make the job of cleaning them more difficult. The sun’s rays can cause the cleaning solution to dry out prematurely, which can result in unsightly streaks, and the wind can deposit dirt and debris on windows that have just been cleaned. You May Also Like How to Make Deionized Water for Best Magic Window Groove Cleaning Brush The Best Way To Pollen-Proof Your Load More Conclusion In conclusion, the ideal weather conditions for washing the outside of windows are a cloudy day with temperatures between 40 and 70 degrees Fahrenheit (4 and 21 degrees Celsius). If you meet these requirements, you will be able to accomplish the greatest possible cleaning outcomes without encountering any unwarranted difficulties. Keep in mind that in order to achieve a flawless and gleaming clean appearance for your windows, you will need to use the required tools, a cleaning solution of high quality, and the correct cleaning procedure.

What do Window Cleaners Use in Their Water

What do Window Cleaners Use in Their Water. Maintaining clean windows is an important part of any building’s cleaning routine. Having clean windows does more than just make a home look nicer; it also allows you to see outside without any obstructions. Professional window cleaners use a wide range of gear and cleaning solutions to leave windows looking spotless. In this article, we’ll look at what window cleaners put in their water. Water is the most important component of any window washing solution. Wet glass, dirt dissolves, and cleaning solution is rinsed away. Windows may need more than water to get rid of tough dirt and stains. That’s why you could see window washers incorporating various chemicals into their water supply. You May Also Like What do Professional Window Cleaners Use How to Make Deionized Water for Why is My Toilet Bubbling When Load More What do window cleaners use in their water? Here is most important information about window cleaners they useually do and clean, What do window cleaners use in their water? 1. Dish soap: Dish soap is frequently counted among the most frequently used cleaning products when it comes to window washing. It is an efficient degreaser and can assist in the dissolution of dirt and grime that has accumulated on windows. Window washers typically use a solution that consists of a few drops of dish soap added to a pail of water before using it to clean the windows. It is vital to just use a tiny amount of dish soap, as using an excessive amount might leave streaks and soap residue on the glass. 2. Vinegar Vinegar is another typical cleaning chemical that is used for cleaning windows. Vinegar is a natural, non-toxic cleaning solution that works well to remove hard water stains and soap scum from windows. Vinegar can also be used to clean other surfaces. Window washers frequently use a solution they make by mixing water and vinegar in a spray bottle before using it to clean the glass. 3. Ammonia When it comes to cleaning windows, ammonia is another widely used cleaning product. It is an effective degreaser that can be used to assist in the removal of stains that are resistant to cleaning. Window washers typically use a solution that consists of a bucket of water with a trace of ammonia added to it before cleaning the windows. However, improper use of ammonia can cause it to become toxic; therefore, it is absolutely necessary to use it in accordance with the directions provided by the manufacturer. Conclusion In conclusion, in order to get spotless results, window washers add several detergents to their water. Common household cleaners include dishwashing liquid, vinegar, and ammonia. To avoid streaking and residue on the glass, however, it is crucial to use these cleaning products in the proper quantities. To get a spotless result, professionals use not only cleaning solutions but also specialized equipment like squeegees and microfiber cloths. Professional window cleaners can maintain the pristine appearance of your windows with the use of specialized equipment and cleaning solutions.

Can I use Compressed Air to Clean the Refrigerator Coils?

If you want to clean the coils in your refrigerator, you might be curious about whether or not using compressed air is a good alternative for you. The quick answer is yes, you can use compressed air to clean the coils in your refrigerator; however, there are a few important points that you must keep in mind before doing so. In this article, we will explain how you can use it. You May Also Like Where are the Coils on a Air Conditioner Preventive Maintenance Checklist Can I use Compressed Air to Load More It is critical that you begin by gaining an understanding of the reasons behind the initial requirement that you clean the coils on your refrigerator. When your refrigerator is operating, it generates heat, which needs to be vented out of the appliance through the coils located at the back or bottom of the unit. Your refrigerator will have to work harder and use more energy as a result of dust, dirt, and other material that has accumulated on the coils over time. The buildup of dirt, dust, and other debris may be to blame for this. This can also lead to the refrigerator overheating, which can cause irreparable damage to the appliance. The coils can be cleaned quickly and effectively by using compressed air as the cleaning medium. The following are some steps that should be followed: Turn off the power to your refrigerator. Prioritise protection! Find the coils in the area. The coils can be found either at the rear of the unit or at the bottom of the unit, depending on the model of your refrigerator. To gain access to them, you might have to take off a panel first. To remove any loose dirt from the coils, you can either use a brush with soft bristles or a hoover cleaner. This will result in the compressed air having a greater level of effectiveness. A canister of compressed air should have a nozzle attached to it. A canister of compressed air is available for purchase at the majority of home improvement and office supply retailers. Keep the canister in an upright position and aim the nozzle at the coils while maintaining a space of a few inches between the two. Make use of quick bursts of air to clear away any debris that may still be present. It is important to remember that spraying the coils with too much compressed air at once or too tightly could cause them to become damaged. After you have finished cleaning the coils, reinstall any panels that you took off the refrigerator, and then plug it back in  Compressed air can be a useful tool for cleaning the coils within your refrigerator, but it is no replacement for routine servicing. If you want your refrigerator to last as long as possible and function at peak efficiency, you should clean the coils every six months to a year.