How To Clean Water Tank Without Removing Water

How To Clean Water Tank Without Removing Water

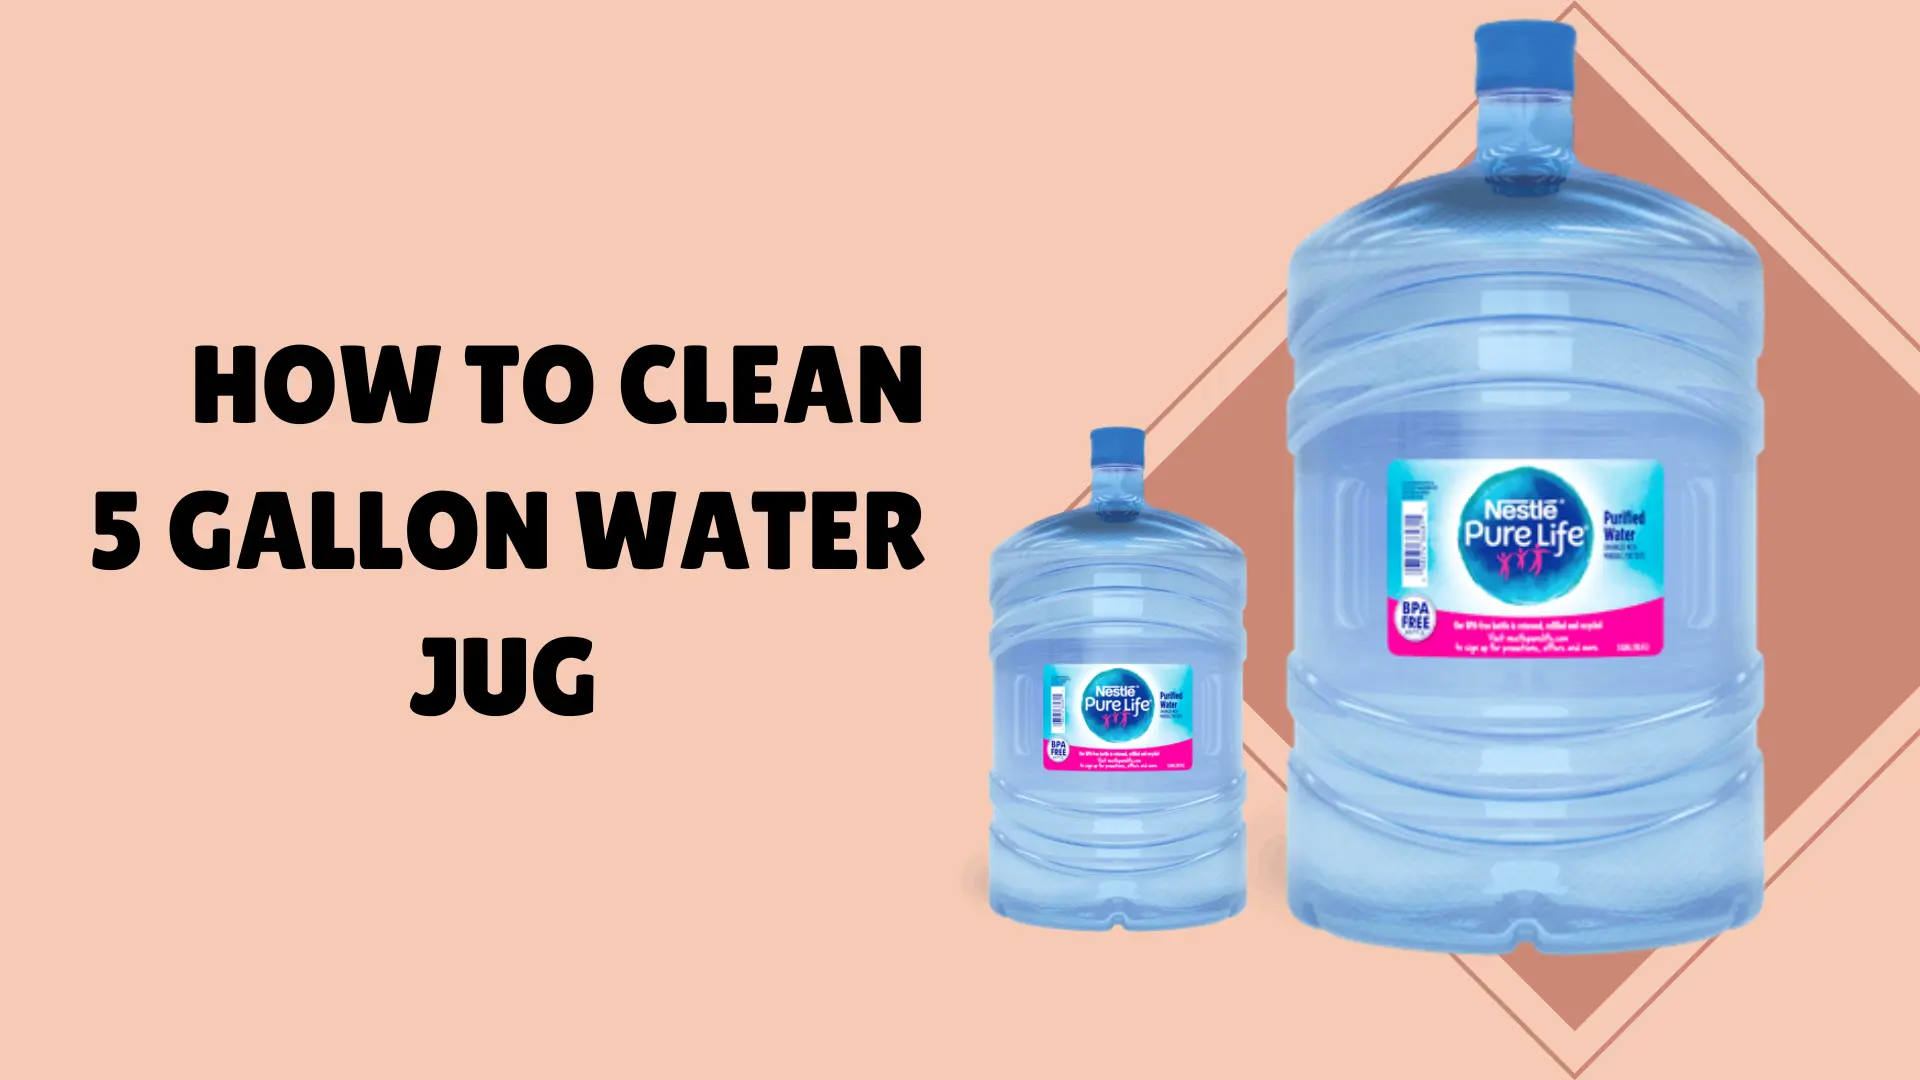
How To Clean Water Tank Without Removing Water. Water tanks are a necessity in most households. However, if you do not clean them after every 6-7 months, then they can be dirty and unsanitary. If your water tank has been cleaned for a while, it can cause problems for your family and home. You should regularly inspect and clean your home’s water tank. Although cleaning the tank itself is very easy, removing and replacing the water can be pretty troublesome, you can also see here how to clean water tank filter. In this post we will share step-by-step guide on how to clean water tank without removing water from it. This guide is perfect if you’re wondering how to clean a water tank without removing water. You’ll find detailed instructions for quickly and easily disinfecting your water storage tank. How To Clean Water Tank Without Removing Water Siphoning The term “siphoning” refers to the simple act of transferring contents from one container to another. It’s a great technique to clean out the sediment at the bottom of your tank without turning off the water supply. Using this method, those living in homes with smaller water storage tanks might save money. However, if you’d prefer to make do with what you already have, we have developed a detailed guide on constructing a siphon for your work. Find a length of bendable plastic tubing. Ensure that it is long enough to reach the base of your tank. Then, you may finish it off using a standard kitchen funnel. Soak the tube in water until the horn is halfway complete. Verify that any air leaks have been plugged in. Hold the tube vertically with a watertight gasket over the open end to prevent water from leaking. To move the tube around within the tank, you need to connect it to a long pole. When complete, you may lower the tube’s funnel end into the tank while holding a bucket at the other end. All of the sediments in your tank will be collected here. Then, remove the plug and let the vacuum pressure clean the tank. An electrically powered siphoning system, like the ones used for cleaning swimming pools, may be appropriate for individuals who utilize larger water storage tanks. It does the same thing, but at a more expensive rate. ALSO READ How To Clean 5 Gallon Water Jug in 6 Easy… How to Clean Zojirushi Water Boiler with Vinegar (Ultimate Guide) Which Kitchen Countertops Are The Best? (Answered) Other Methods Cleansing agents are often injected into the washing water through a dosing pump, typically air-driven, and a fitting attached to the deck’s washing pipe. There is no longer a need for a dosing pump when the cleaning agent is introduced to the suction side of the washing water pump. Reduced precision in dosage and more effort are two consequences. To increase the cleaning power of washing, rather than just diluting the water with cleaning agents, you may add the cleaning agents straight to the washing water. It is recommended to wash for 1-2 hours. The final rinse is performed in either saltwater or freshwater, depending on the loaded product. Conclusion: Therefore, it is concluded that it is the most critical job to clean the water tank of your house. Your family’s health is worth the four to six hours it will take you to clean the complete water tank. Several companies provide affordable tank cleaning services. But follow our guides that are very easy to apply, and you will get great results. But be careful while using detergents and any chemicals, and also clean them thoroughly so that it should not mix with water. We are certain that you will find our essay to be both entertaining and informative. FAQs How do I clean my water tank with warm water? You can use a simple technique to clean your water tank. Put some dish soap drops into a spray bottle of hot water and use it to clean the water tank. Then, spray the area around your water tank until it begins to foam. After 5 minutes, give it a good rinse to eliminate any lingering soap. Can I use my pressure washer to clean my water tank? Yes, you can use a pressure washer to clean your water tank. However, we recommend using a siphon hose with a high-pressure nozzle on it, as this will ensure that all of the debris is removed from the bottom of the tank. How do I remove rust stains from my water tank? You can use a wire brush on the inside of your water tank to scrape off any rust stains that have built up over time. There may be a need to replace the whole tank if there is a significant amount of rust.

How to Clean Silver Ring at Home | Top 5 Mathods

how to clean silver ring at home

Learn how to clean silver ring at home. Silver rings are the favorite items in the collection of jewelry of most ladies. They love to wear it, but some carelessness may damage it. Most people consider them useless, no dear, don’t make such mistakes. We have come up with fresh ideas to clean your silver rings. After trying these methods, you will witness these rings again shine in your hands and make them beautiful. Thus the blackish look will disappear in a few minutes, and you will find them as they were. In this post, we will share easy step-by-step guide to on how to clean silver ring at home with 5 efficient methods. So, without moving around, let’s move towards the complete detail about them. How To Clean Silver Rings – Top 5 Ways These are the best methods to clean silver rings that will provide lots of benefits to you. 1. Clean Silver Ring With Polish The most effective method to help gain an original look to your ring is to clean it with polish. If you want to polish your rings, these are the measures you need to do. Get a clean, wet cloth and put a dab of polish on it. Then rub it on your silver ring up and down. Never use it circularly because the scratches may become apparent. Fabric tarnish may be avoided by repeatedly reversing the fabric. When you’ve rubbed the rings long enough, please give them a quick rinsing with warm water and thoroughly dry them with a dry towel. ALSO READ 5 Best Moving Companies in Chicago to Help You Make… How to Hire Contractor for Home Renovations in 2022 Which Kitchen Countertops Are The Best? (Answered) 2. Cleaning Sliver Ring With Salt And Towel If you want your ring to look natural, then don’t forget to apply this method. Combine 3 tablespoons of salt, the juice of a lemon, and a cup of boiling water. Drop your ring in this solution and let it remain for about 5 minutes. Take caution since they might be hot when removed.  Use a gentle towel to dry the jewelry. 3. Clean Silver Jewlery With Aluminum Foil And Baking Soda This is the best home remedy to clean the tarnish of your silver ring. You will see a difference in no time. Take a bowl and then use aluminum foil as a lining. Add baking soda and pour some hot water. Just throw in your silver jewelry and walk away for up to three minutes.  Take caution while removing the rings since they may still be hot. Use a gentle towel to dry them. 4. Using Toothpaste To Clean Silver Ring at Home Another method looks strange to apply for cleaning the silver ring. Take a little toothpaste and then use a dish wash sponge to rub this paste on a silver ring. Although the toothpaste helped a little, it wasn’t enough to eliminate the tarnish. Instead of fading the whole work, it came off in clumps. The rubbing of the brush may cause some scratching, so be careful while applying it. 5. Use Ketchup To Clean Silver Rings It is not used to eat with yummy foods but can also be used for cleaning purposes, especially for silver. It looks funny but believe me, you will wonder after seeing its excellent results. Apply some ketchup on a toothbrush to scrub the silver rings clean. Warm water should be used to wash off, and a soft towel to dry off afterward. You will see a shine on the ring, and you will be able to wear it in your beautiful hands. Conclusion: Here you have found the best methods to solve your problems. Additionally, these are easy to apply, and everything will be available at home. These methods are a blessing in disguise to clean your silver rings. You’ll notice a change for the better if you give it a go right away. We hope that you get enough information and tarnish from your rings will disappear. FAQs How to protect silver jewelry from tarnish? Preventing silver from tarnishing is as simple as taking a few precautions. When you keep the jewelry out of the box and expose it to air, it will damage you significantly. Please place them in a velvet box; thus, your jewelry will not be affected by the air, and you will find them new whenever you wear them. What should we keep out of the silver while cleaning it? A firm bristle brush will leave a permanent scratch in the silver. Silver-specific cleansers sometimes include chemicals that harm the material rather than clean it. So, you should refrain from using these items while cleaning the silver.

How To Clean Zebra Blinds – Find Simple and Easy Way to Clean Zebra Blinds

how to clean zebra blinds

Learn how to clean zebra blinds with our quick and easy step-by-step guide. A zebra blind is a type of window coverings that has a pattern of black and white stripes. To stop heat loss and offer security, they are frequently used in houses, workplaces, and other commercial structures. Zebra blinds are a best way to add color and interest to your home. They’re also a great source of privacy since they can be used as a complete barrier between rooms or even as an actual door. what are the zebra blinds? know 5 things of zebra blinds. In this post, we will provide you with a easy and step-by-step guide on “how to clean zebra blinds“.  Zebra blinds are excellent windows for any room in your house, providing privacy and light control. However, like any other type of blinds, they can collect dust and dirt over time. Therefore, it’s essential to know how to clean zebra blinds properly to keep them looking new and fresh for years to come. Basic Tips For Cleaning Zebra Blinds Before cleaning a zebra blind, be sure not to damage its surface with rough cleaning products. A good way to clean your zebra blind is using a soft cloth with gentle soap or detergent. After washing it off with water, you can gently use an old toothbrush or toothpaste to scrub the dirt off your blinds’ surface. Cleaning your zebra blinds is just as easy as cleaning any other window. You’ll first want to remove the curtains from the frame, then take a damp cloth and wipe down the entire surface of the window. Use water-based cleaners on your windows because they won’t damage your curtains or drapes. But take caution; in place of soap, you can clean Zebra blinds by using washing liquid for sensitive fabrics or a product made for hand washing. Never use a sponge or brush to clean the fabric, even if the stains are very bad! Steer clear of harsh chemicals because they might discolor clothing. How To Clean Clean Zebra Blinds In Quick And Simple Ways If you’re looking for a quick, simple way to clean your zebra blinds, there are three steps you should follow: Remove the blinds from their frames by lifting them off the top rail. This will allow you access to all areas of the fabric and make it easier to wipe away dust and dirt with a damp cloth. Once all stains have been removed, apply a small amount of dish soap (as little as half a teaspoon) onto a cloth pad or paper towel and wipe down all areas that need cleaning. The soap will help break up any residue left behind by previous spills or stains, making them easier to remove later down the road! Once all stains have been removed, dry off any remaining moisture using another clean cloth or paper towel. ALSO READ 5 Best Moving Companies in Chicago to Help You Make… How to Hire Contractor for Home Renovations in 2022 Which Kitchen Countertops Are The Best? (Answered) 5 Mathods To Clean Zebra Blinds We are going to share 5 diffrent mathods with you to clean your zebra blinds, you can apply any mathod to easily and effectively clean them. 1. Clean Zebra Blinds Using Damp cloth The first method uses water and a cloth or sponge to wipe down the surface. This will remove any dirt, dust, or grime from the surface of your Zebra Blinds so they can be easily cleaned again later on down the road! Clean the inside of the blind with a damp cloth. Use mild detergent to clean the outside of the blind. Wipe down any dirt collected on the frame or railings with a damp cloth or sponge. 2. Hand Cleaning Method Hand-cleaning involves scrubbing the fabric with a brush or rag until it’s clean. This requires some elbow grease but should take a little bit of time! 3. Cleaning Zebra Blinds With Vacuum Machine Using a machine like a vacuum cleaner or steam cleaner can help remove stains and dirt from your blinds much faster than using your hands alone (although they still need regular cleaning). Unscrew the frame from the window and remove all the linings. Clean all the dust off the cloth’s inner side using a vacuum cleaner with a brush attachment. Put some warm water into a bowl, add some mild soap, and sponge down each section of fabric until they’re all clean and wet with water (you can use paper towels if desired). 4. Cleaning Zebra Blinds With Toothpaste If there is a lot of dirt, then take some toothpaste and apply it to the surface of the blind. Then wipe it with a damp cloth and repeat this process until no more dirt is visible on the surface of the blind. 5. Clean Zebra Blinds With Steam cleaner Consider using a steam cleaner if you’re looking for tricks to keep your blinds clean without heavy-duty scrubbing. It’s quick, easy, and effective and will save you time in the long run! Conclusion: If you’re looking for tricks to clean your zebra blinds, you’ve come to the right place! We’ve shared our top tips and tricks for keeping them clean. If you have any FAQs about how to clean zebra blinds, feel free to reach out. We’re always happy to help! We hope that you’ve learned a lot from this article. We hope you’ll use the information to clean your blinds and make them look new!

How To Clean 5 Gallon Water Jug in 6 Easy Steps

How To Clean 5 Gallon Water Jug In 6 Easy Steps

Using my 6-step process, cleaning a 5 gallon water Jug is simple. Today in this post, we will share a 6 step guide for how to clean 5 gallon water jug. Drinking water bottles are commonly made of plastic, which is lightweight. You cannot use them repeatedly. However, when it comes to hard plastic water bottles, they should last a long time. As an example, 5-gallon containers or a sports bottle can be used. Cleaning 5 Gallon Water Jug (Basic Steps) The first step in cleaning your jug is to remove any plastic wrap or other materials that may have been left on top of the bottle when you filled it up with water at the store. Then, wash off any dirt and debris around the mouthpiece with soap and warm water. Next, take the lid off your bottle and rinse all the inside parts with warm water so they are completely clean. Please ensure no cracks or holes in these parts because they could allow dirt into your bottle! Finally, dry all parts thoroughly before putting them back together again–this will keep them from getting moldy over time! TIP:  If you use hot water to rinse plastic bottles, the plastic may leach carcinogens into your water. Store water bottles in a cool, dry place away from direct sunlight to help prevent mold and bacteria growth. ALSO READ How to Hire Contractor for Home Renovations in 2022 How to Clean TV Screen Without Streaks – A Quick… Which Kitchen Countertops Are The Best? (Answered) 6 Methods To Clean 5 Gallon Water Jug: Cleaning your water jug is important to keep it clean and germ-free. You want to ensure that the water inside your bottle does not become contaminated, which can lead to a bacterial infection. Cleaning a 5 gallon water jug; there are many ways to go about it. Here are some of the most common methods and how they work. 1. Cleaning 5 Gallon Water Jug With Warm, Soapy Water Use warm soapy water and scrub with a soft brush or sponge. This method works best for those with hard water conditions who need to remove mineral deposits from their water bottles. 2. Use Of Woodash Wood ash is one of the earliest known natural cleansers. Wood ash was commonly used to clean bottles even before introducing dishwashing soaps. It cleans bottles, removes odors, and even disinfects them. Wood ash can be placed directly on the bottles and washed away with a sponge and warm water. 3. Dishwashing Put your bottle in the dishwasher on the lowest heat setting possible (no soap) and run through a rinse cycle with hot water added until all of the soap is removed; then dry thoroughly with a cloth towel before storing away for future use! 4. How To Clean 5 Gallon Water Jug With Vinegar And Salt Pour at least two cups of white vinegar into a bowl, add 2 tablespoons of salt (optional), and stir until salt dissolves completely before pouring over the bottle cap and filling it with hot water from the faucet until the full level reaches the top of the cap (do not submerge). Swish around inside cap until all lint is gone; then rinse well with clear water (do not submerge). 6. Clean 5 Gallon Watter Jug Using Rice Water Hydrogen peroxide has been shown to kill germs and bacteria, so it’s perfect for cleaning a 5-gallon water bottle. Just pour some into a bowl or cup and add some water; then dip your lid until it starts bubbling. When it does, rinse any excess with running water so none of the hydrogen peroxides gets left behind! 5. Cleansing Water Bottle Through Hydrogen Peroxide The mixture of starch and citric acid in rice water aids in the removal of grease. Fill the bottle with rice water and leave it for around 30 minutes. After that, scrub the bodttle thoroughly and wash it under warm water to remove the unique scent of rice water.d Avoid Using Bleech Or Harm chemicals While Washing the bottle: If you’re seeking a technique to clean your glass water bottle, look no further. First, you must ensure that your water bottle is clean and free of contaminants. You can do this by washing it in hot soapy water or with a dishwasher on the highest setting. Second, avoid using bleach or other harsh chemicals on the outside of your bottle. These can damage the surface of the glass and make it more difficult for you to see through your water bottle when you’re drinking from it. Third, try not to drop your water bottle onto hard surfaces–this can cause damage! Finally, once you’ve cleaned your water bottle with soap and warm water (or dishwashing liquid), run it under cold water for about ten minutes so that any leftover dirt falls off easily into the sink bowl or tub drain. We’re almost done! Hard plastic water bottles are undeniably reusable. You must, however, take special care of such bottles. Otherwise, algae and other potentially hazardous microorganisms may grow within the bottle. In this essay, I attempted to explain how to clean a 5-gallon water bottle in various ways. I hope you can now complete the task without difficulty.

How To Clean Glass Table In 3 Easy Mathods (Step-by-Step Guide)

how to clean glass table

Learn how to clean glass table with our step-by-step expert guide. The glass table is one of the most common tables you’ll find in homes worldwide. Glass table easy to clean, but it can be difficult to keep looking good and new. When you’re looking for ways to spruce up your home, cleaning glass tables is one of the best options. Glass tables can be cleaned using different types of cleaners, including various household chemicals such as vinegar and lemon juice. Fortunately, achieving a sparkling clean glass tabletop is a relatively simple task. Today in this post, you’ll discover four effective methods to clean your glass tabletop and restore its shine. Follow these tips to remove stubborn stains and achieve a streak-free finish. 1. Clean Glass Table With Baking Soda And Vinegar Cleaning a glass table with baking soda and vinegar is an eco-friendly and effective way to remove stains and grime. These common household ingredients can work wonders on a dirty glass tabletop. Step 1: Pour equal parts water and vinegar into a small container for later use. To make your cleaning solution, combine the water and vinegar. The size of your glass tabletop determines the quantity you make. Begin by combining 1 cup (0.24 L) of water and vinegar, then add more later if necessary. While you make the baking soda paste, set aside the mixture. Step 2: Make a paste with 0.5 cup (0.12 L) baking soda and at least 3 teaspoons (44 mL) water. To clean the glass surface without harsh chemicals, create a thick mixture by combining baking soda and water in a small basin. This mixture can be used effectively to clean the glass surface. The method is eco-friendly and safe. Step 3: Using a sponge, apply the baking soda mixture to the table. After dipping the sponge into the basin, rub the paste mixture over the table in circular, sweeping motions. Strive to be as meticulous as you can, and make sure to cover the entire surface of the glass. Choose a soft sponge that won’t scratch or leave marks on the glass. Use a soft sponge that will not leave marks or scratches on the glass. When spreading the baking soda, avoid using items such as steel wool. Step 4: Use a sponge dipped in the vinegar mixture to rinse the table. Use lengthy, sweeping motions to clean the table after soaking the sponge in the vinegar solution. Continually rinse the baking soda until all of it is gone. Based on the size of your table, this can take a while. Consider keeping a small basin or bucket near the table’s edges to capture any vinegar that spills off the table. Step 5: Wipe the glass with a squeegee and allow it to dry. Run a plastic squeegee along the table in straight lines. To remove any extra fluid from the table, work in a grid pattern. After you’ve finished cleaning the table, let it air dry. Continue to catch any extra fluid in a spare container or bucket. A squeegee can be purchased in the car supply department of a store or online ALSO READ How to Hire Contractor for Home Renovations in 2022 How to Clean TV Screen Without Streaks – A Quick… Which Kitchen Countertops Are The Best? (Answered) 2. Clean Glass Table Spraying with Glass Cleaner or Vinegar Looking for an easy way to clean your glass table? Spraying it with glass cleaner or vinegar can be a simple and effective solution. Here’s what you need to know. Step 1: Spray the surface with glass cleaner. Use the amount of product specified on the bottle. Make sure to cover all regions and corners of the table with spray. To avoid streaks, wipe any visible debris from the table with a microfiber cloth or other soft material before spraying on the cleaner. Step 2: If you don’t want to use a glass cleaner, use white vinegar instead. Vinegar can be used to clean dirt and grime from a table. Fill a small spray bottle halfway with white vinegar for easier application. Spray until the entire surface of the table is fully covered. Step 3: To thoroughly wipe the glass, use lengthy, circular strokes. Rub the cleaning solution into the table’s surface with a microfiber cloth. Wipe clean with a lint-free cloth, as lint can make your table appear dusty and cause streaks. 3. Taking Preventative Action Place coasters beneath liquids to prevent the appearance of drink residue. Place your drinks on coasters to prevent rings from developing on the surface. Keep at least a dozen on hand in case you have guests. Cork and sandstone are excellent choices since they do not attach to the glass. Use newspaper to remove minor imperfections. If something spills on your glass table, wipe it down with a little newspaper in small, circular strokes. You can also use newspaper instead of a microfiber cloth when applying cleaning agents. Clean your table daily to keep it looking new and shining. Wipe down your glass table regularly to avoid removing a lot of filth and debris all at once. Depending on how frequently you use the table, set aside a few minutes each week or month to wipe the glass. If you live with others, consider alternating cleaning responsibilities. Conclusion: In this article, I’ve shown you how to clean your glass table. I hope that you were able to learn something new about this process and the products needed for it. If you have any question, please feel free to contact us at any time. We would love to help you out!

How To Deeply Clean 10k, 14k and 18k Gold Jewellry In Easy Steps

How To Deeply Clean 10k, 14k and 18k Gold Jewellry In Easy Steps

Cleaning your hands with sanitizer or hot water and soap is a no-brainer, but do you know how to clean your 10k, 14k, and 18k gold jewelry? Discover how to keep your precious pieces shining like new.  Should you remove your jewelry before sanitizing or washing your hands? Can alcohol damage 14k and 18k gold, as well as gemstones? This article will undoubtedly assist you in cleaning your 18k gold jewelry securely. Basic Tips To Clean 10 karat, 14 karat and 18 karat Gold Jewellry: When it comes to cleaning your 10k, 14k, and 18k gold jewelry, there are a few things you need to know. First, you want to make sure that you clean your 10k, 14k, 18k jewelry in a well-ventilated area. This will help prevent any chemicals from getting into your skin or lungs and causing irritation. Second, try not to use harsh chemicals on your jewelry because they can damage the metal over time. Instead, use gentle cleaners such as soap and water or even baby shampoo! Third, always dry off all of your jewelry before storing it away in its box or bag again. This will help prevent rusting from occurring if moisture is left behind after washing the initial dirt off of your piece of jewelry! Method 1 To Clean 10k , 14k and 18k Gold Jewellry Combine a mild liquid dish soap and warm (not boiling) water. Blue Dawn works well for this, but if you use another soap, ensure it is not hydrating since extra chemicals can cause a film to form on the jewelry. Soak the jewelry for 15 to 30 minutes in the soapy liquid. Use warm water to rinse the jewelry, and a cotton swab to clean any difficult-to-reach areas. Dry the jewelry with a polishing cloth. This will help keep your jewelry clean and looking its best. With a polishing cloth, dry the jewelry. If your jewelry is exceptionally filthy, you can add some drops of ammonia to the mixture, but only if it does not contain semi-precious gemstones such as opals or turquoise. ALSO READ How to Hire Contractor for Home Renovations in 2022 How to Clean TV Screen Without Streaks – A Quick… Which Kitchen Countertops Are The Best? (Answered) Method 2 To Clean 10k , 14k and 18k Gold Regular cleaning with dish soap and ammonia is suitable for solid gold and diamond jewelry, but if your gold jewelry includes semi-precious gemstones like opals or turquoise, special care is needed due to their porous nature. Mix warm (not boiling) water with a gentle liquid dish soap. Blue Dawn works well for this, but if you use another soap, ensure it is not hydrating since extra chemicals can cause a film to form on the jewelry. Using a cotton swab or soft cloth dipped in the solution, carefully wipe the jewelry. Avoid soaking turquoise or opals in the warm water solution as they are porous and may absorb water. The intent is to clean gently. With a polishing cloth, dry the jewelry. Avoid using ammonia or hand sanitizer on gold jewelry that has turquoise or opals as it can cause irreversible damage to the stones. Additionally, it’s important to note that ultrasonic machines can also harm these delicate stones. What To Prevent When Cleaning 10k , 14k and 18k Gold Chlorine can permanently tarnish or destroy your gold jewelry and rings at high temperatures. First, confirm that the water is warm, not hot, when soaking your items. Sanitizer – try to avoid using sanitizer on your jewelry. If you’re out shopping or running errands, this may only sometimes be practical, so clean your jewelry after disinfecting your hands. When washing your hands, always remove any jewelry that contains porous stones, such as opals or turquoise. Moisturizer – Moisturizing is essential for keeping hands germ-free. Cracked or dry hands lose their protective barrier. Check your jewelry for extra accumulation, particularly your engagement rings and wedding bands. Is it possible to clean your jewelry too much? Both yes and no. It is dependent on the stones in the jewelry; diamonds may withstand regular washing, while softer and more porous stones, such as pearl and turquoise, can be dulled and damaged by cleaning solutions. Never soak pearl or turquoise jewelry in a cleaning solution. Instead, gently wipe the piece with a gentle cleaning cloth dipped in non-soapy water before wiping it again. Conclusion: Finally, remember that cleaning your jewelry isn’t just about making it look better–it’s also about protecting it from rusting over time! So remember to protect against oxidation by applying clear nail polish on both sides of each piece before storing them away for long periods. We hope that the article has helped you clean your jewelry properly. If you have any questions or concerns, feel free to contact us.

How to Clean Wood Furniture with Vinegar and Baking Soda (Quicky and Easily)

How to Clean Wood Furniture with Vinegar and Baking Soda

Want to clean wood furniture with vinegar and baking soda? if yes, then you will find this article very helpful. I know that investing in wooden furniture brings a touch of warmth, elegance, and charm to any space in your home. With the right care, it can endure for generations, making it a valuable addition to your household. But over time, wooden furniture can accumulate dirt, grime, and other unsightly substances that detract from its appearance, but don’t worry because Me and you will make your dirty wooden furniture new again. These natural cleaning products (vinegar and baking soda) are not only effective but also environmentally friendly and safe for use on all types of wooden surfaces. As opposed to strong chemicals, vinegar and baking soda will not harm the wooden surface or leave any dangerous residue. In this blog post, we will provide a step-by-step guide on how to clean your wooden furniture using vinegar and baking soda and restore it to its original luster. Just follow this simple step-by-step guide for cleaning wood furniture with vinegar and baking soda. Types of Wood and Finishes Before you begin to the cleaning process, it’s important to know the types of woods and finishes. Certain woods are more porous, while others are less so. Similarly, some finishes are more delicate, while others are more robust. By understanding your furniture, you can avoid damaging it during the cleaning process. There are two different types of wood finishes: one is oil-based and other-one is water-based. Oil-based finishes, such as teak oil, are ideal for outdoor furniture, as they are more durable and water-resistant. Water-based finishes, on the other hand, are ideal for indoor furniture, as they are less brittle and more flexible. They are also simpler to fix in the event of any damage. ALSO READ How to Clean Laminate Floors Without Leaving a Film How to Clean Wood Cabinets And Make them Shine Cleaning Tips: How To Clean Wooden doors Step-By-Step Guide And… Cleaning Wooden Furniture with Vinegar and Baking Sodad What you will need: Baking soda White vinegar Water Spray bottle Cloths (for cleaning and drying) Sponge or brush (optional) Step 1: Mix Baking Soda and Water Step 1: Mix Baking Soda and Water In a bowl, mix together 1/4 cup of baking soda with 1 cup of water to form a paste. If you are dealing with tough stains, you can add 2 tablespoons of baking soda to the mixture. Step 2: Apply Baking Soda Paste to Furniture Using a cloth, sponge, or brush, apply the baking soda paste to the surface of your furniture. Allow the mixture to rest for 5-10 minutes to effectively disintegrate any dirt, smudges, or blemishes. Step 3: Wipe off Baking Soda Paste Using a clean, damp cloth, wipe off the baking soda paste. Ensure to clean along the grain to prevent any harm to the wood. Step 4: Mix Vinegar and Water Combine 1/4 cup of white vinegar and 1 cup of water in a separate bowl. Transfer the mixture into a spray bottle for easy application. Step 5: Spray Vinegar Solution on Furniture Spray the vinegar solution onto a clean cloth, then wipe the surface of your furniture with it. The vinegar will help to remove any remaining baking soda and also sanitize and deodorize the wood. Step 6: Dry Furniture Finally, use a clean, dry cloth to dry your furniture. Ensure you dry in accordance with the grain to prevent water marks from appearing. And there you have it! Your wooden furniture should now look clean and refreshed. If the stains are persistent, you may need to repeat the steps multiple times to fully remove them. But overall, cleaning your wooden furniture with vinegar and baking soda is a simple and effective way to keep it looking its best. Conclusion In conclusion, using vinegar and baking soda to clean your wooden furniture is a great way to save money, protect the environment, and keep your home looking its best. Experience the benefits yourself by trying it today!

How to Remove Sticky Varnish from a Table (Quick and Easy Guide)

how to remove sticky varnish from a table

Have you found yourself with too much varnish on your table and wondered how to remove sticky varnish from a table? If yes, then this article is for you! Here, you will find a step-by-step guide on how to effectively remove sticky varnish from your table and restore its original finish. Removing sticky varnish from a table can be a frustrating task, but with this step-by-step guide, it can be done easily and effectively. Whether you’ve accidentally spilled something sticky on your table or the varnish has simply worn down over time, there are several steps you can follow to restore your table’s finish. In this blog post, we’ll walk you through the process of removing sticky varnish from a table and help you get your table looking like new again. ALSO READ How to Prevent and Remove Rust from Clothes with Baking… How to Remove Water Stains From Quartz Countertops How To Remove Rust From Cast Iron With Salt and… Here’s How to Remove Sticky Varnish from a Table Clean the surface of your table with soap and water to remove any dirt or debris that might have accumulated on the surface. Sand the surface with fine-grit sandpaper to rough up the surface of the varnish. Sand until the surface feels slightly rough to the touch. Apply denatured alcohol or mineral spirits to a clean cloth and rub the surface to remove the varnish. Make sure to use a clean portion of the cloth each time you rub the surface. Wipe the surface clean with a clean, damp cloth to remove any residual solution. Repeat the process of applying the solution and wiping it clean until all of the varnish has been removed. Allow the surface to air dry completely. Sand the surface with a fine-grit sandpaper to smooth out the surface. Clean the surface with soap and water to remove any remaining residue. Apply a fresh coat of varnish or finish as desired. Please Note: Due to material difference you should test the solution on a small portion of your table, in your case it might  not work properly. so before applying, test it and make sure it’s working. Conclusion In conclusion, removing sticky varnish from a table can be a straightforward process with the right tools and techniques. Whether you have a small spill or a table that has become sticky over time, following the steps outlined in this article will help you restore your table to its original finish. With a little bit of patience and attention to detail, you’ll be able to enjoy a clean and smooth table once again. So don’t let sticky varnish hold you back – get started today!

How to Hire Contractor for Home Construction & Renovations in 2023

How to Hire Contractor for Home Renovations in 2022

Here are some helpful hints and a complete guide on hiring a contractor for home construction, interior desing and home renovations, including what questions to ask and how to negotiate. A construction company is is a contractor who focuses on home buliding, interior desings, roofing and home renovations etc. Whether you want to build your dream home or redesign your home instal new floors or carpets, create a new deck, or entirely renovate a home, you should just choose best construction company as well as home renovation contractors. Best Home Constructions and Renovations Contrctor to Hire! JPR Construction DO I NEED A CONTRACTOR FOR HOME RENOVATION If your home improvement project is tiny, you may be thinking if you need a contractor at all or if a handyman will suffice. A licenced general contractor (GC), on the other hand, has the expertise and skills to take on any work, big or small. A handyman is someone who is skilled at doing simple jobs that do not require formal licencing. We typically hire a handyman for tasks such as hanging doors and windows, installing cabinetry, and laying flooring. It is preferable to hire a contractor. How to Find Best Contractor for New Home Building Get Friends and Family Recommendations Where should you start from to find perfect contrator?  The very first place to find a good home building, interior design or home renovation contractor is “ask your friends and family” maybe they recently had their home constructed or reinovated, Referrals are an excellent method to meet wonderful people. If they don’t recommend to anyone, hit a search on sites like: HomeAdvisor etc, once you know a company, goto social media pages like Google, Facebook, Twitter and read testimonials and reviews. Talk to multiple contractors (at least three or four) The major situation if you’re considering a home renovation is the price point you’ll be working with or at least what you’d prefer the price to be. Obtaining quotes from three different contractors is a good idea. This will provide you with a list of contractors categorised as small, medium, and pricey. When you encounter quotes that are extremely low or extremely expensive, you will wonder why. On the low end, the contractor is just starting out; on the high end, they are extremely busy. 5 Most Important Questions to Ask A Home Renovation Contractor ARE YOU CERTIFIED, DO YOU HAVE A LICENCE? How can I verify a contractor’s licence? Begin by looking up individual contractors on your state’s licencing page to discover what licences or certificates they hold, and make sure your contractor has the certifications required for the project. HOW MANY JOBS YOU HAVE DONE SIMILAR TO THIS ONE? If they have done many jobs of home renovation in they past which means they are well skilled it’s a good sing to trust the contractor. WHAT ARE YOUR PAYMENT TERMS? Contractors must present a line-item contract that details every component of the job. Determine what is required in your location and ensure that all agreements are have written. WHAT HAPPENS IF SOMETHING RUNS OUT OF THE BUDGET? Hopefully, you’re adding 10-25% to your forecast to account for unanticipated circumstances. If your contractor discovers mould behind the bathroom tile, which causes you to go over budget, you’ll want to know what to do from then on. HOW LONG SHOULD THE JOB TAKE? If you have some deadlines for this project, please make sure your contractor can meet it. Keep in mind that the estimate procedure alone can take several weeks.

How to Clean Your Gut Naturally (Quick & Step-By-Step Guide)

Want to know how to clean you gut naturally and instantly? you’re at best plavce. The trouble with the gut is frequently the first indication that something is wrong when life becomes stressful and healthy habits are neglected. Eating, sleeping, and moving around comfortably can be challenging when you have poor digestive health because it affects all facets of your life. Chronic digestive tract irritation in many people can even result in irritability, depression, and moodiness. Your stress levels and various other lifestyle choices can impact your gut health, but it’s sometimes obvious what’s wrong. Here are Some ways to clean your gut naturally. How to Clean Your Gut Naturally? Try These 5 Foods That Clean Your Gut and Colon Take More Water Water is used by every cell and organ, so maintaining hydration is important for your overall health. The best way to care for the gut is to drink enough water because it keeps the digestive tract supple and slippery, which facilitates food digestion. Even if you feel like you drink plenty of liquids, if you have constipation, you may not get enough water. Drink 8 to 13 cups of water daily to help the process. Water aids in the passage of food waste through and out of the body. Avoid drinking alcohol, caffeine, and sugary beverages, as they can irritate your stomach and cause inflammation. One change at a time, please. Although it might be tempting to cut out dairy, sugar, and gluten all at once, it will get you closer to solving the issue than cutting out one major food group at a time. If your gut is telling you that something you’re eating isn’t right, pay attention to what it’s telling you. However, you need to take a more gradual approach to be able to identify the offending food. Talk to your doctor about a step-by-step elimination diet to identify your food trigger and begin healing your gut. Locate a Reliable Healthcare Provider Even though it may seem obvious, seeing a different doctor every time there is an issue will make it much more difficult to identify and treat the cause of your gut issues. Seeing how other patients have rated and reviewed a provider is the best way to do this. Find a doctor or digestive health specialist you can trust and stick with them. When it can be prevented, you want to avoid using up your medical debt by frequently visiting the emergency room. As an alternative, Health Soul is a virtual platform that allows users to review medical facilities, staff, and insurance plans from anywhere in the world. Review a hospital in your area online if you want to contribute to the improvement of the healthcare system in your neighborhood. When anxious, avoid eating. Researchers now better understand the relationship between the gut and the brain and how mental health may affect the digestive system. Stress triggers your brain to enter the fight-or-flight response, which affects your gut’s blood flow and leads to inflammation. Long-term stress can exacerbate existing digestion issues, even though there is little evidence that it can cause conditions like inflammatory bowel disease or celiac disease. Take a moment to breathe and unwind before eating to counteract the effects of stress on the gut. Also, make sure to eat your meals slowly. Drinks and supplements for gut cleansing from BIOHM For the treatment of leaky gut and to make use of your microbiome of beneficial bacteria, BIOHM Health offers probiotic supplements, super greens powders, and colon cleanses. As a result of using it myself for two years and noticing such amazing changes in my health and GI tract, I always recommend it in my articles on gut health. Since I started using BIOHM, I have no longer experienced bloating or constipation. My energy level has increased, and my hunger has decreased. My health has gotten better. Related To Colon 16 Natural Ways To Cleanse Your Colon With Remedies 13 Foods That Will Help Cleanse Your ColonALSO READ: What Is Tooth Mousse Faqs What is the fastest way to cleanse your gut? Keeping yourself well-hydrated through regular water intake is a great way to keep your digestive system running smoothly. Research also suggests that lukewarm water is beneficial for digestion. Eat lots of foods high in water content, like fruits and vegetables. Watermelons, tomatoes, lettuce, and celery are all examples of such produce. What drinks help clean your gut? Green tea is rich in antioxidants and has been shown to improve bowel regularity. In particular, its high vitamin C content and antioxidant properties have made it a favorite. Any herbal green tea, whether peppermint, ginger, or something else, is fantastic for cleansing the colon. How long does it take for your gut to detox? The human digestive system is home to an estimated 100 trillion bacteria. It may appear to be an uphill battle to alter them, but the good news is that your microbiome can undergo rapid transformation. Science has proven that a healthy diet can alter the gut microbiome in as little as two to four days. How do I know if I have a clean gut? Brown feces, ranging in shade from medium to dark brown, signify a healthy digestive system. It’s a good idea to see a doctor if you notice a change in the normal color of your feces, such as green, black, red, or yellow (and you haven’t recently consumed a highly colored food like beetroot). How do I know my gut is healing? One of the most telling signs that your leaky gut is healing is when you feel like your old self again, complete with renewed vigor and vitality, mental clarity, a positive outlook on life, a healthy weight, and a general sense of well-being. Remember that digestive wellness, like most other health issues, exists on a continuum.